Habitat Door Handle Repair
A Simple Fix Done The Hard Way
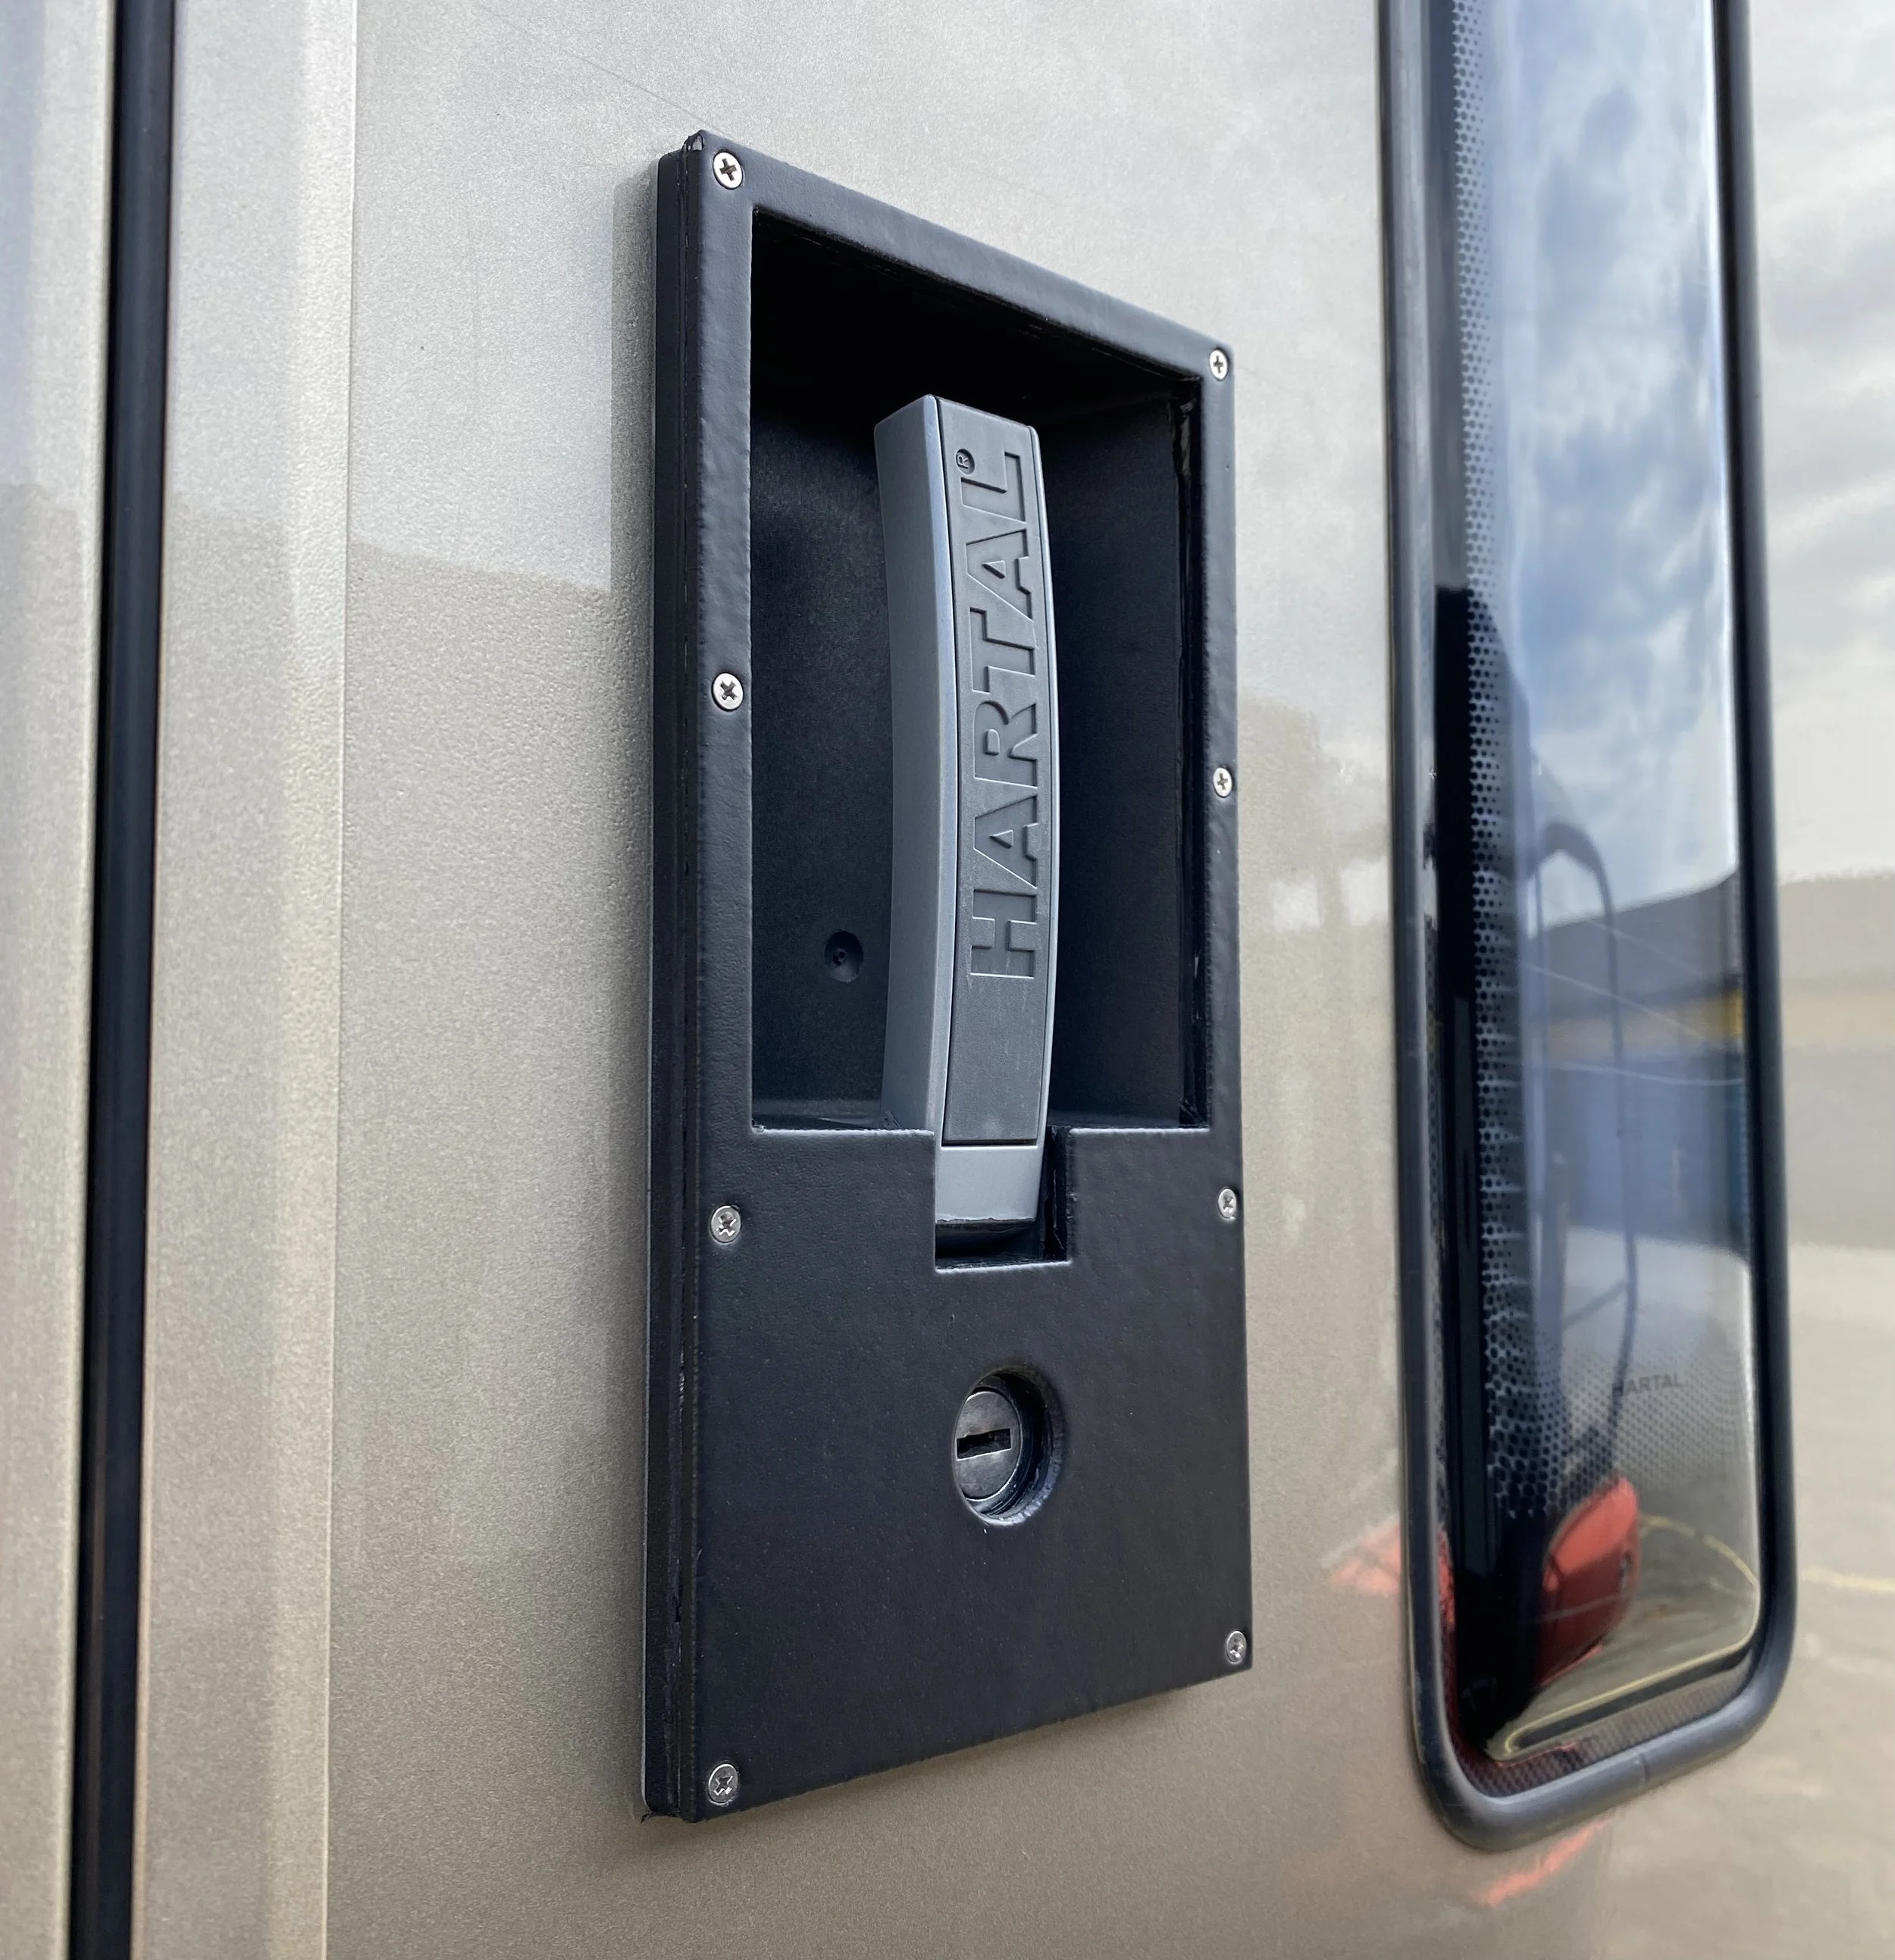
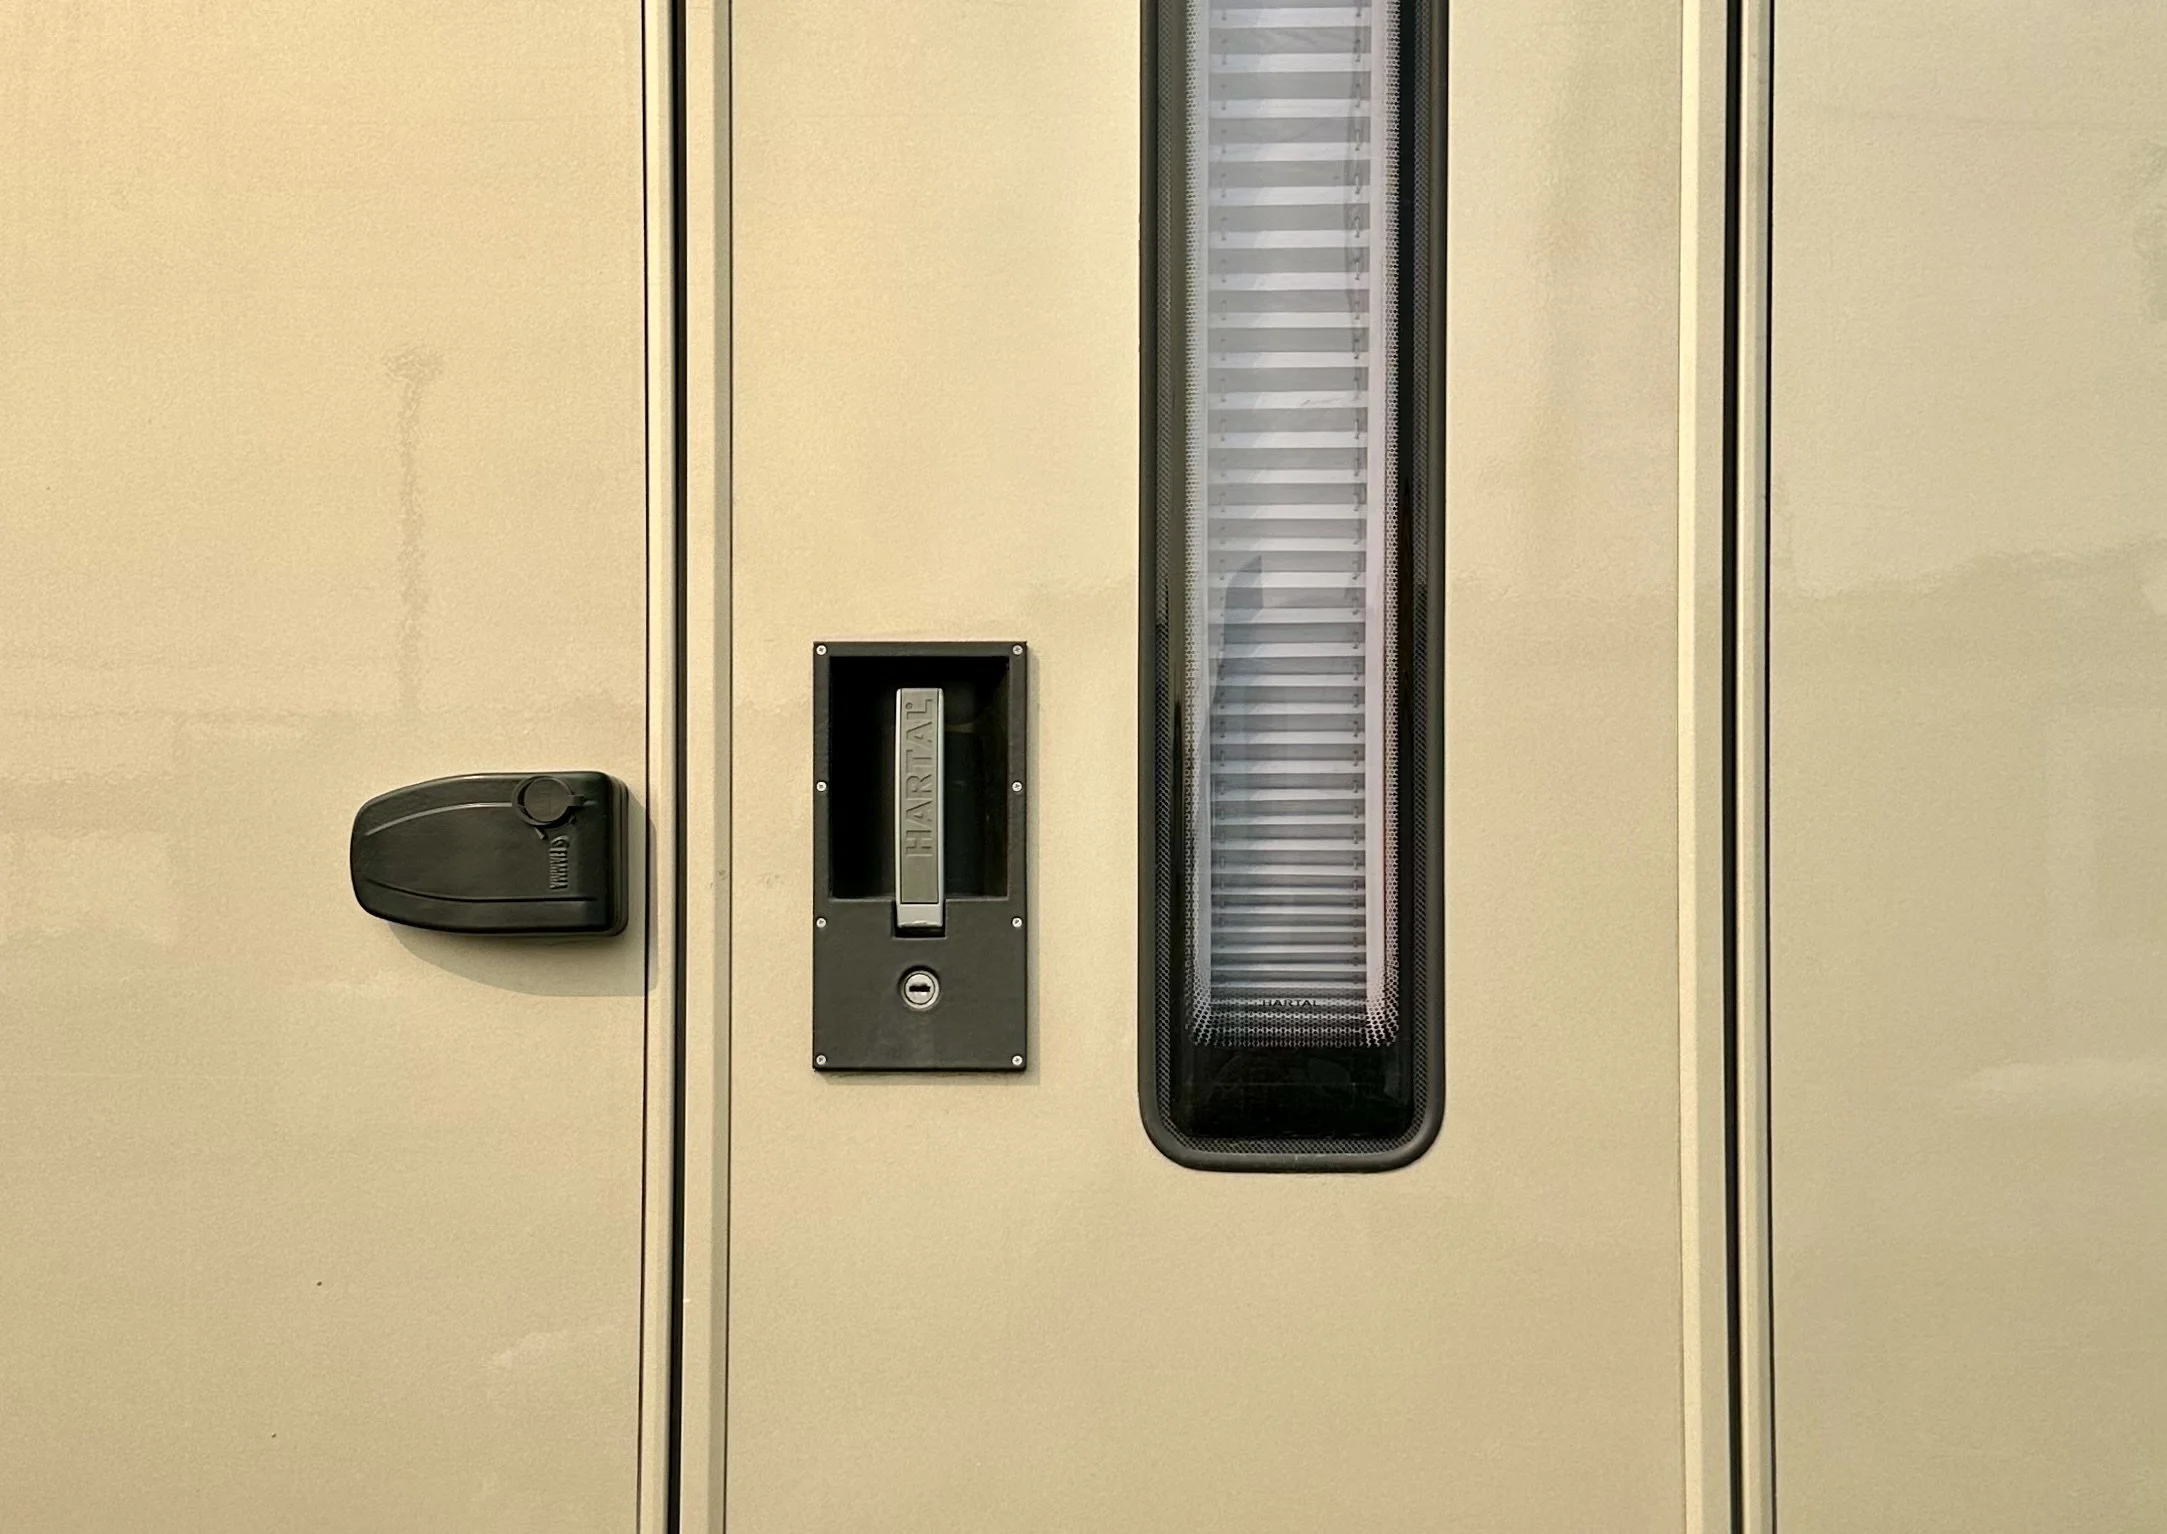
On a recent trip to British Columbia’s north coast our habitat entry door exterior handle started having issues. I say started, but really it was a continuation of an earlier problem that I fixed back in 2022 when the plastic facia panel cracked across its width. Back then we repaired it by making an aluminum panel which was glued and screwed over top of the factory facia panel. It worked great until this more serious failure took place.
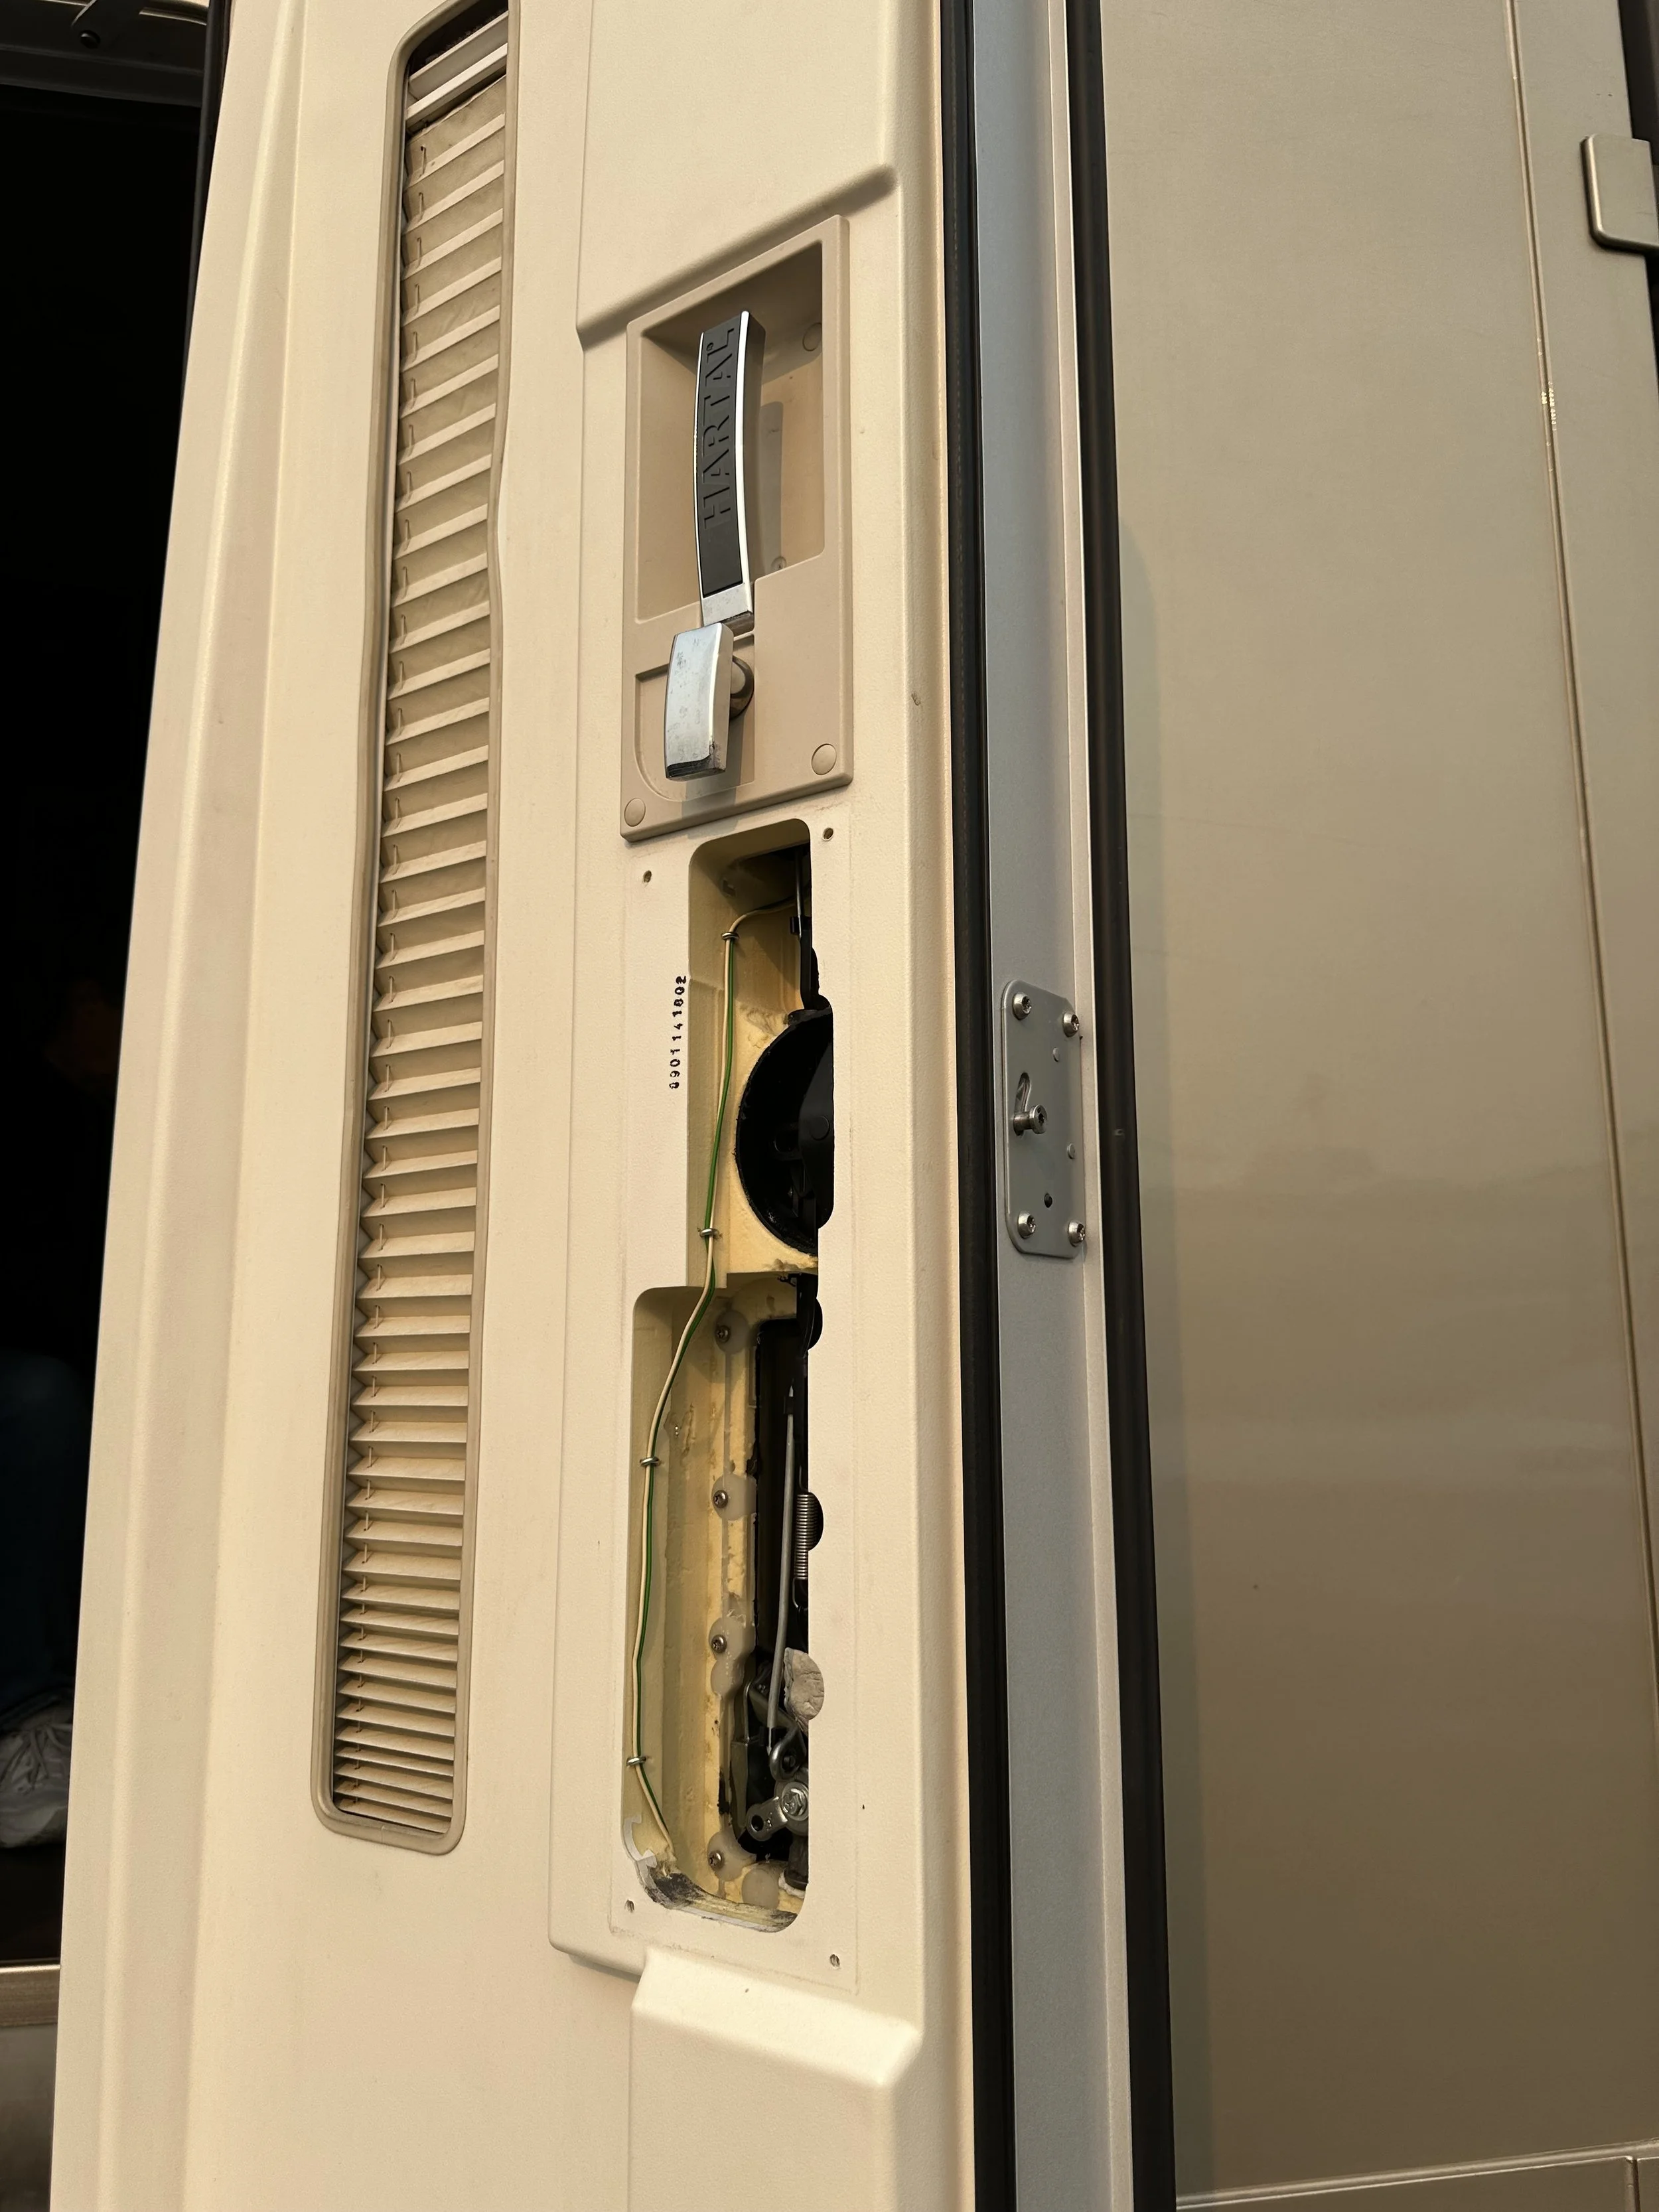
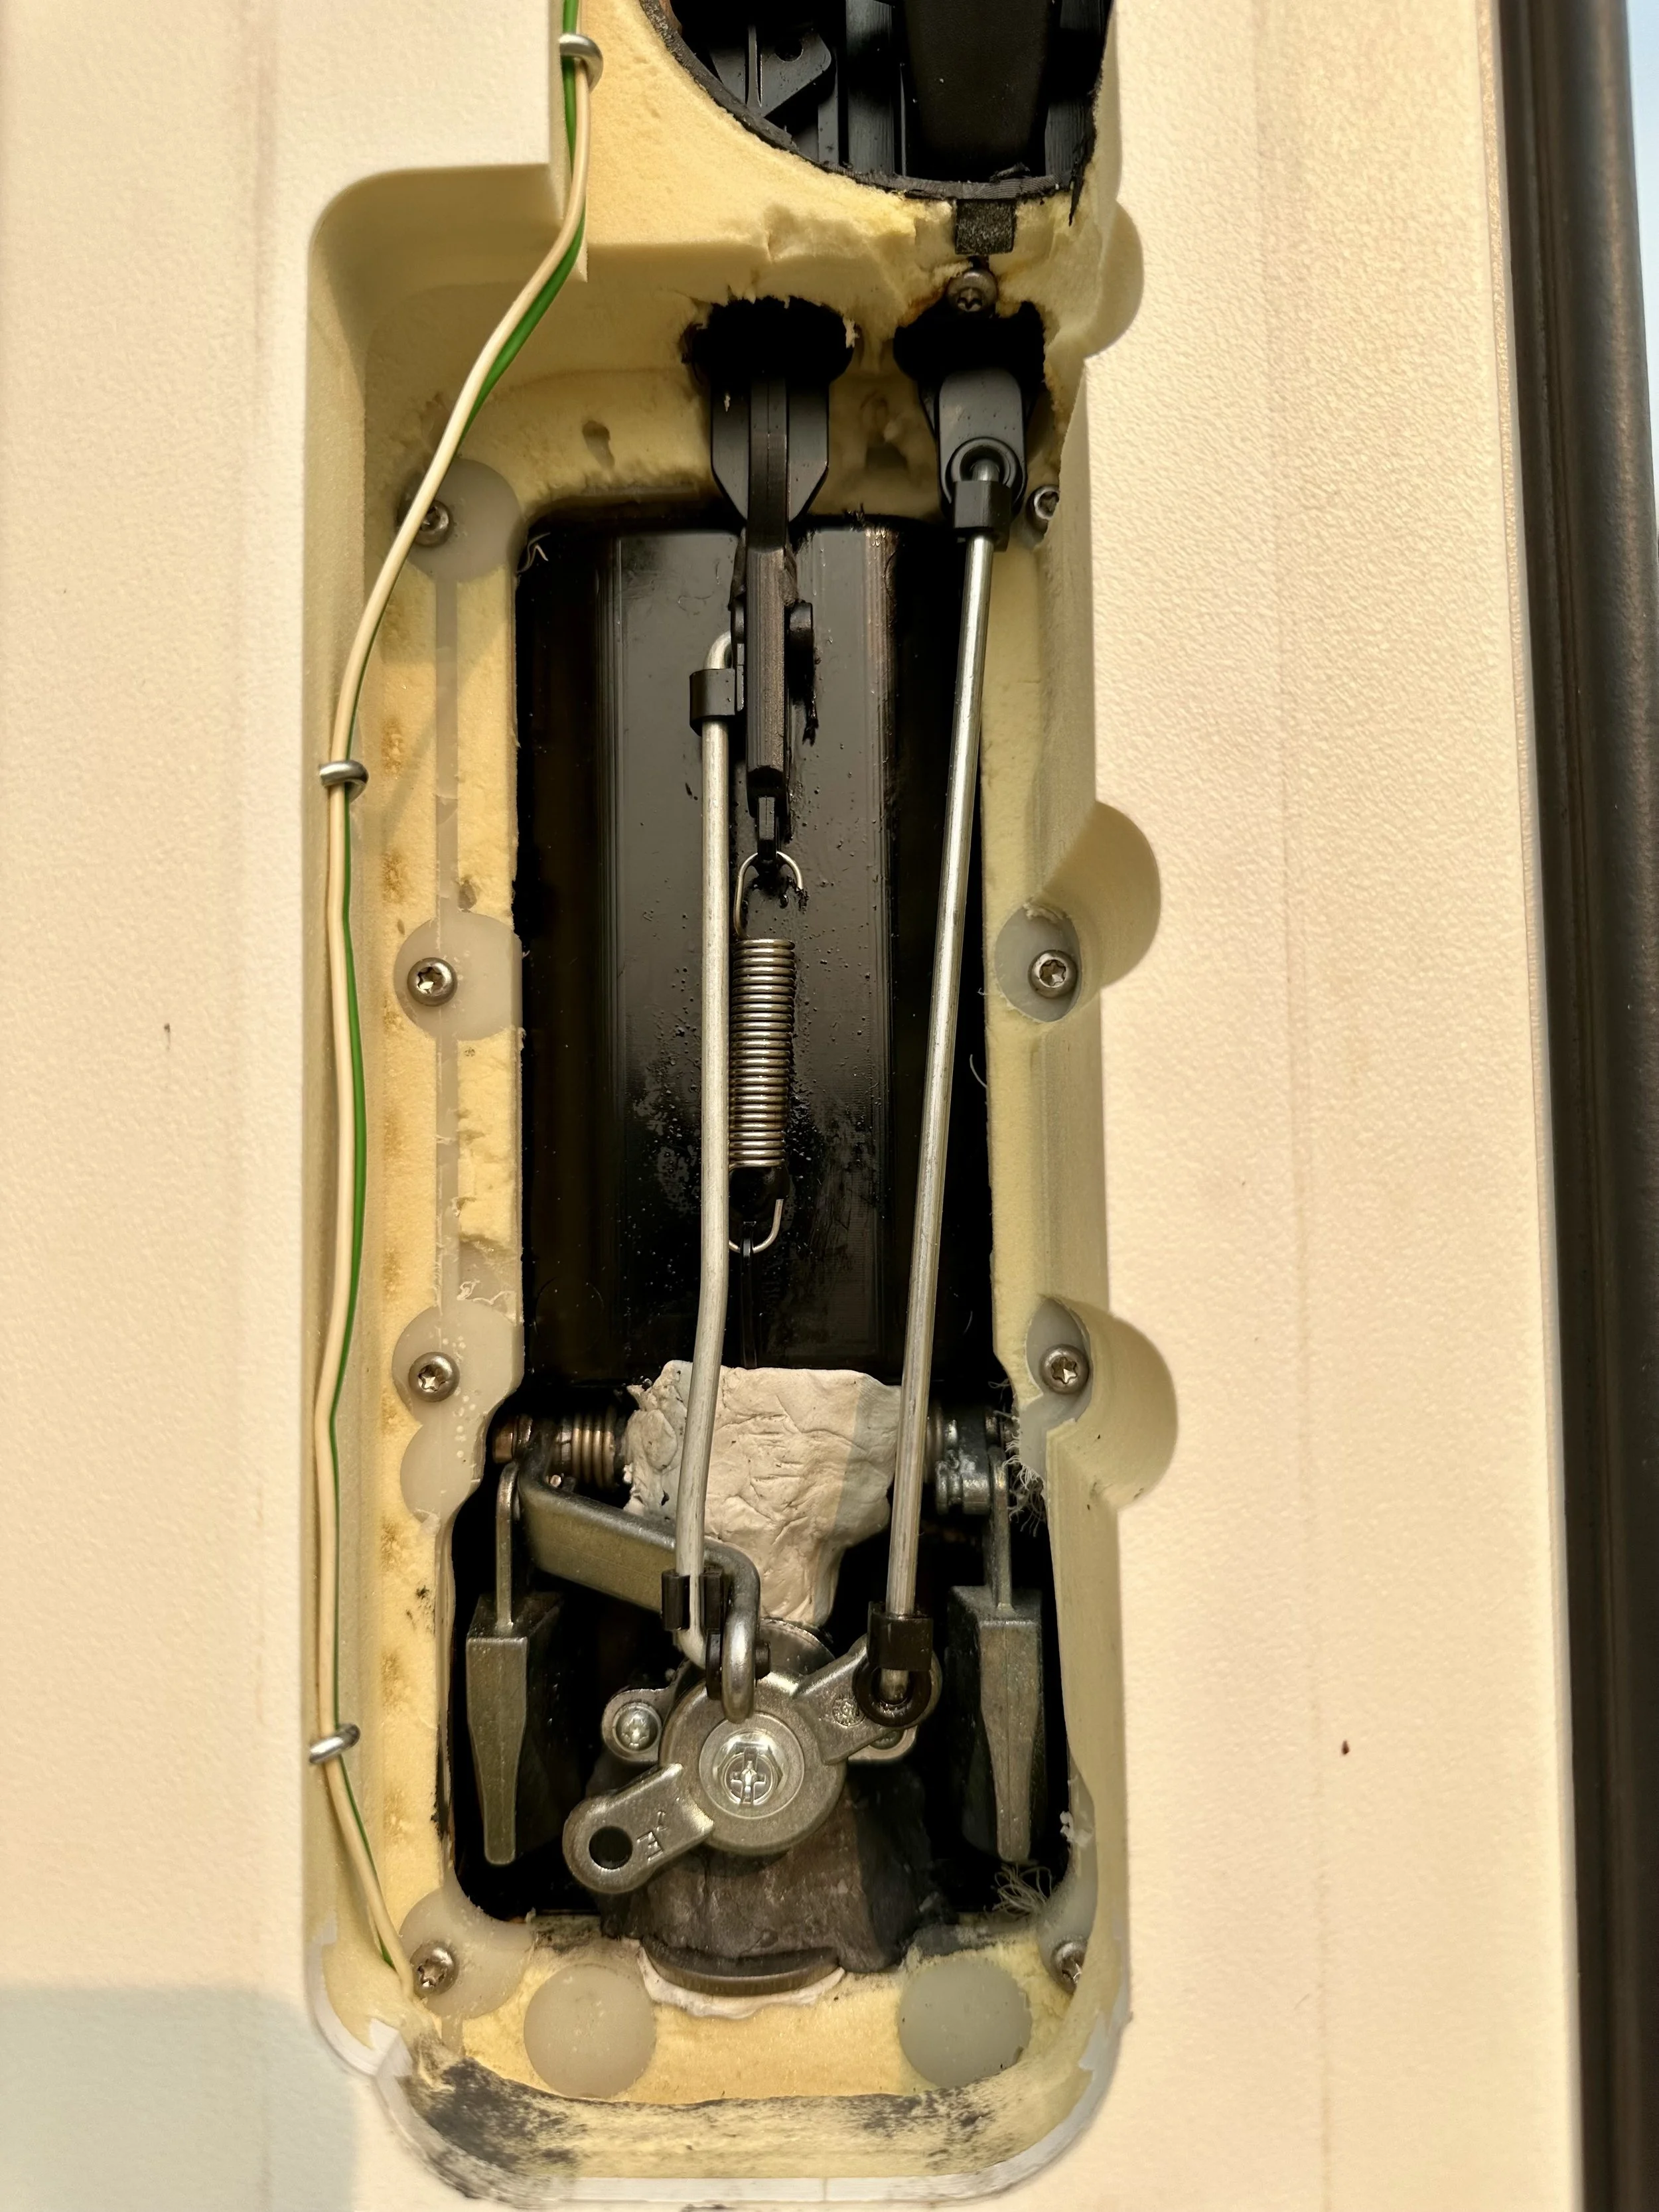
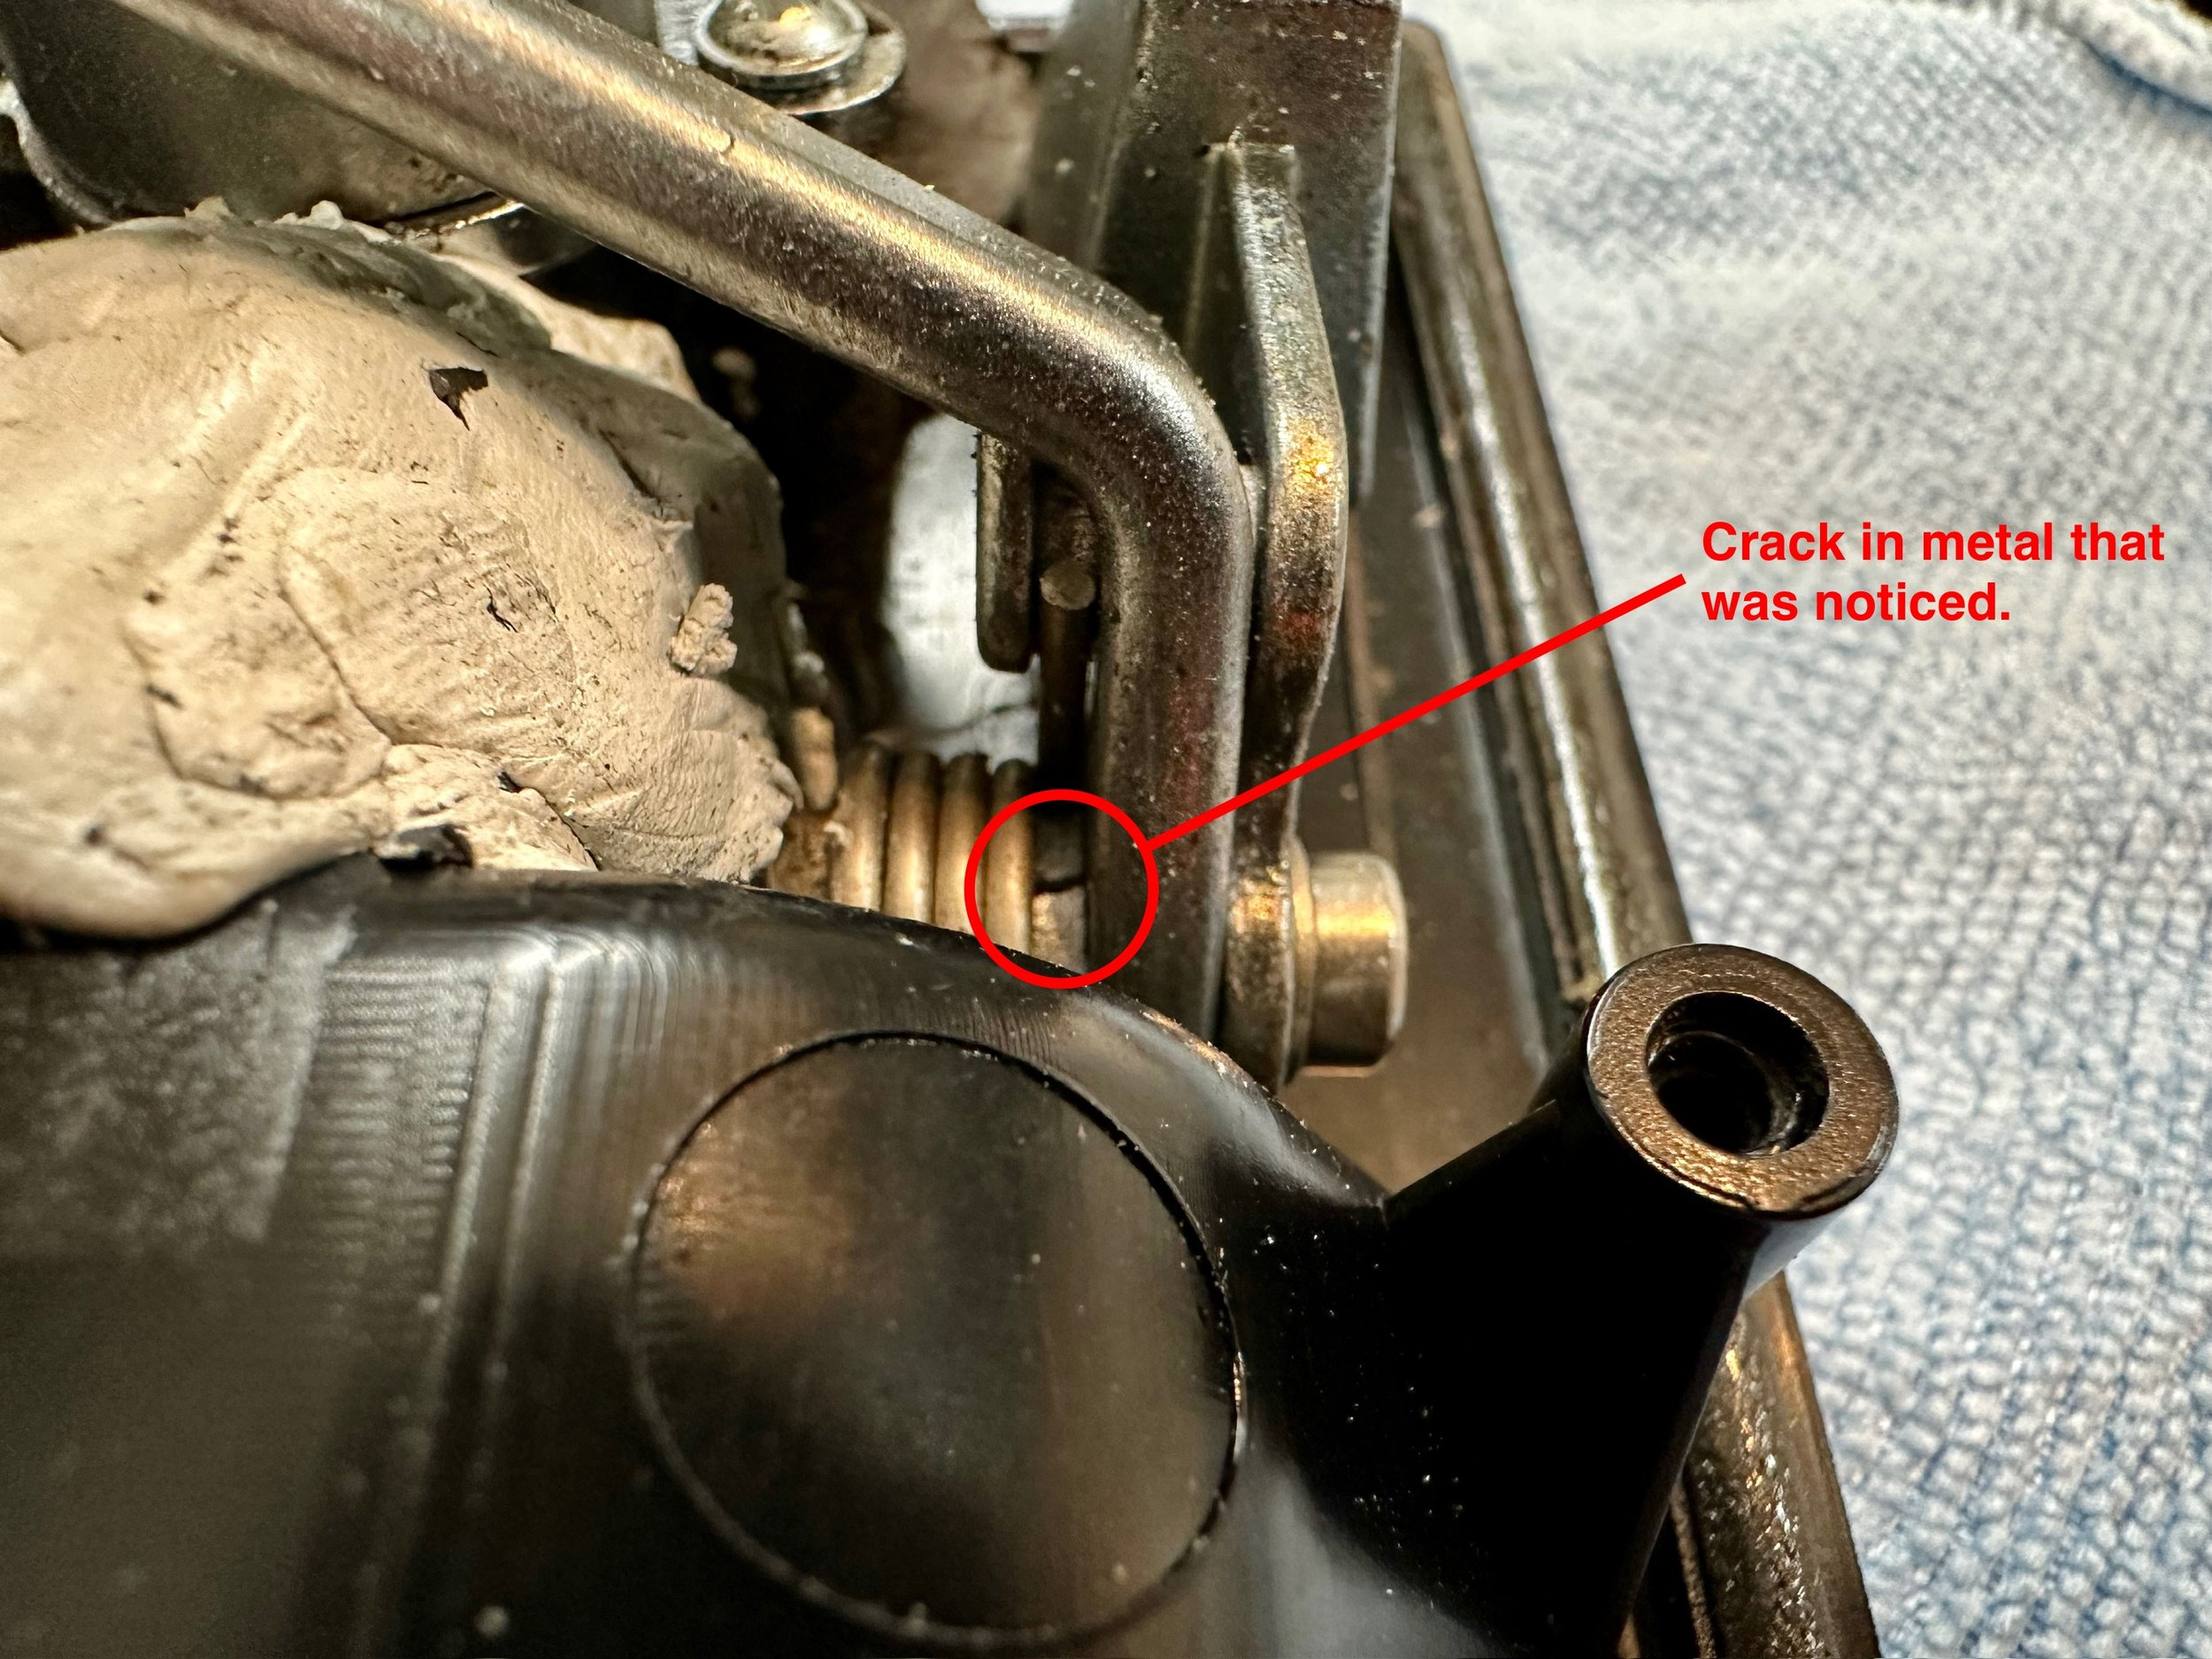
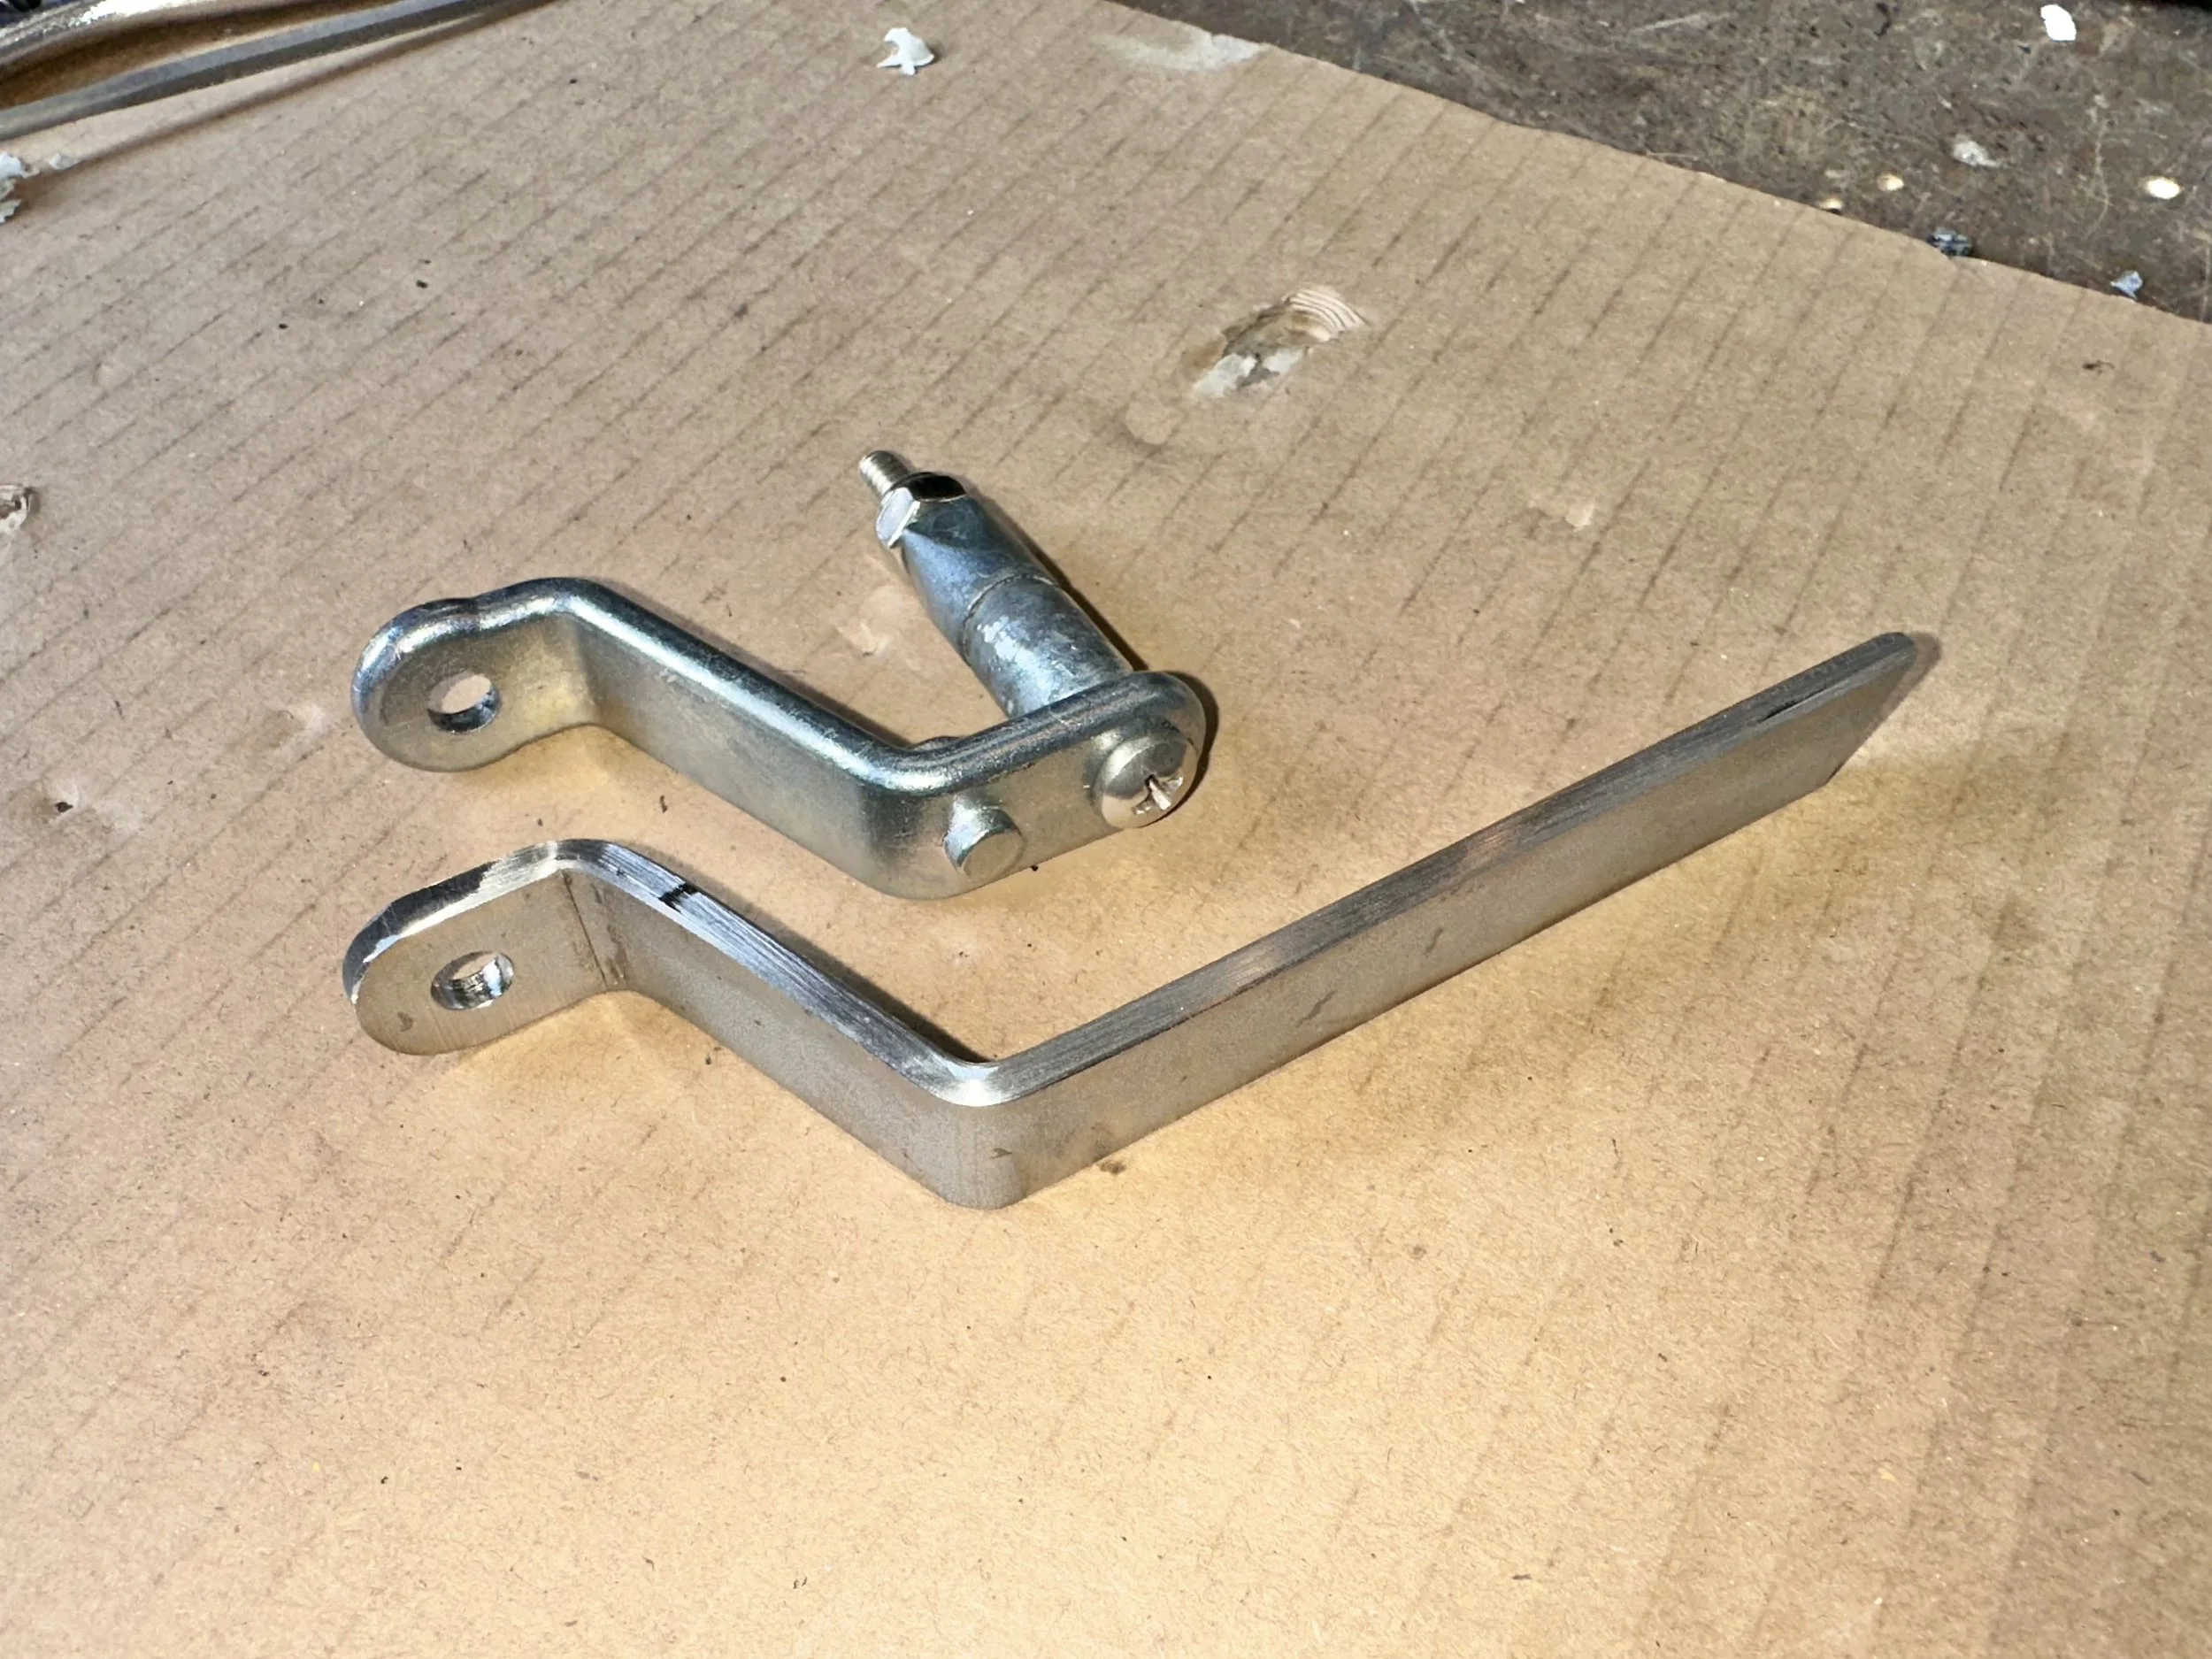
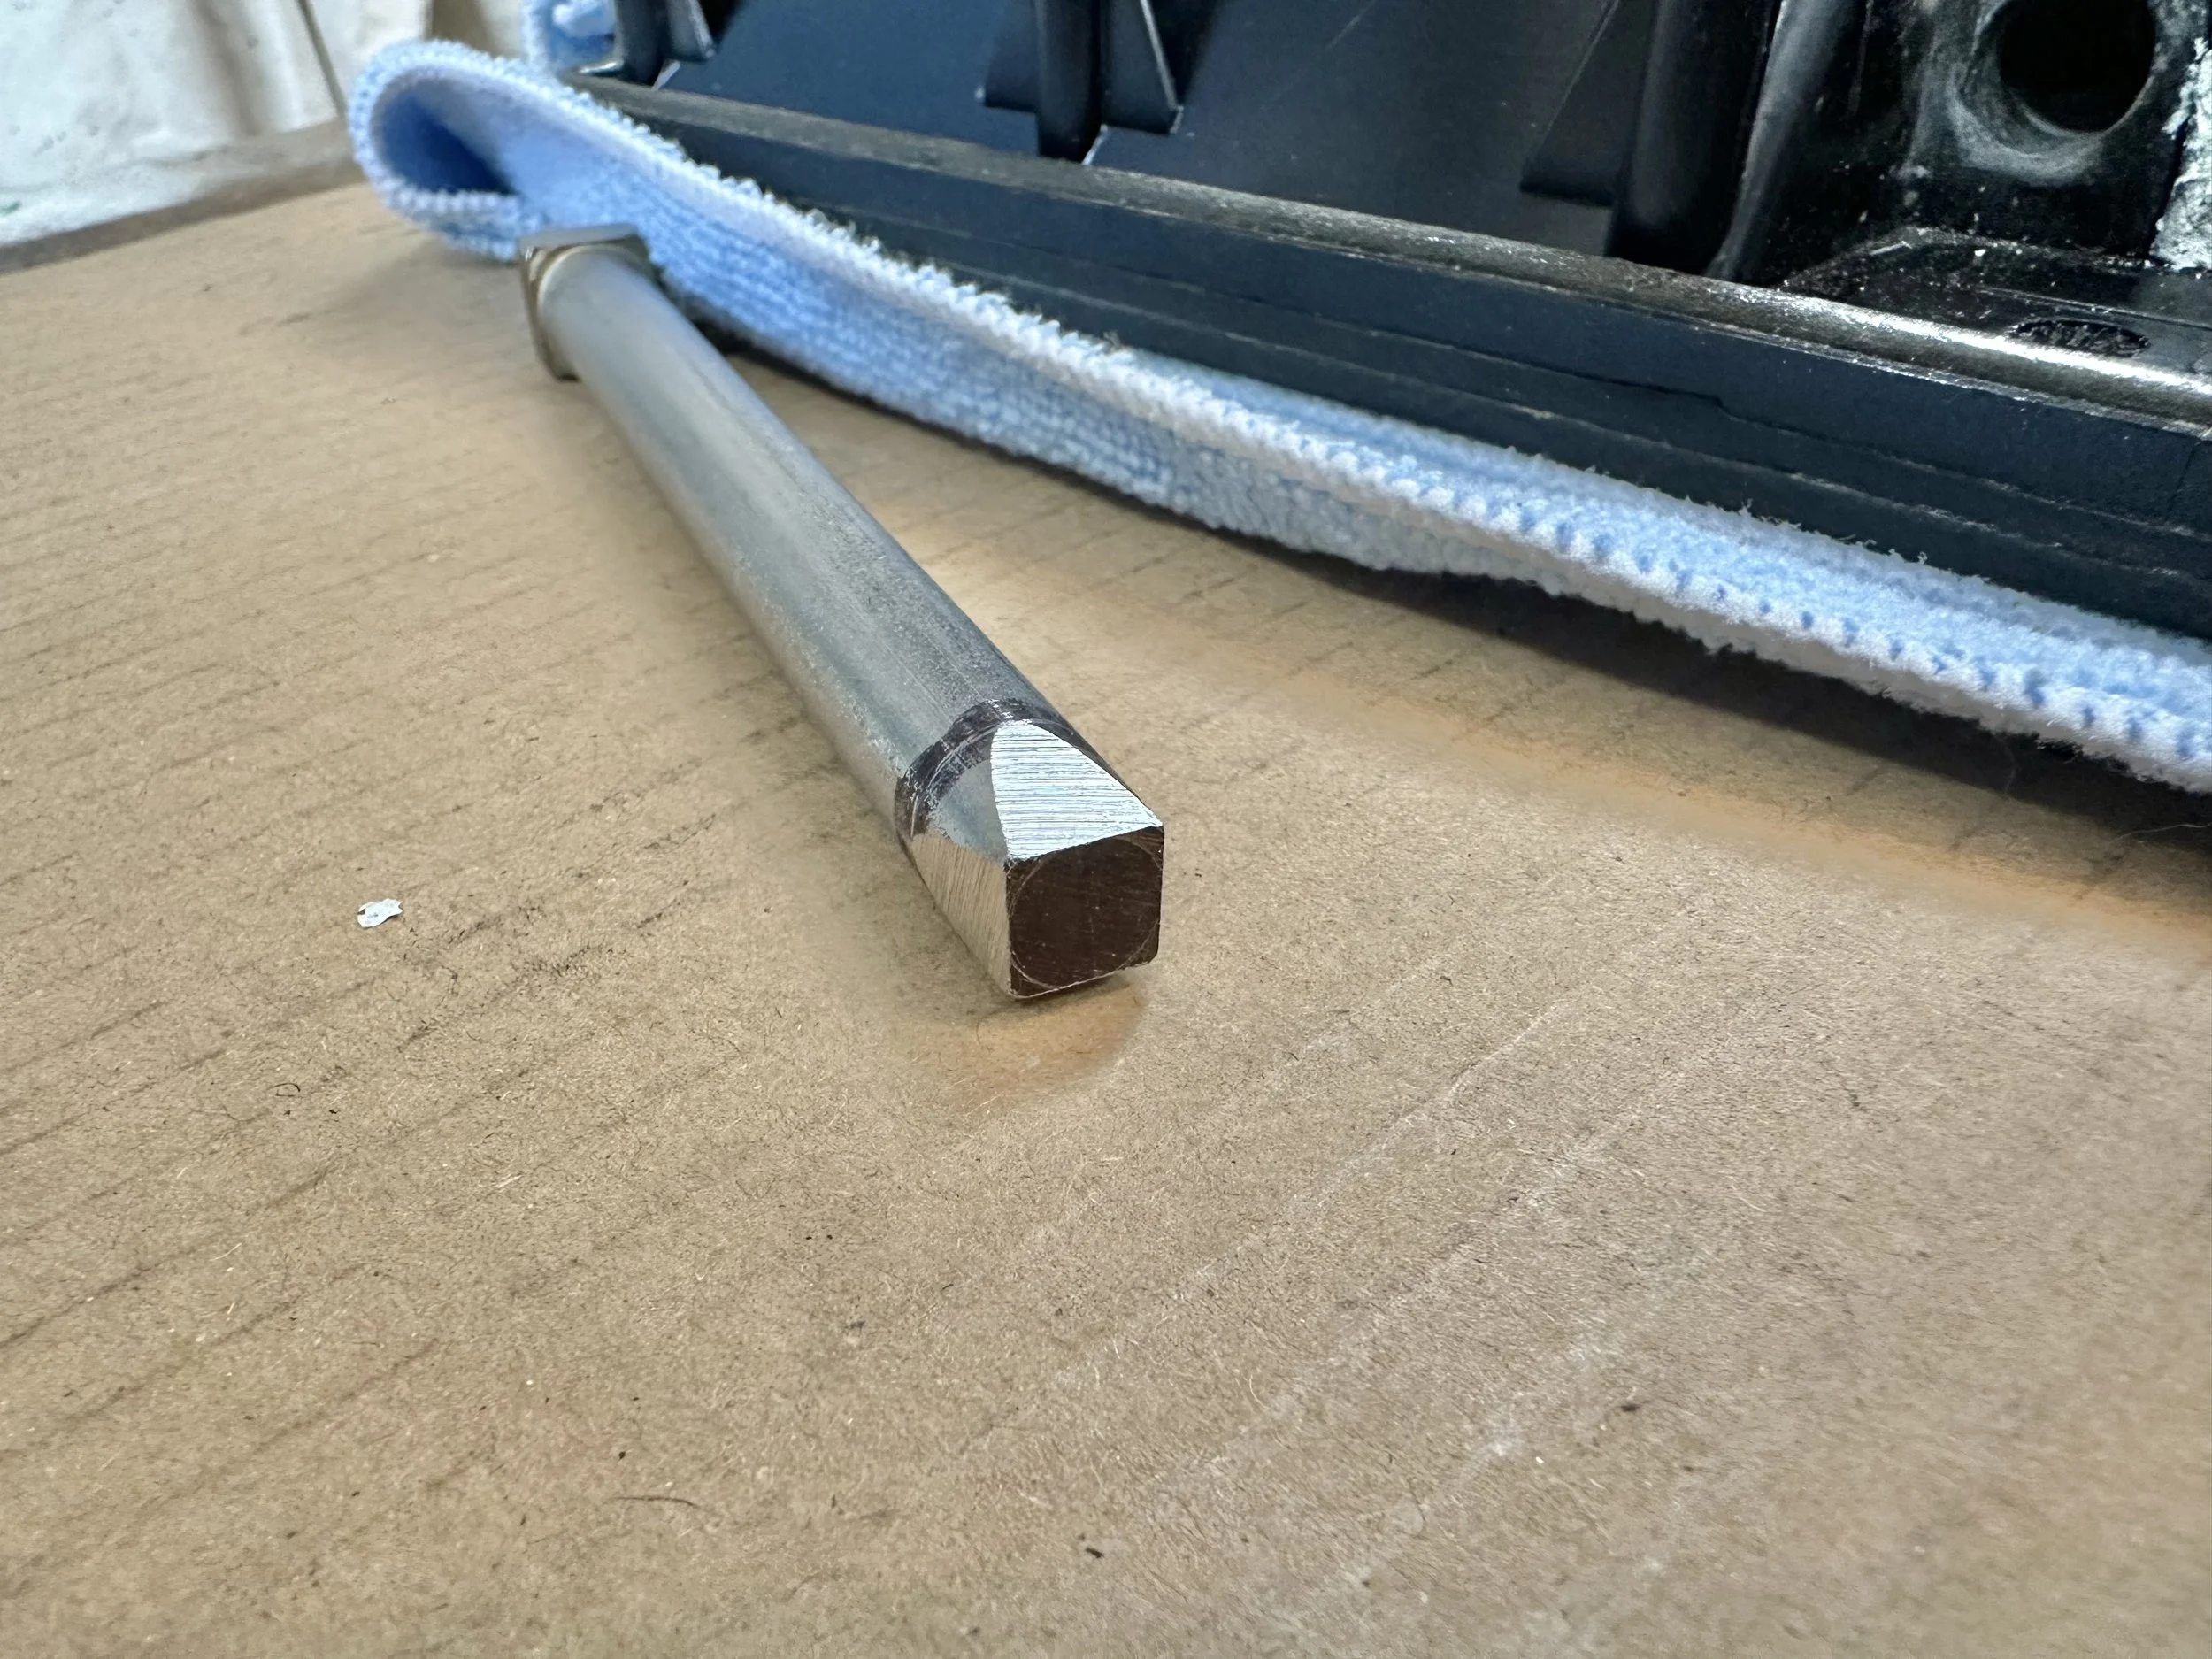
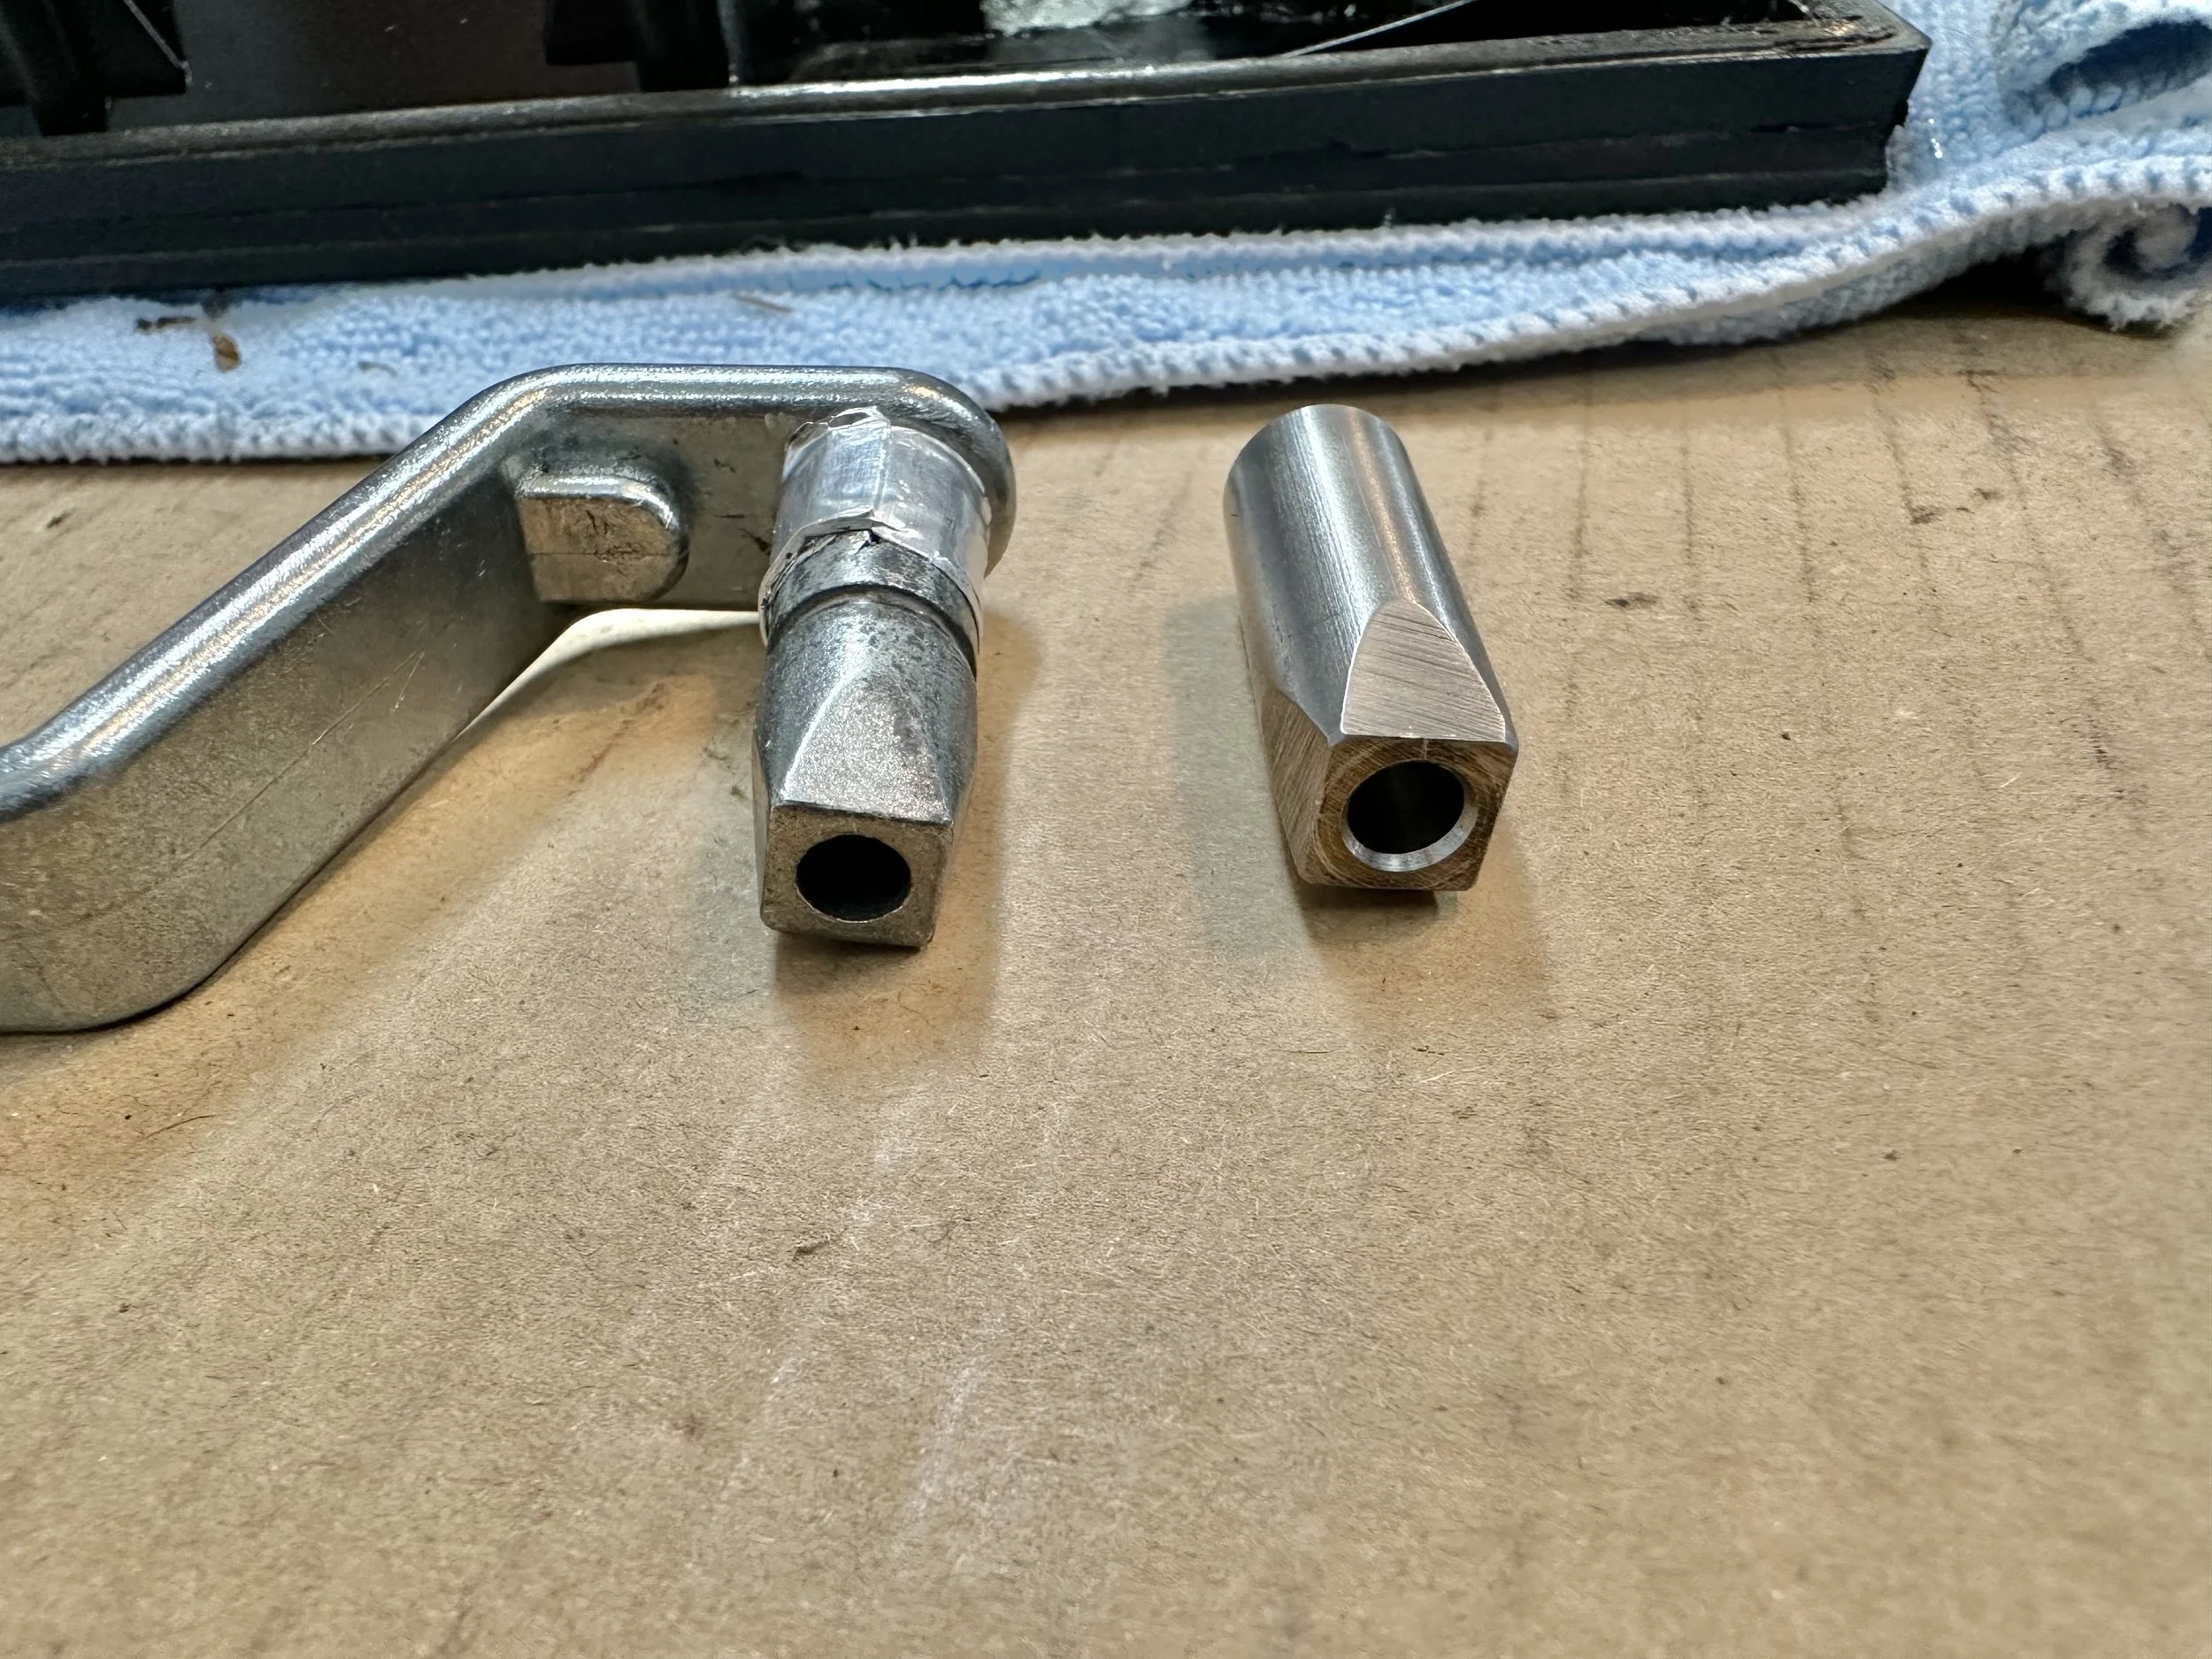
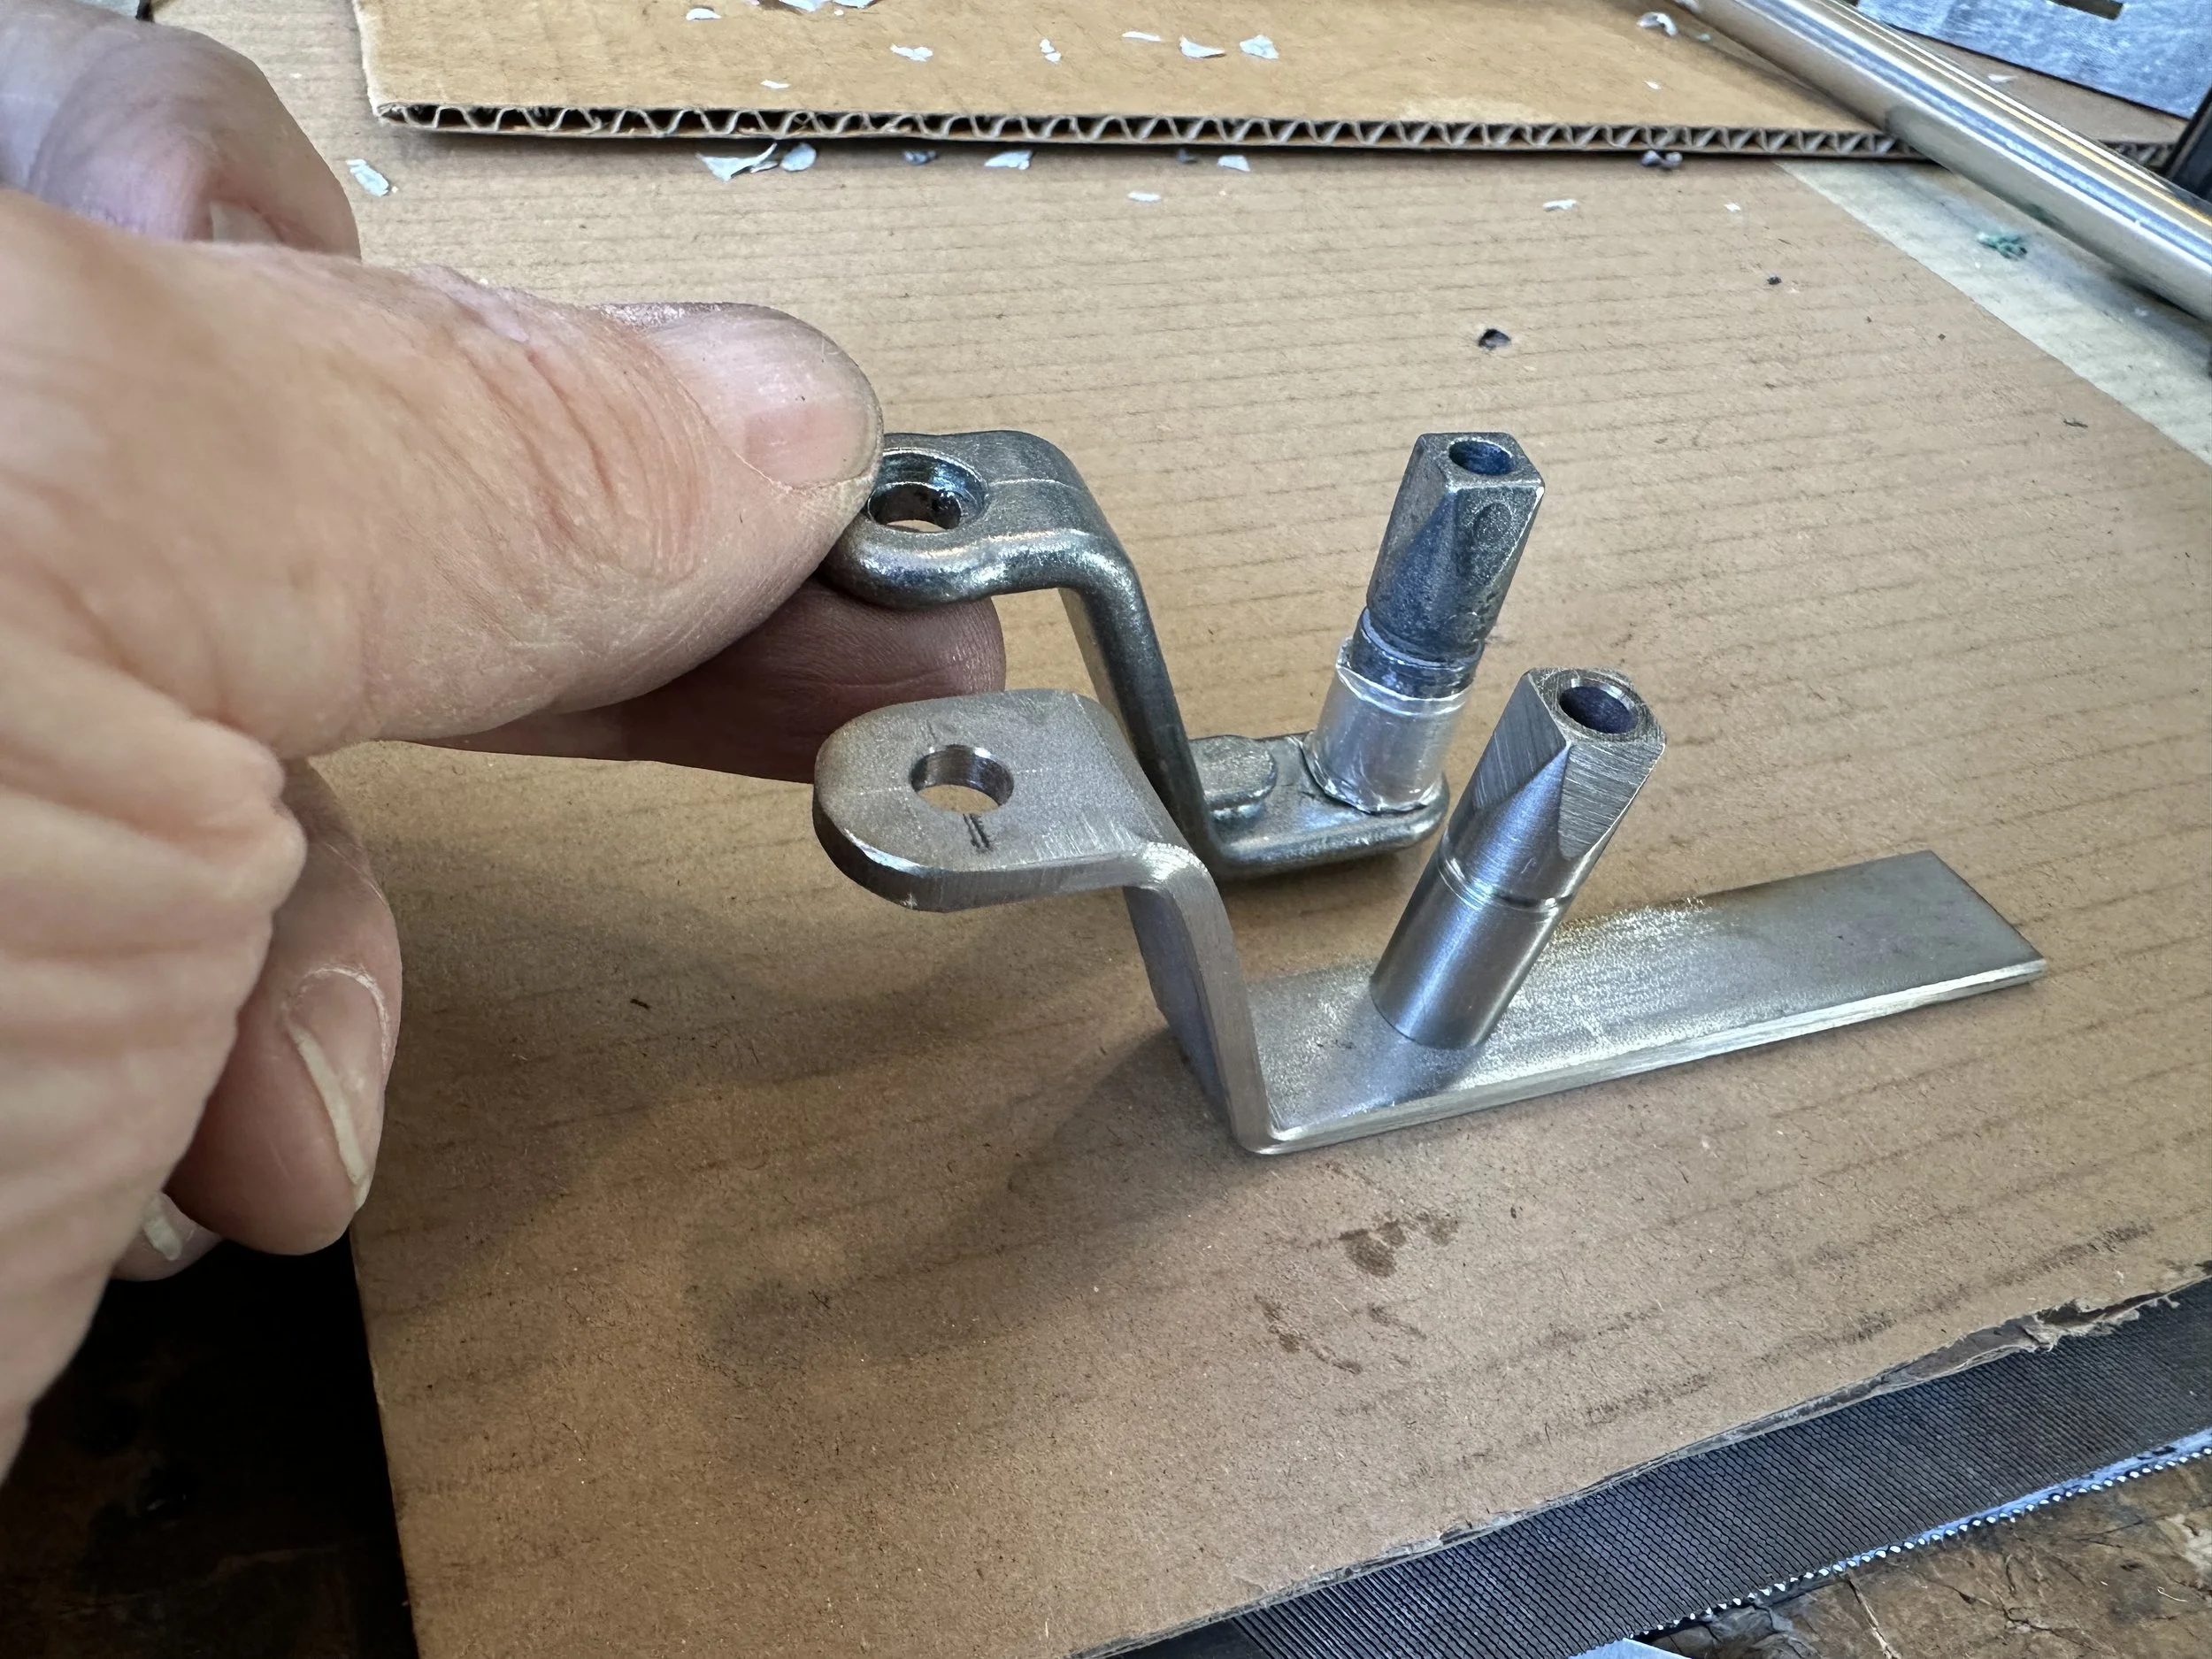
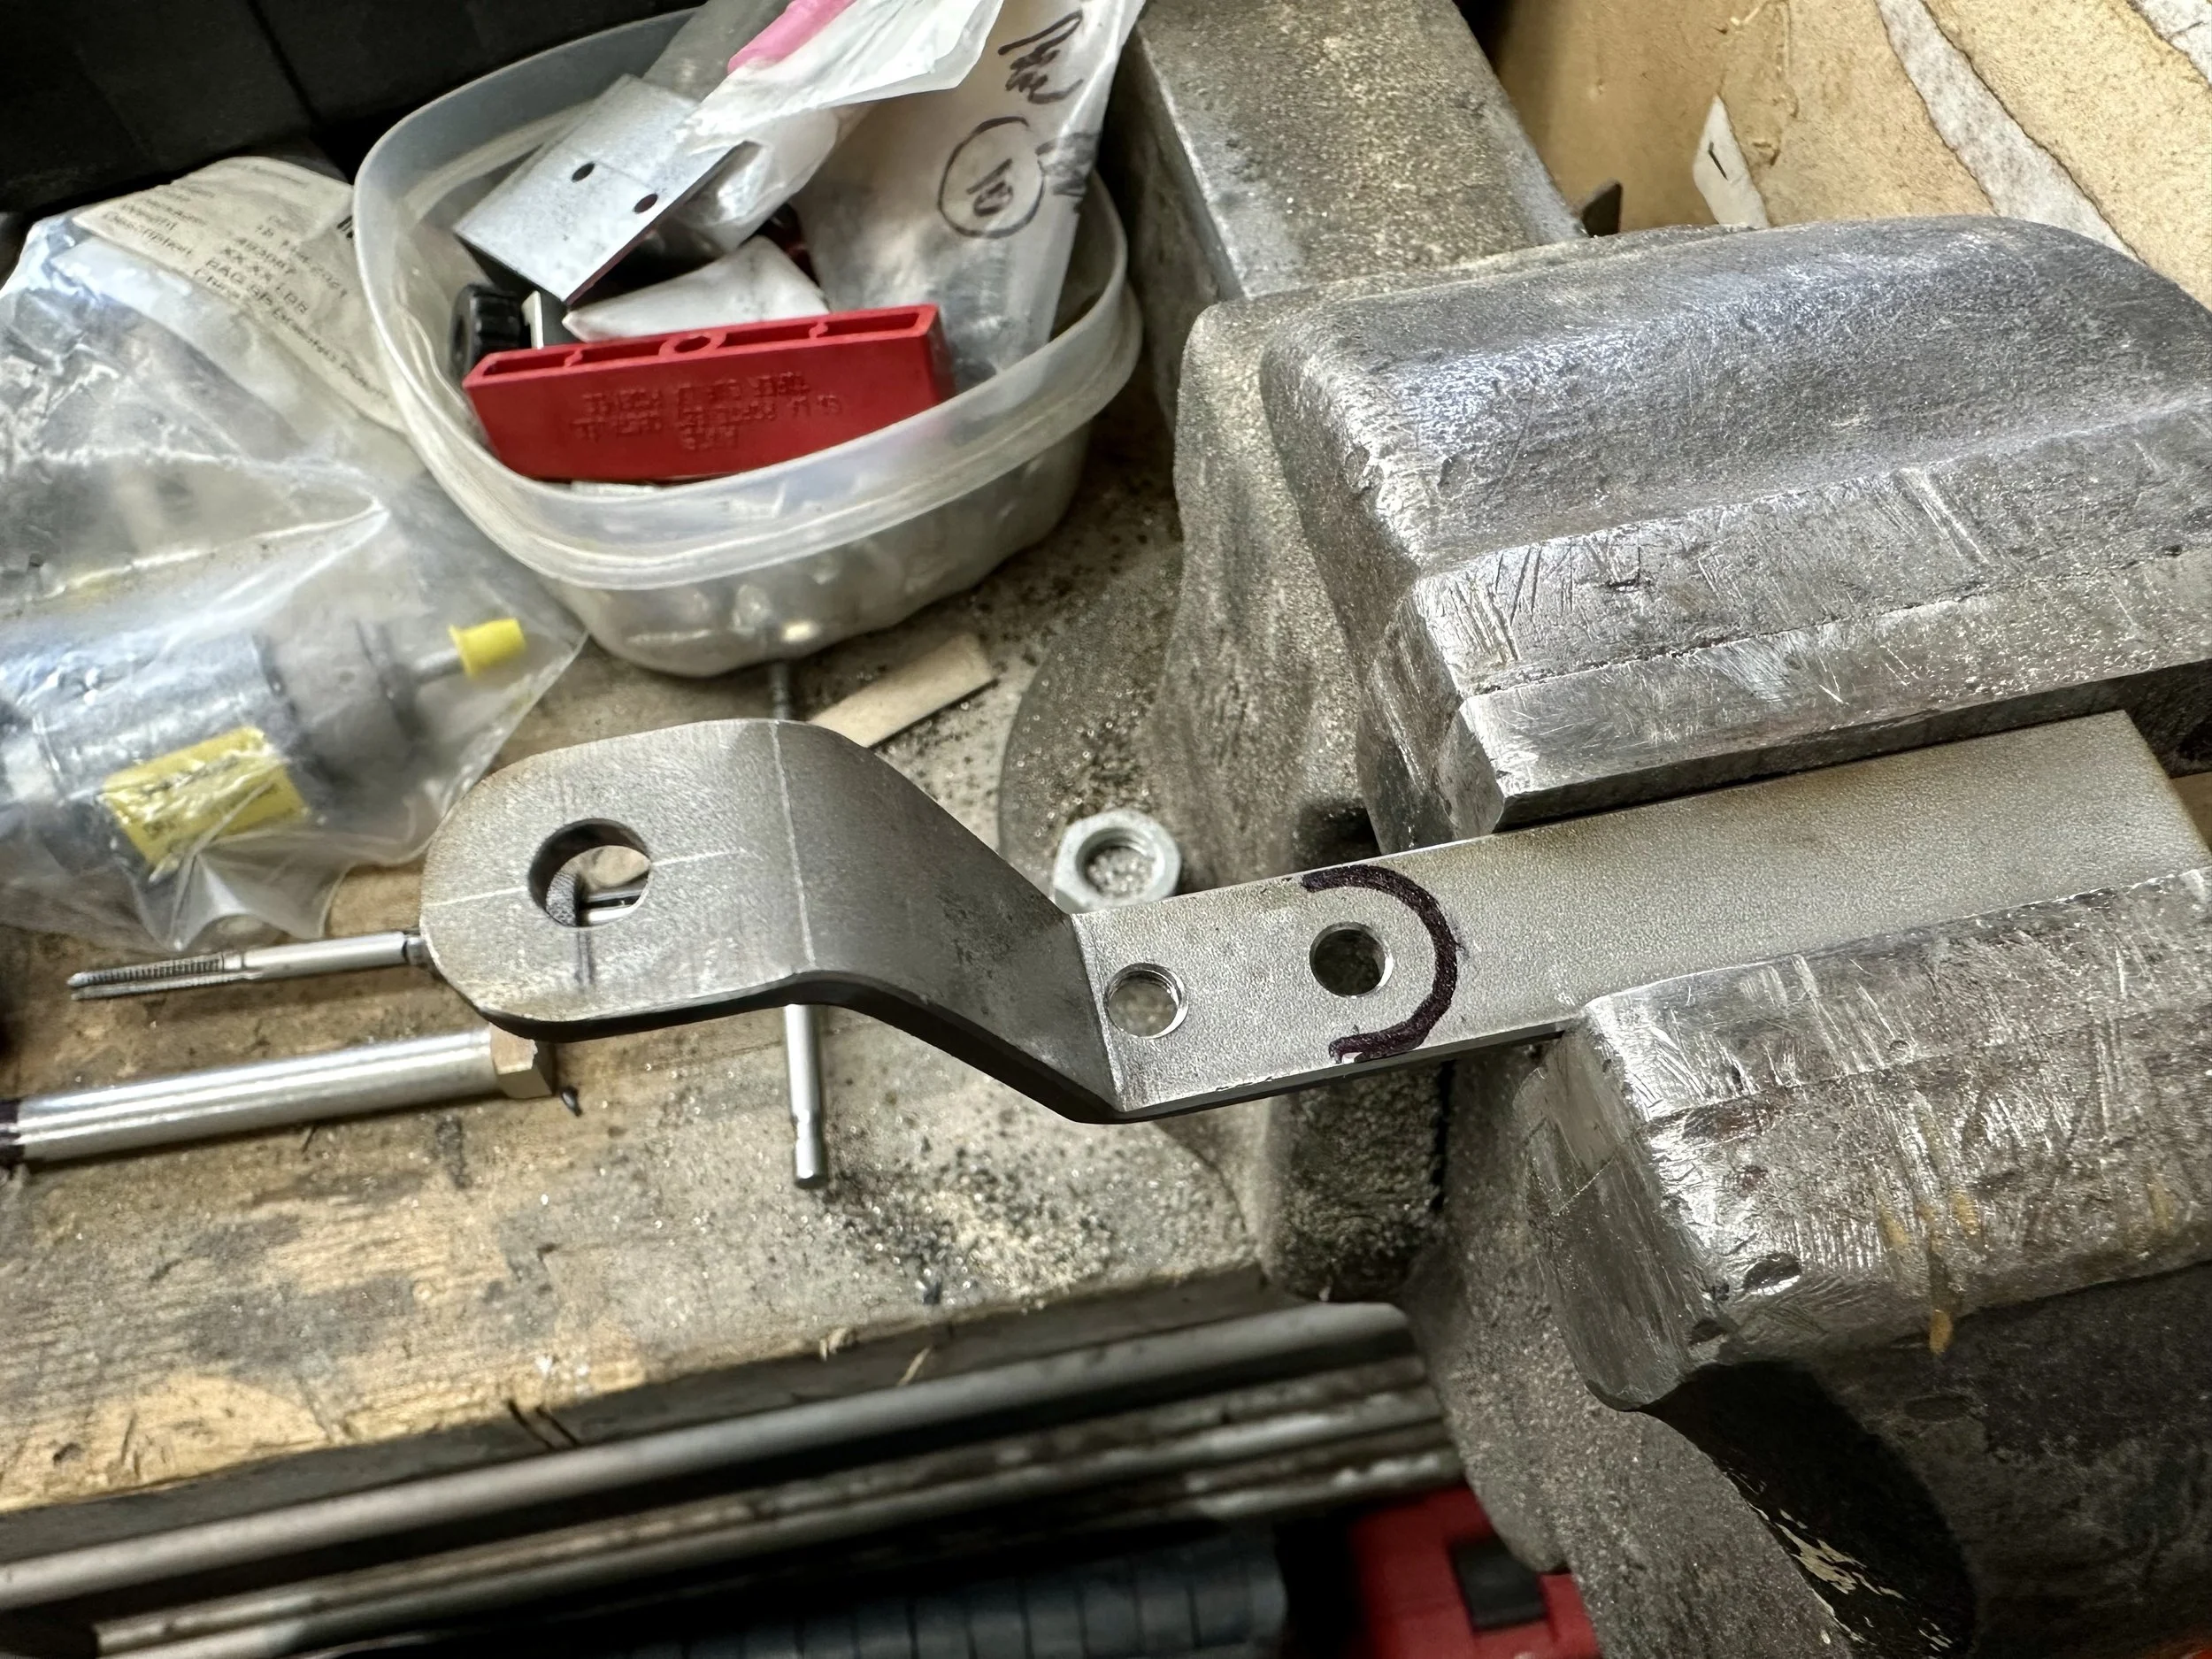
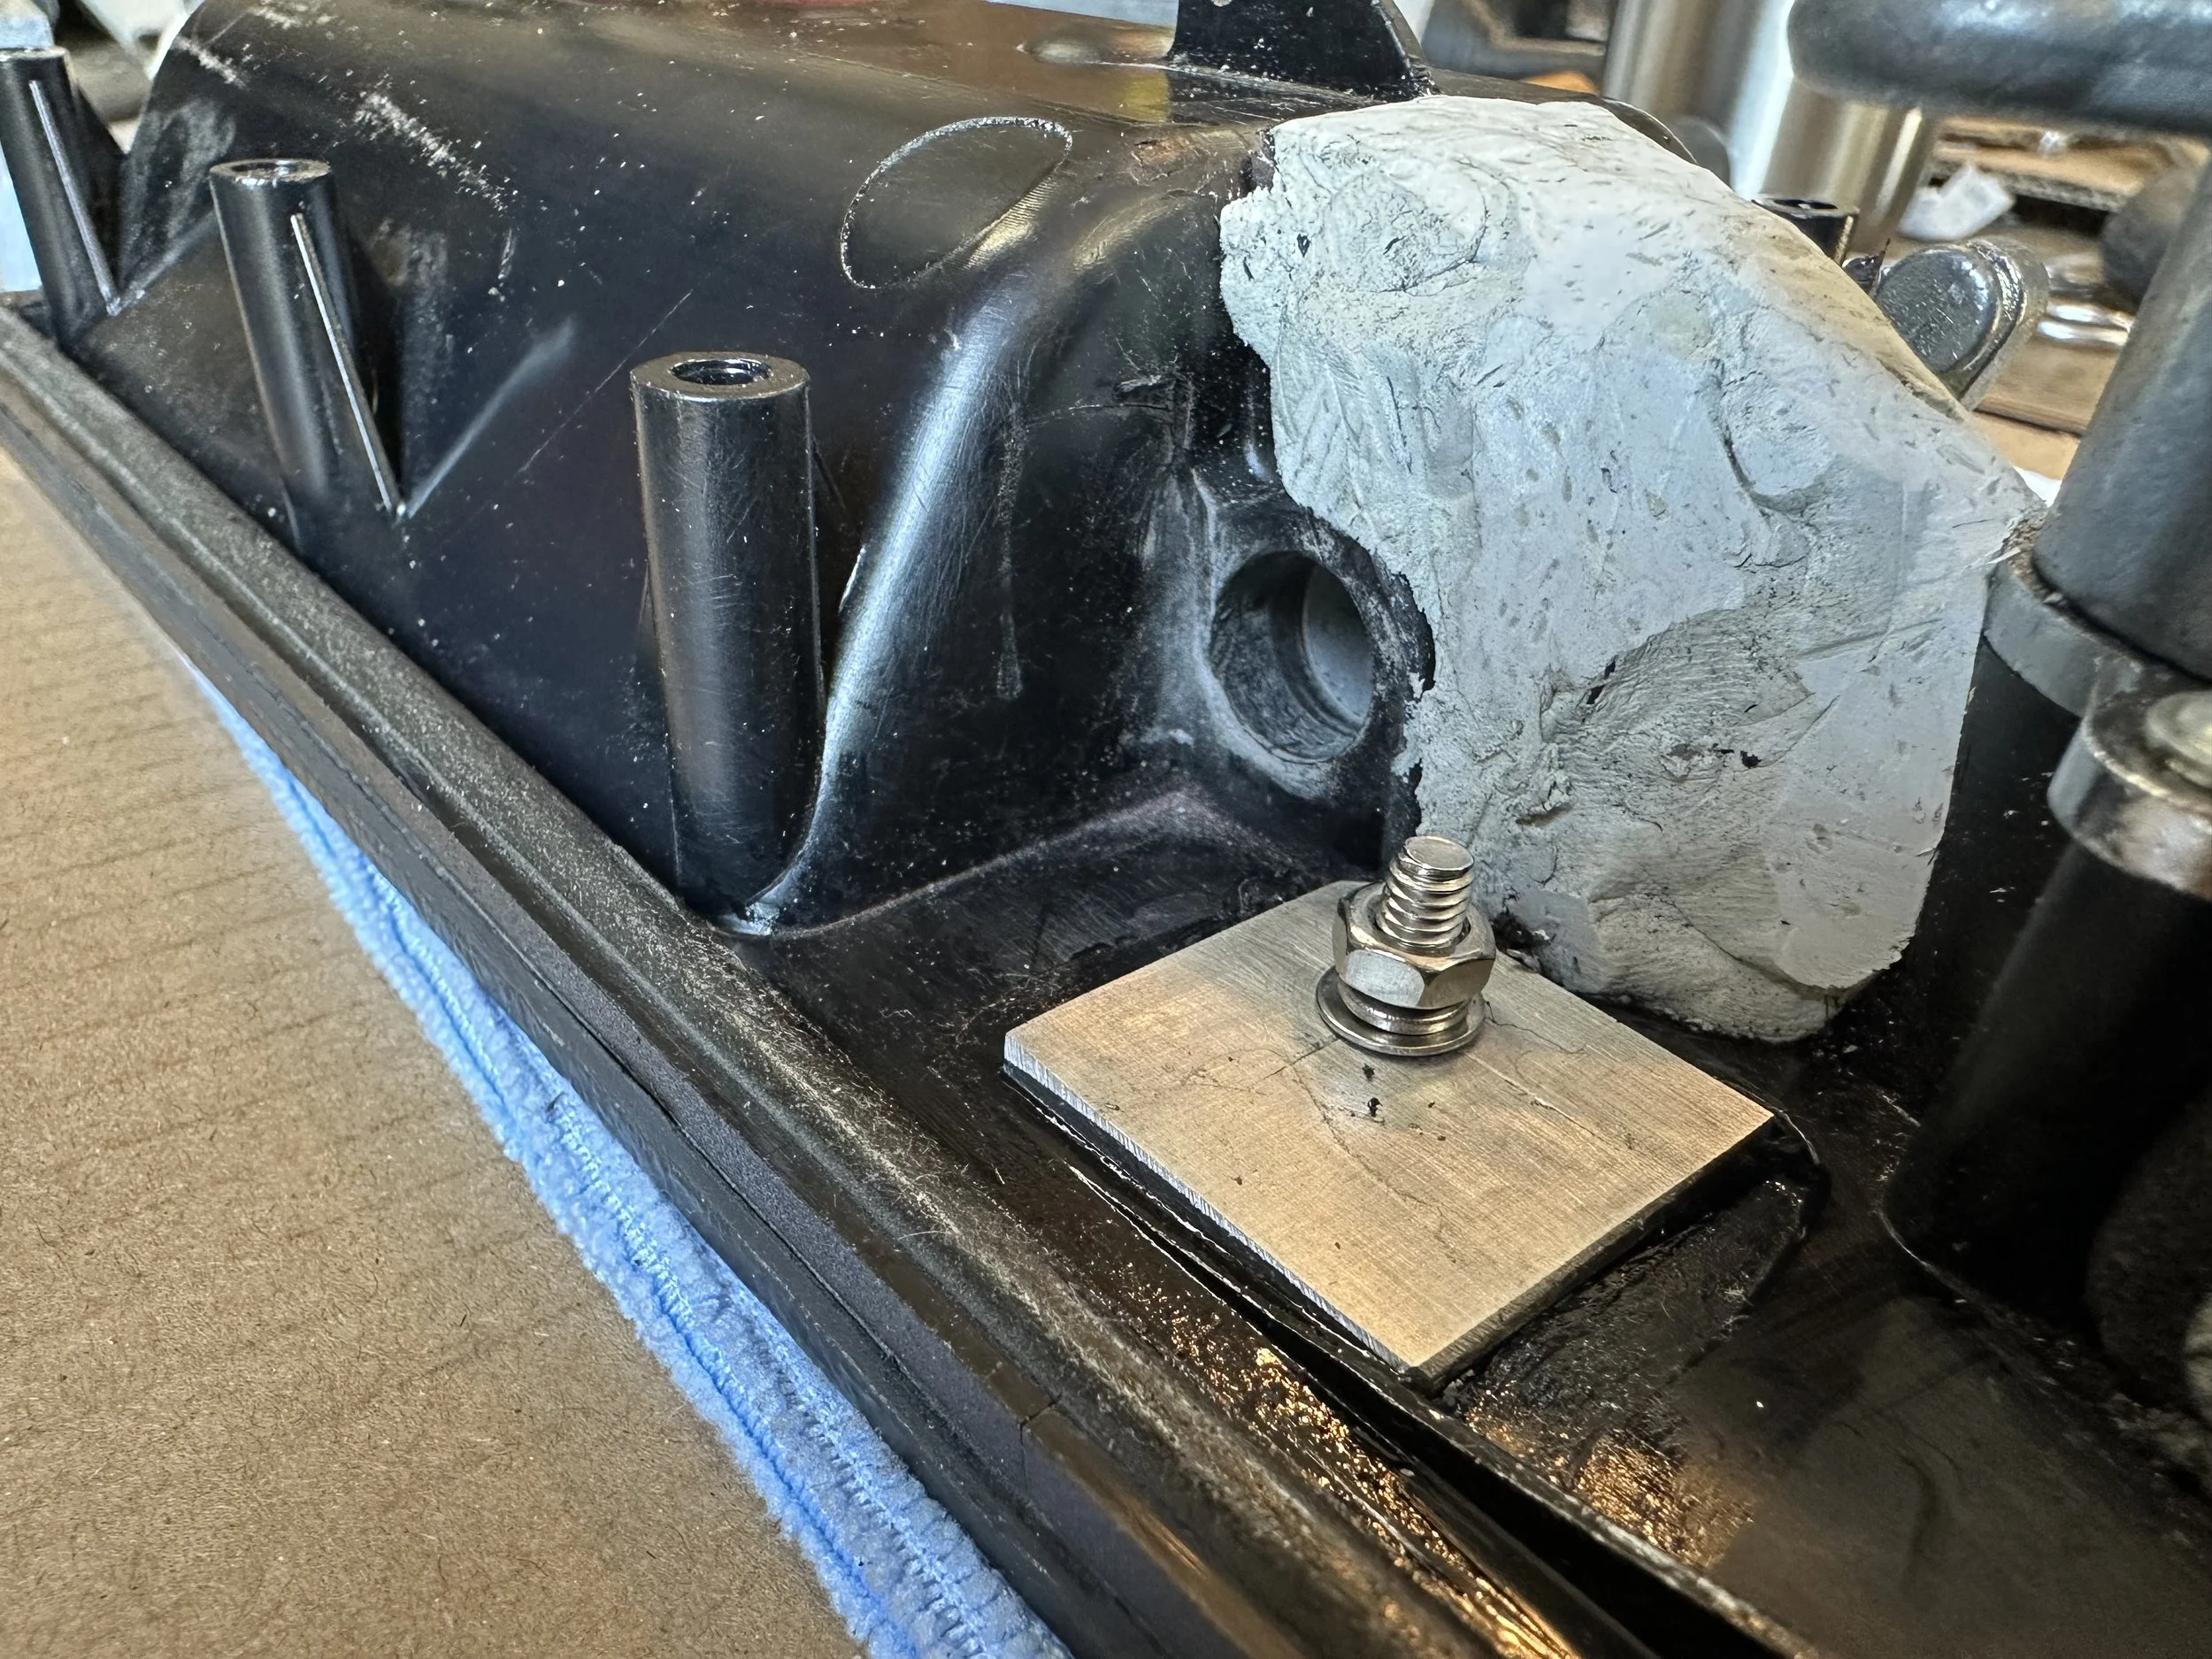
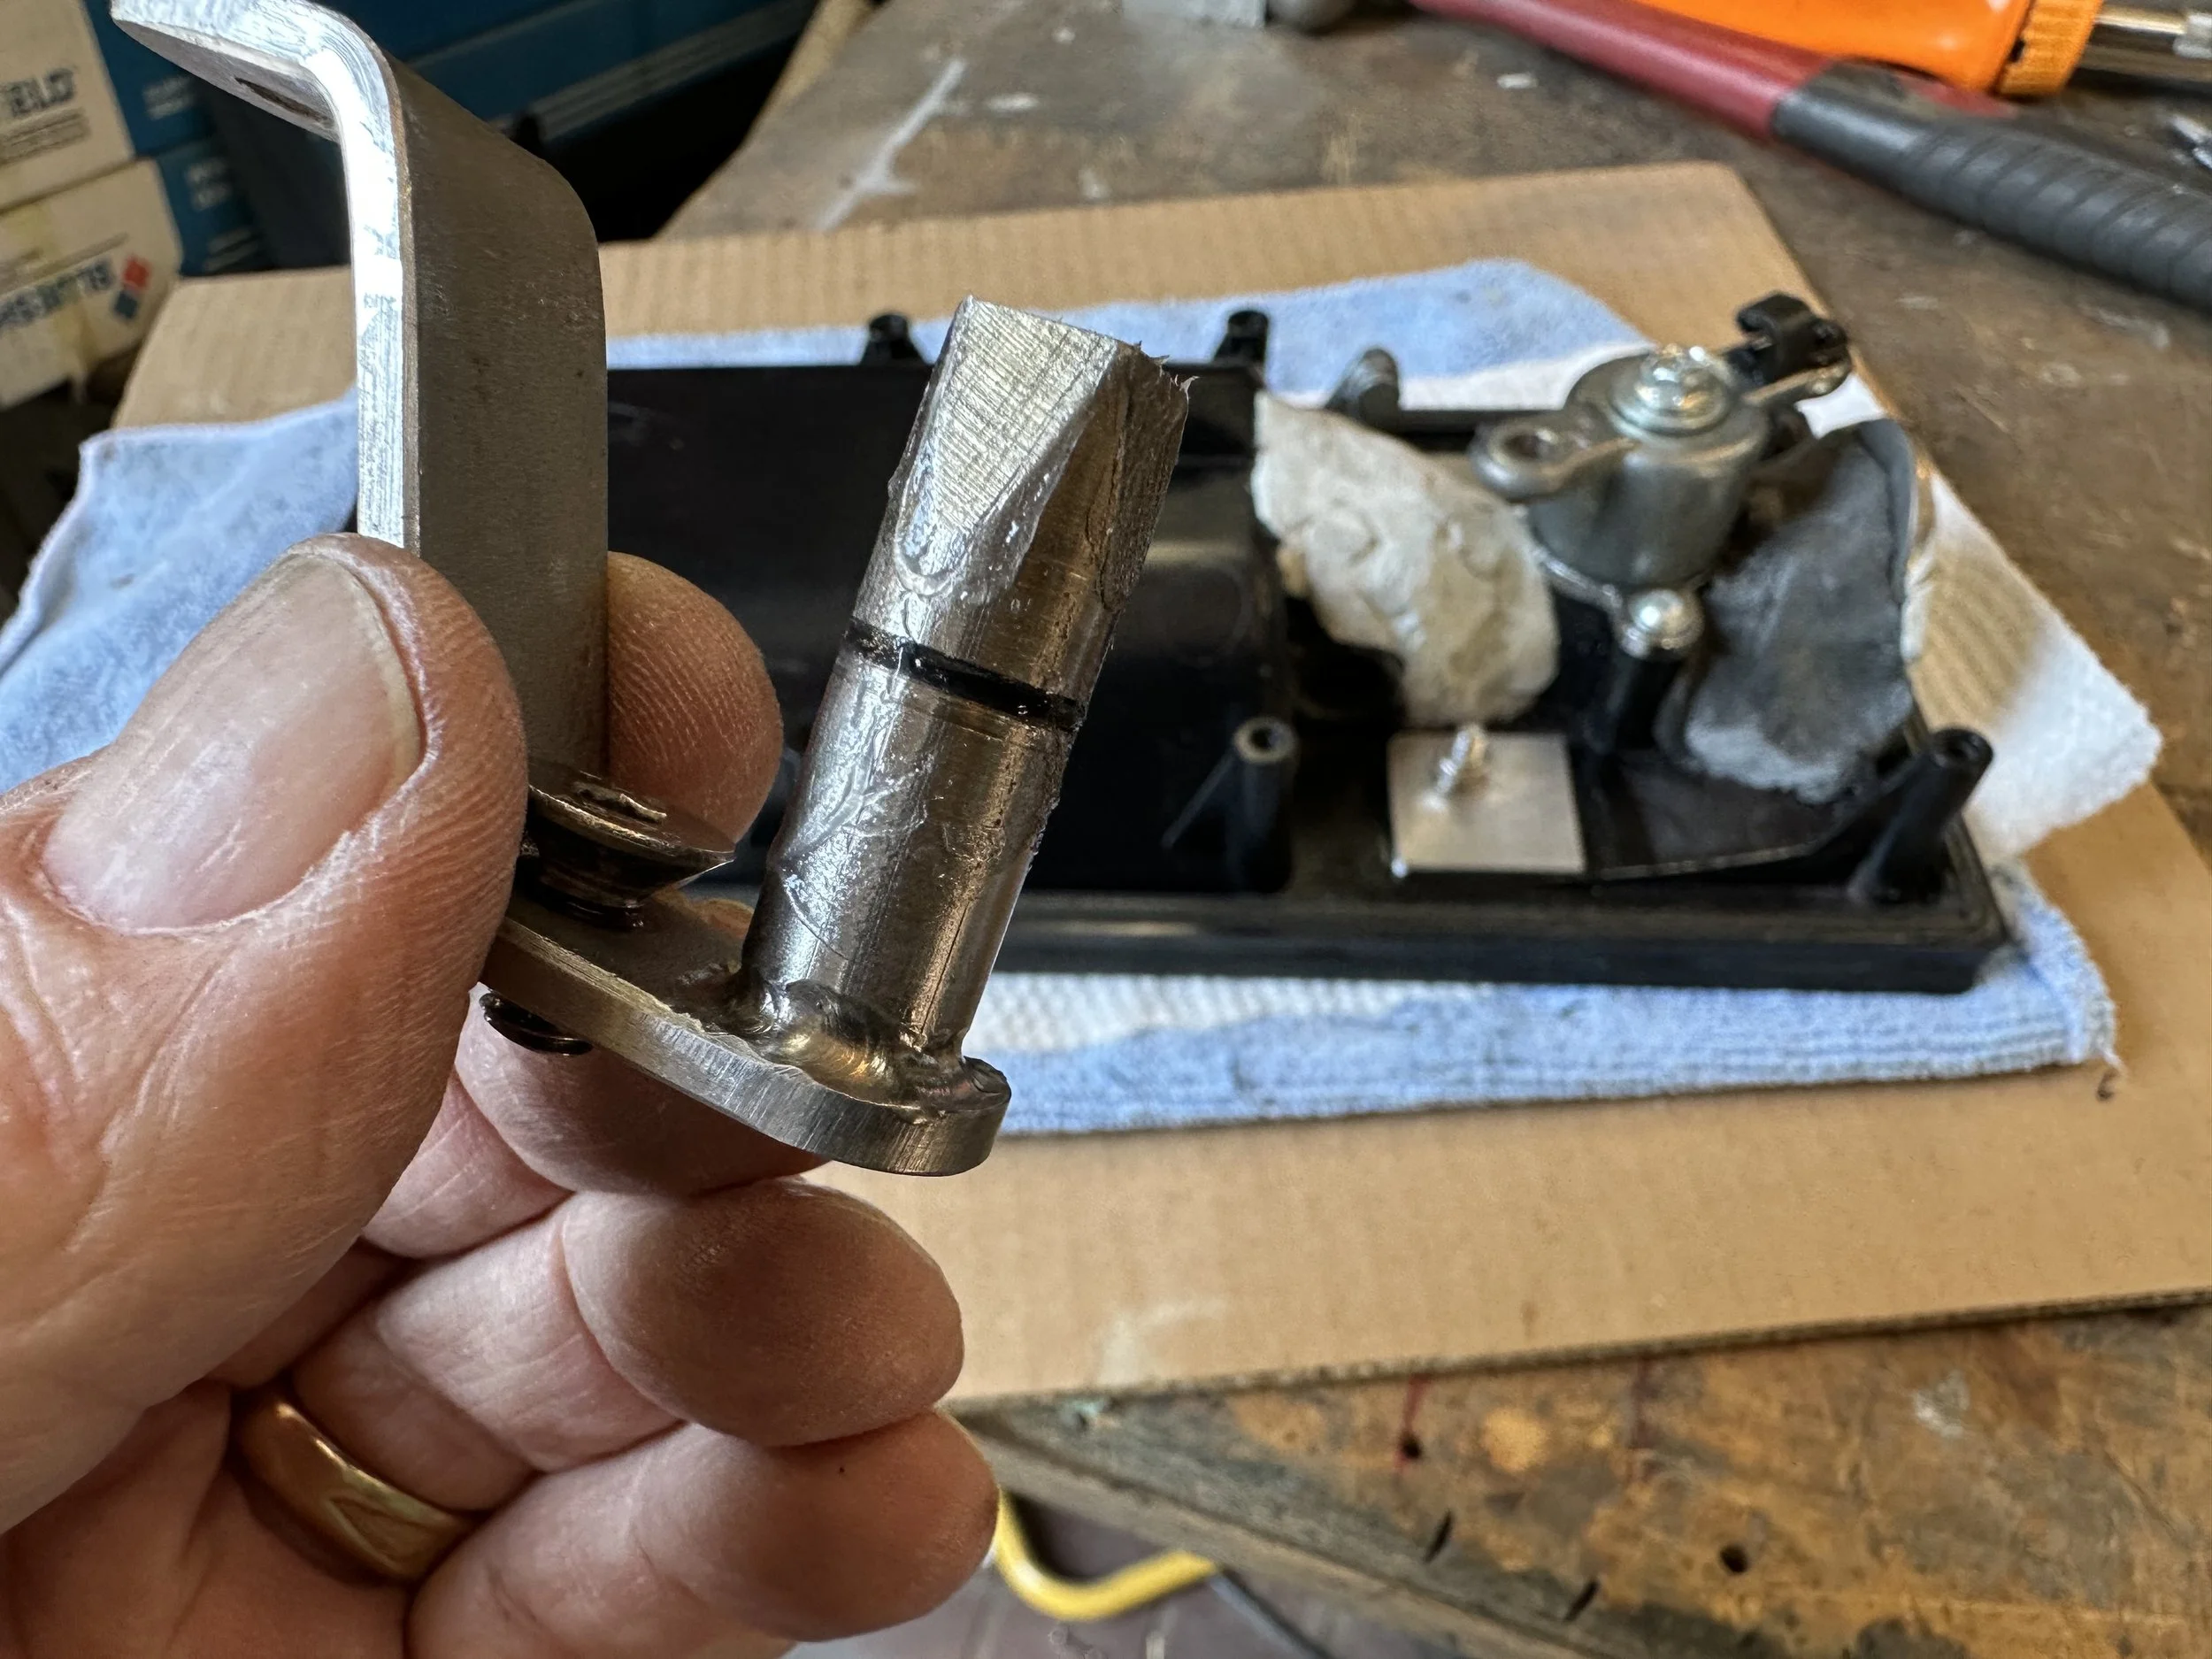
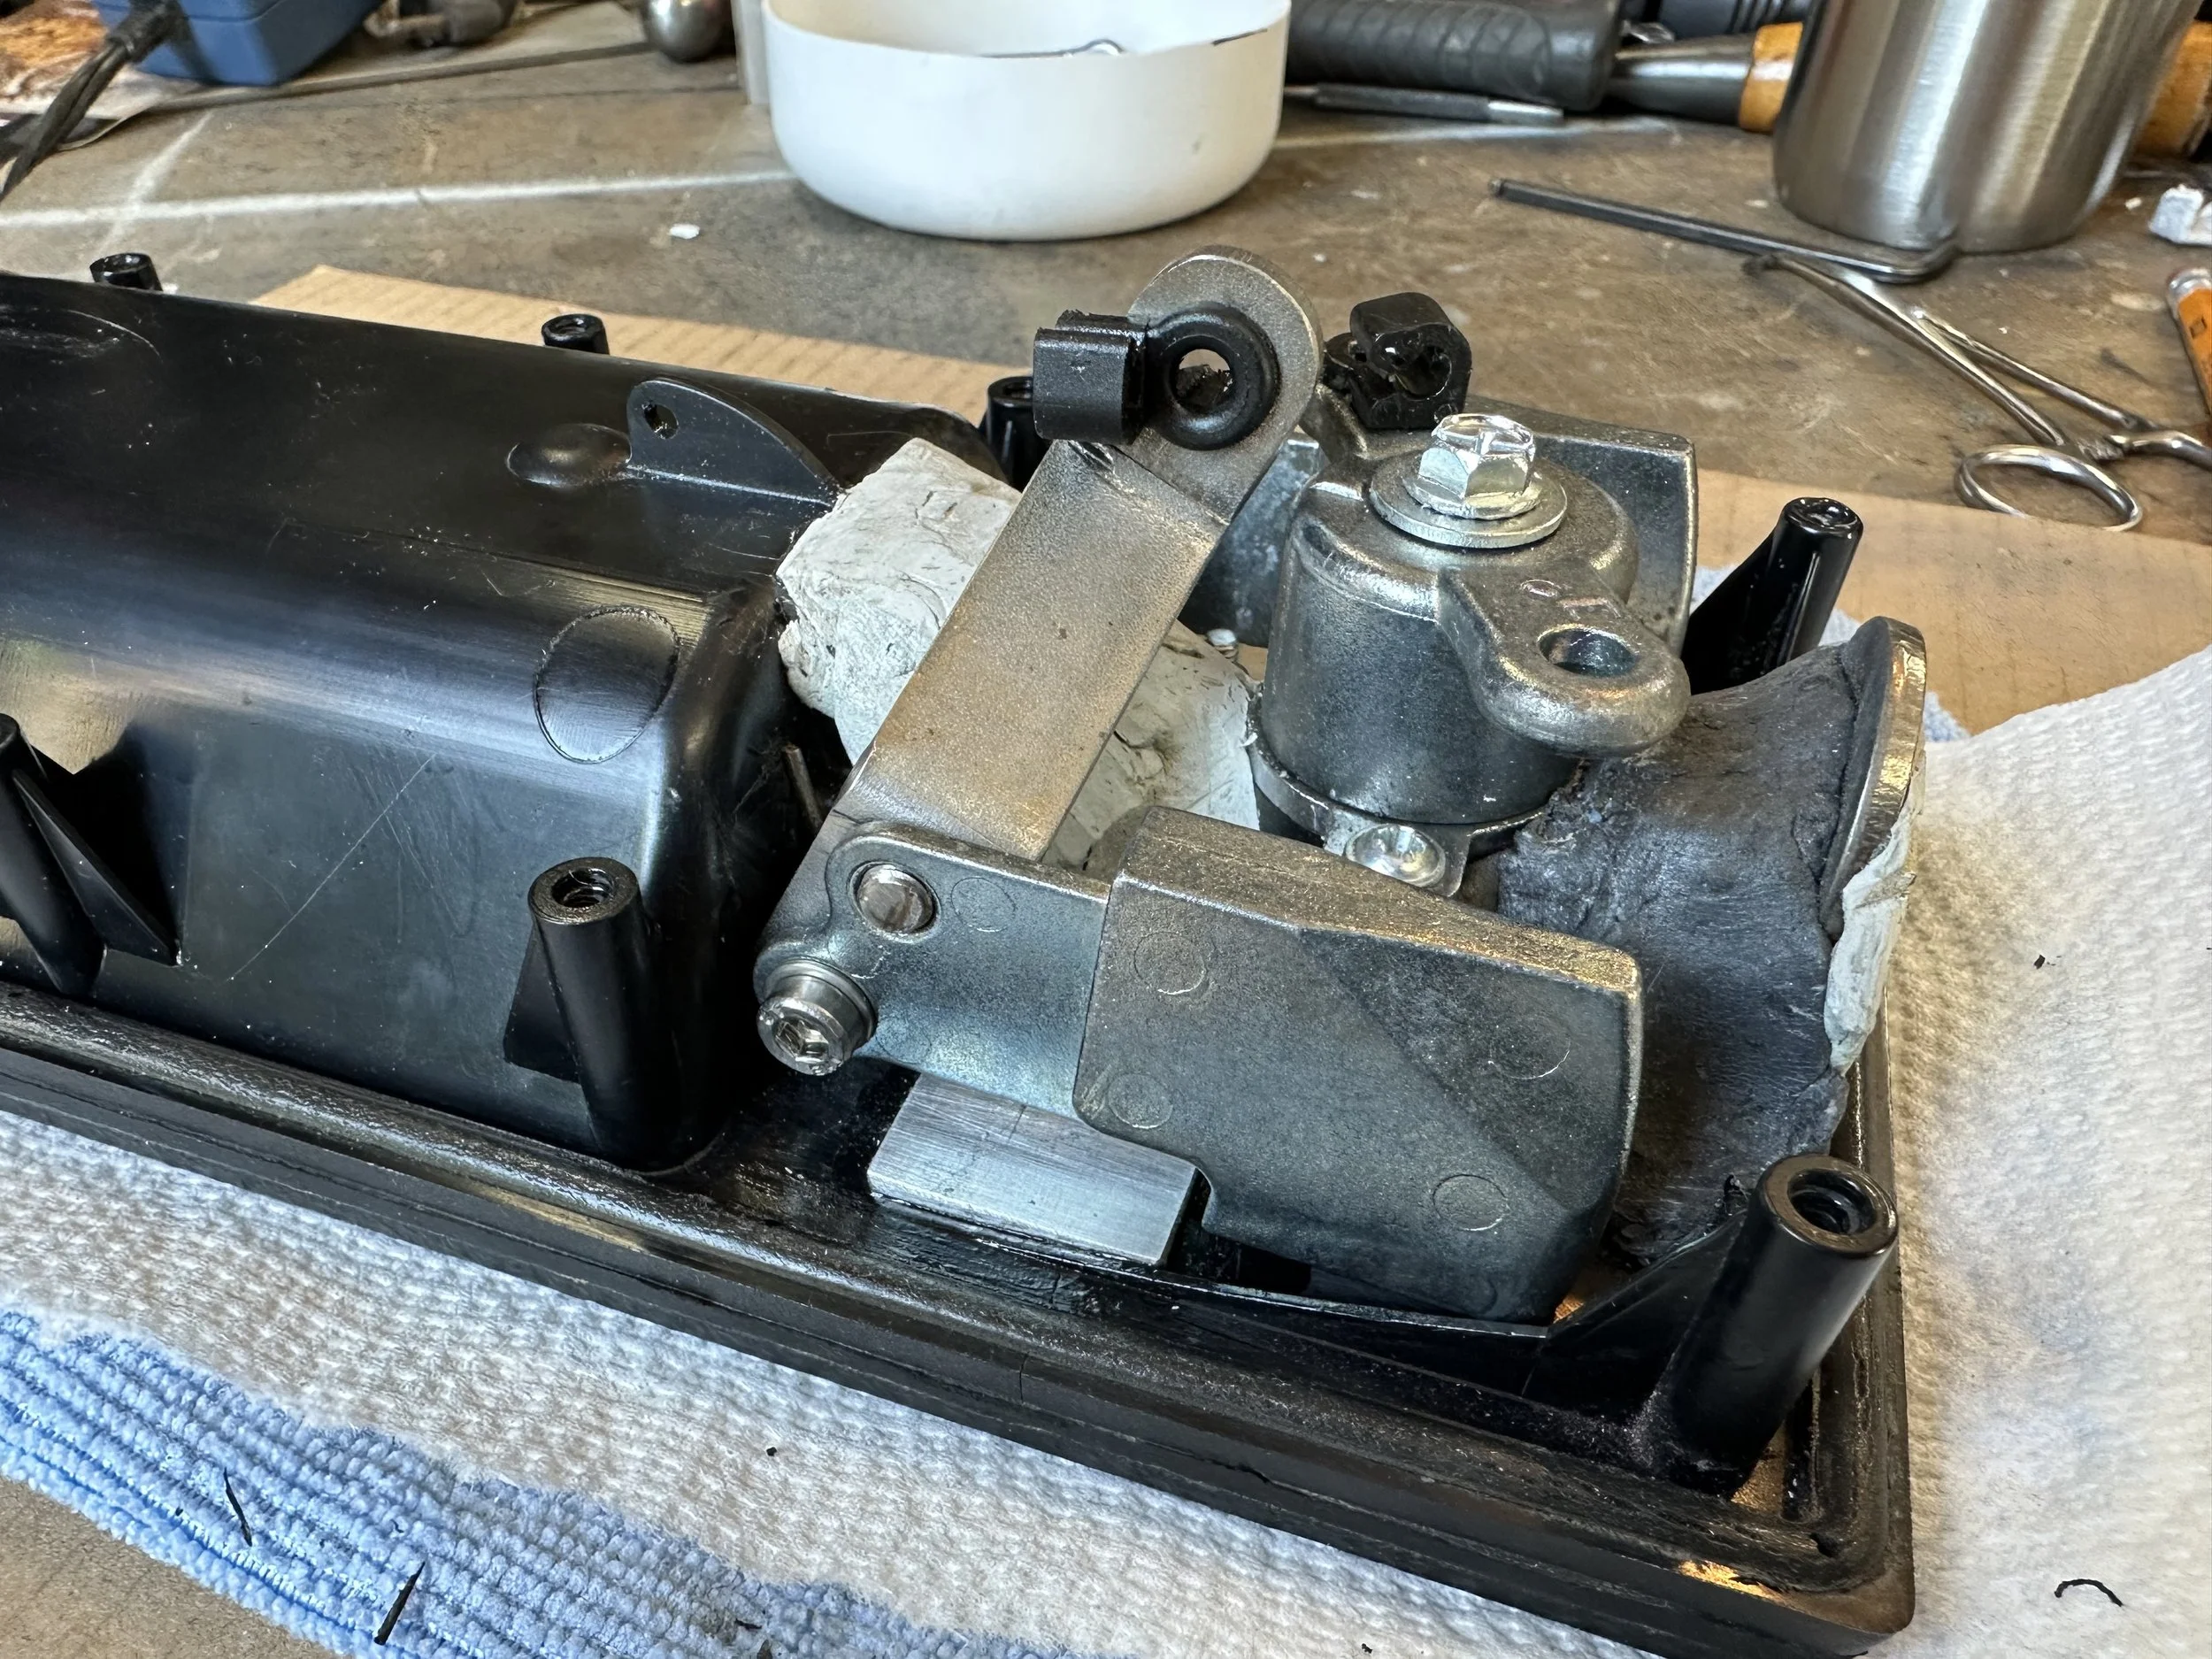
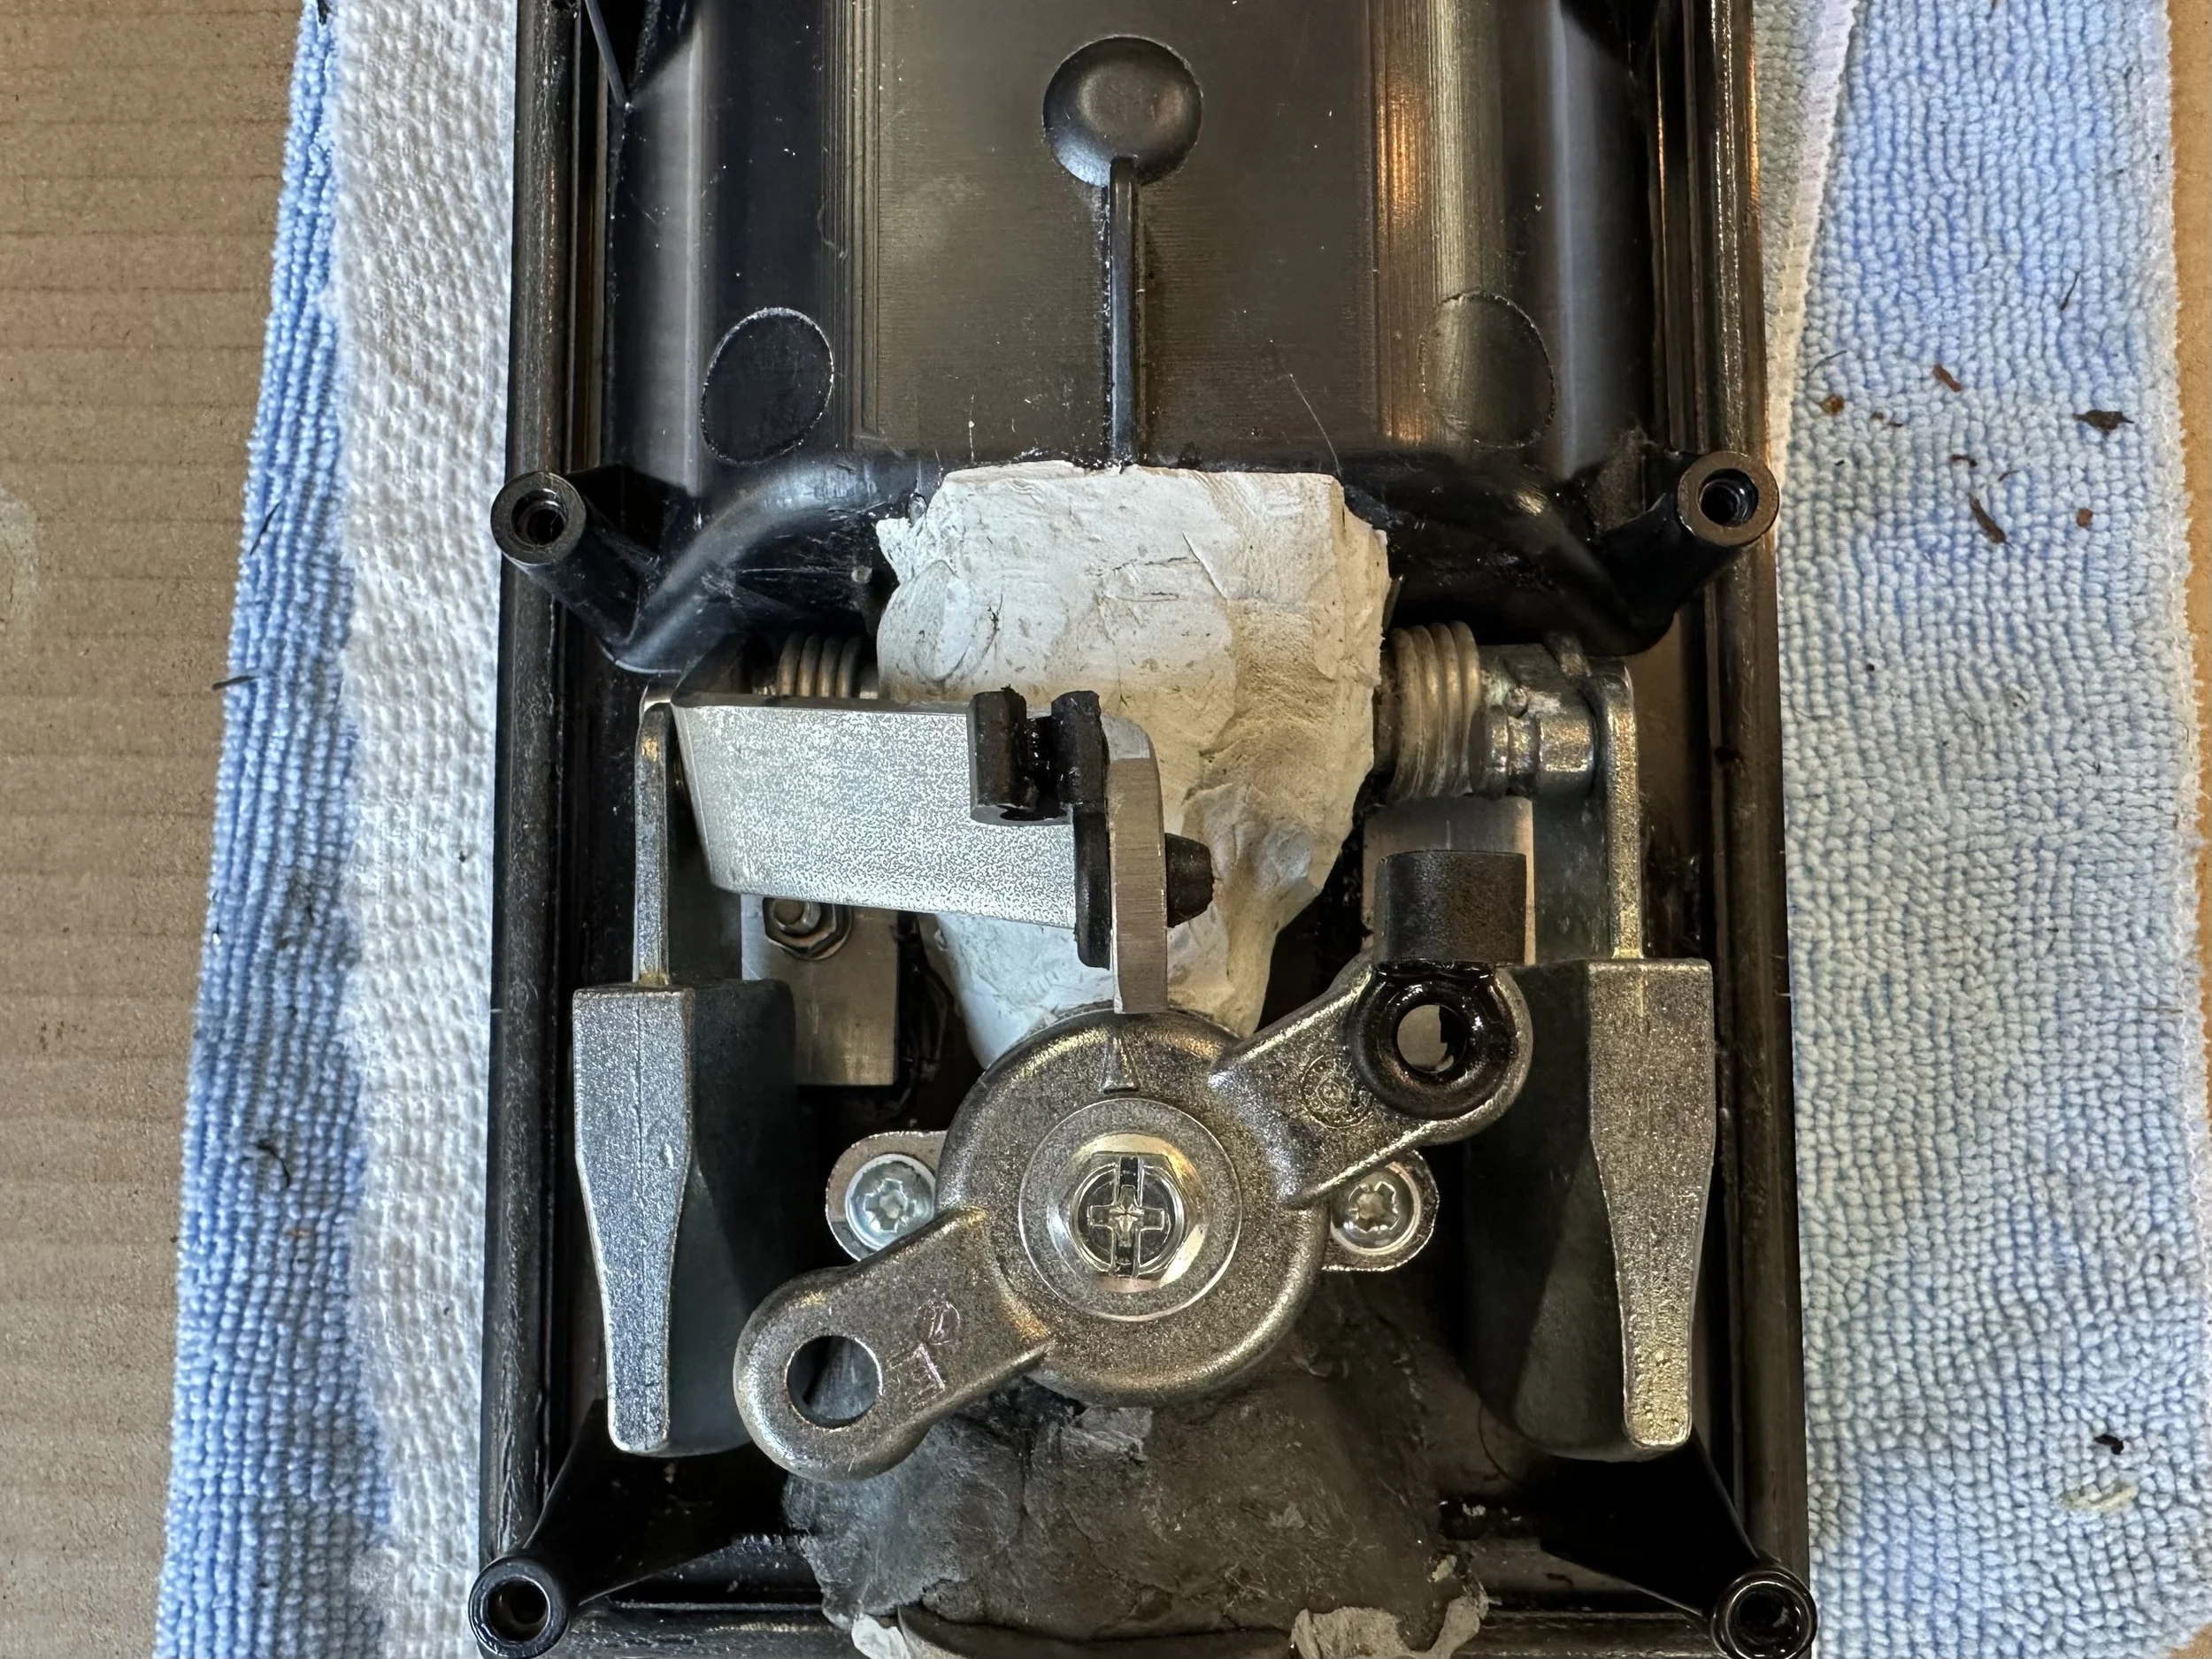
The crack migrated inside to the pivot housing where the mechanism that unlatches the door is located. The housing fractured in numerous places, the cause of which we would soon find out was a broken metal pivot axle. Made of some sort of cast metal, it broke completely in half and made it impossible to open the door from the outside. We were able to push the broken plastic housing back together with some CA glue, and then layer on some JB Weld epoxy putty to reinforce the break. Despite this field repair, the handle still wouldn’t open the door from the outside. Thank the heavens we have a pass through tunnel connecting to the truck cab. We were able to enter the habitat via this route to open the door from the inside. Fortunately the failure happened towards the end of the trip, so the inconvenience was reduced.
When we got back home we contacted the builder wanting to order a new outer door handle assembly. Something that should be easy since the door is made by a big German maker of RV door and accessories. We had to go through the builder as the German company, Hartal, would not deal with us directly. Unfortunarely, once again the builder let us down. They didn’t have any record of the door model from when they made the habitat, and for some bizarre reason, weren’t able to determine the door model from the photos we sent. Nor could Hartel in Germany, according to the builder. We had hoped for a better outcome since GXV had been purchased by Storyteller Overland. But alas, the saga of failure persists even now.
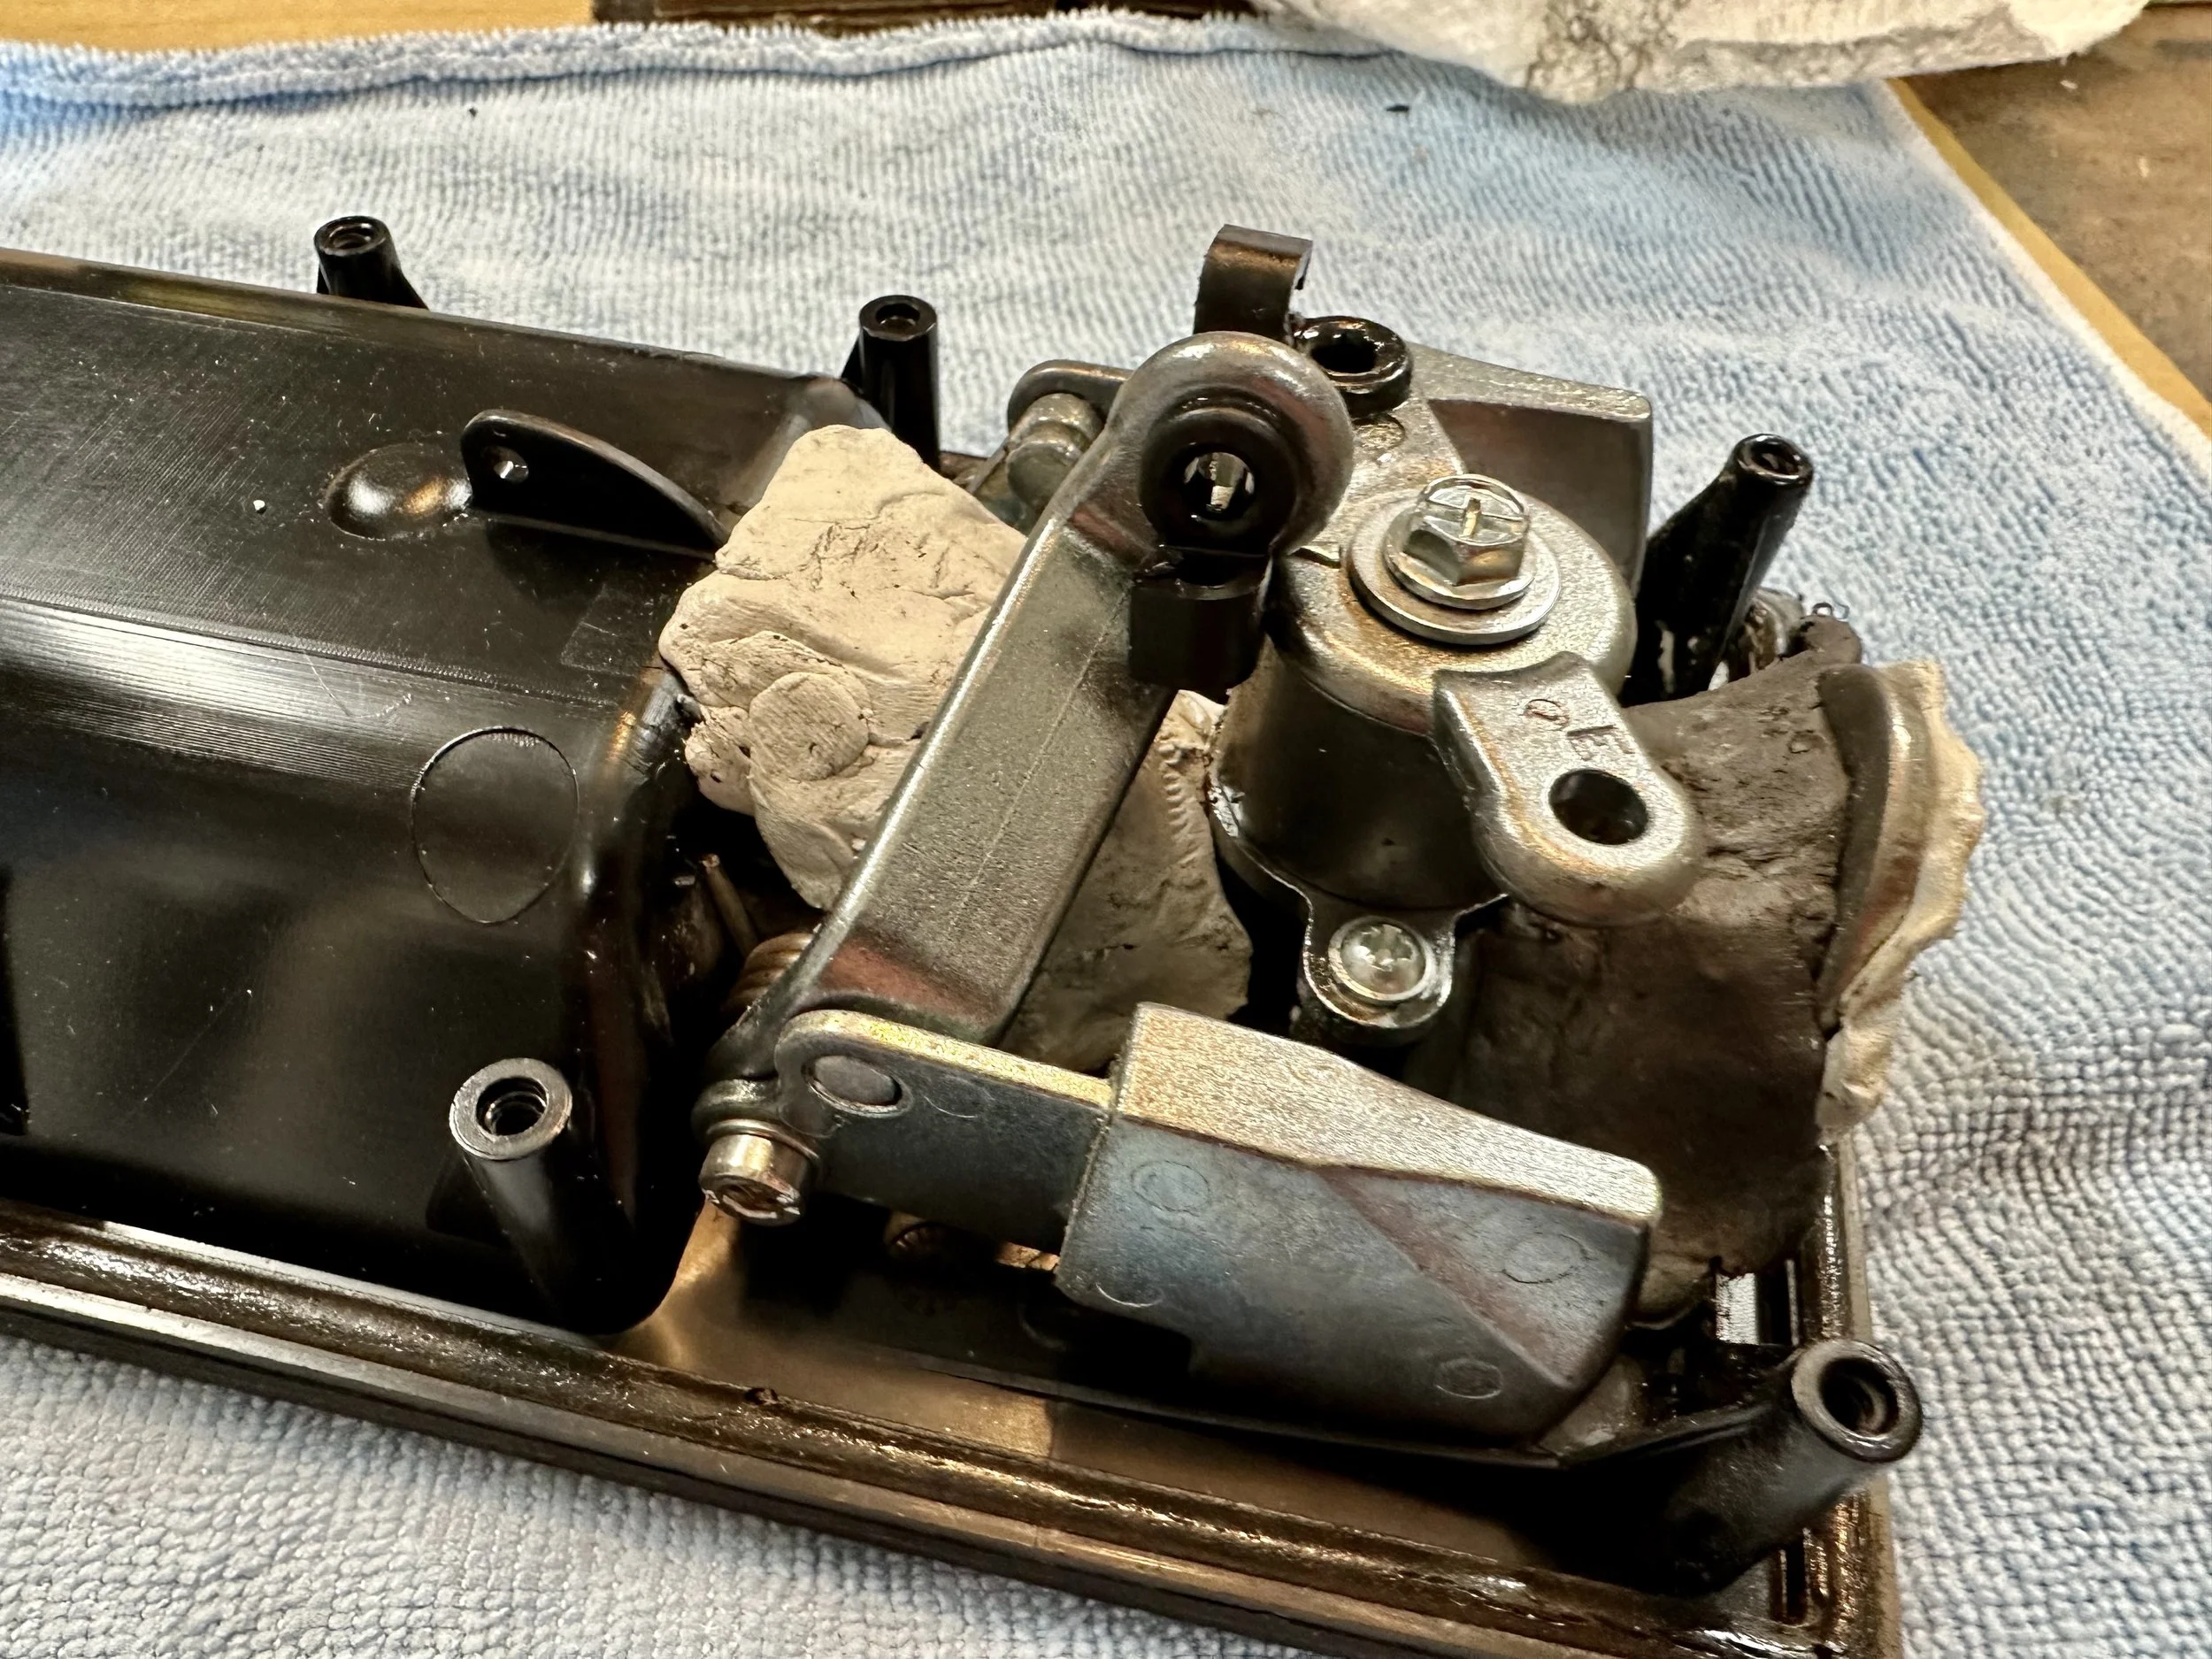
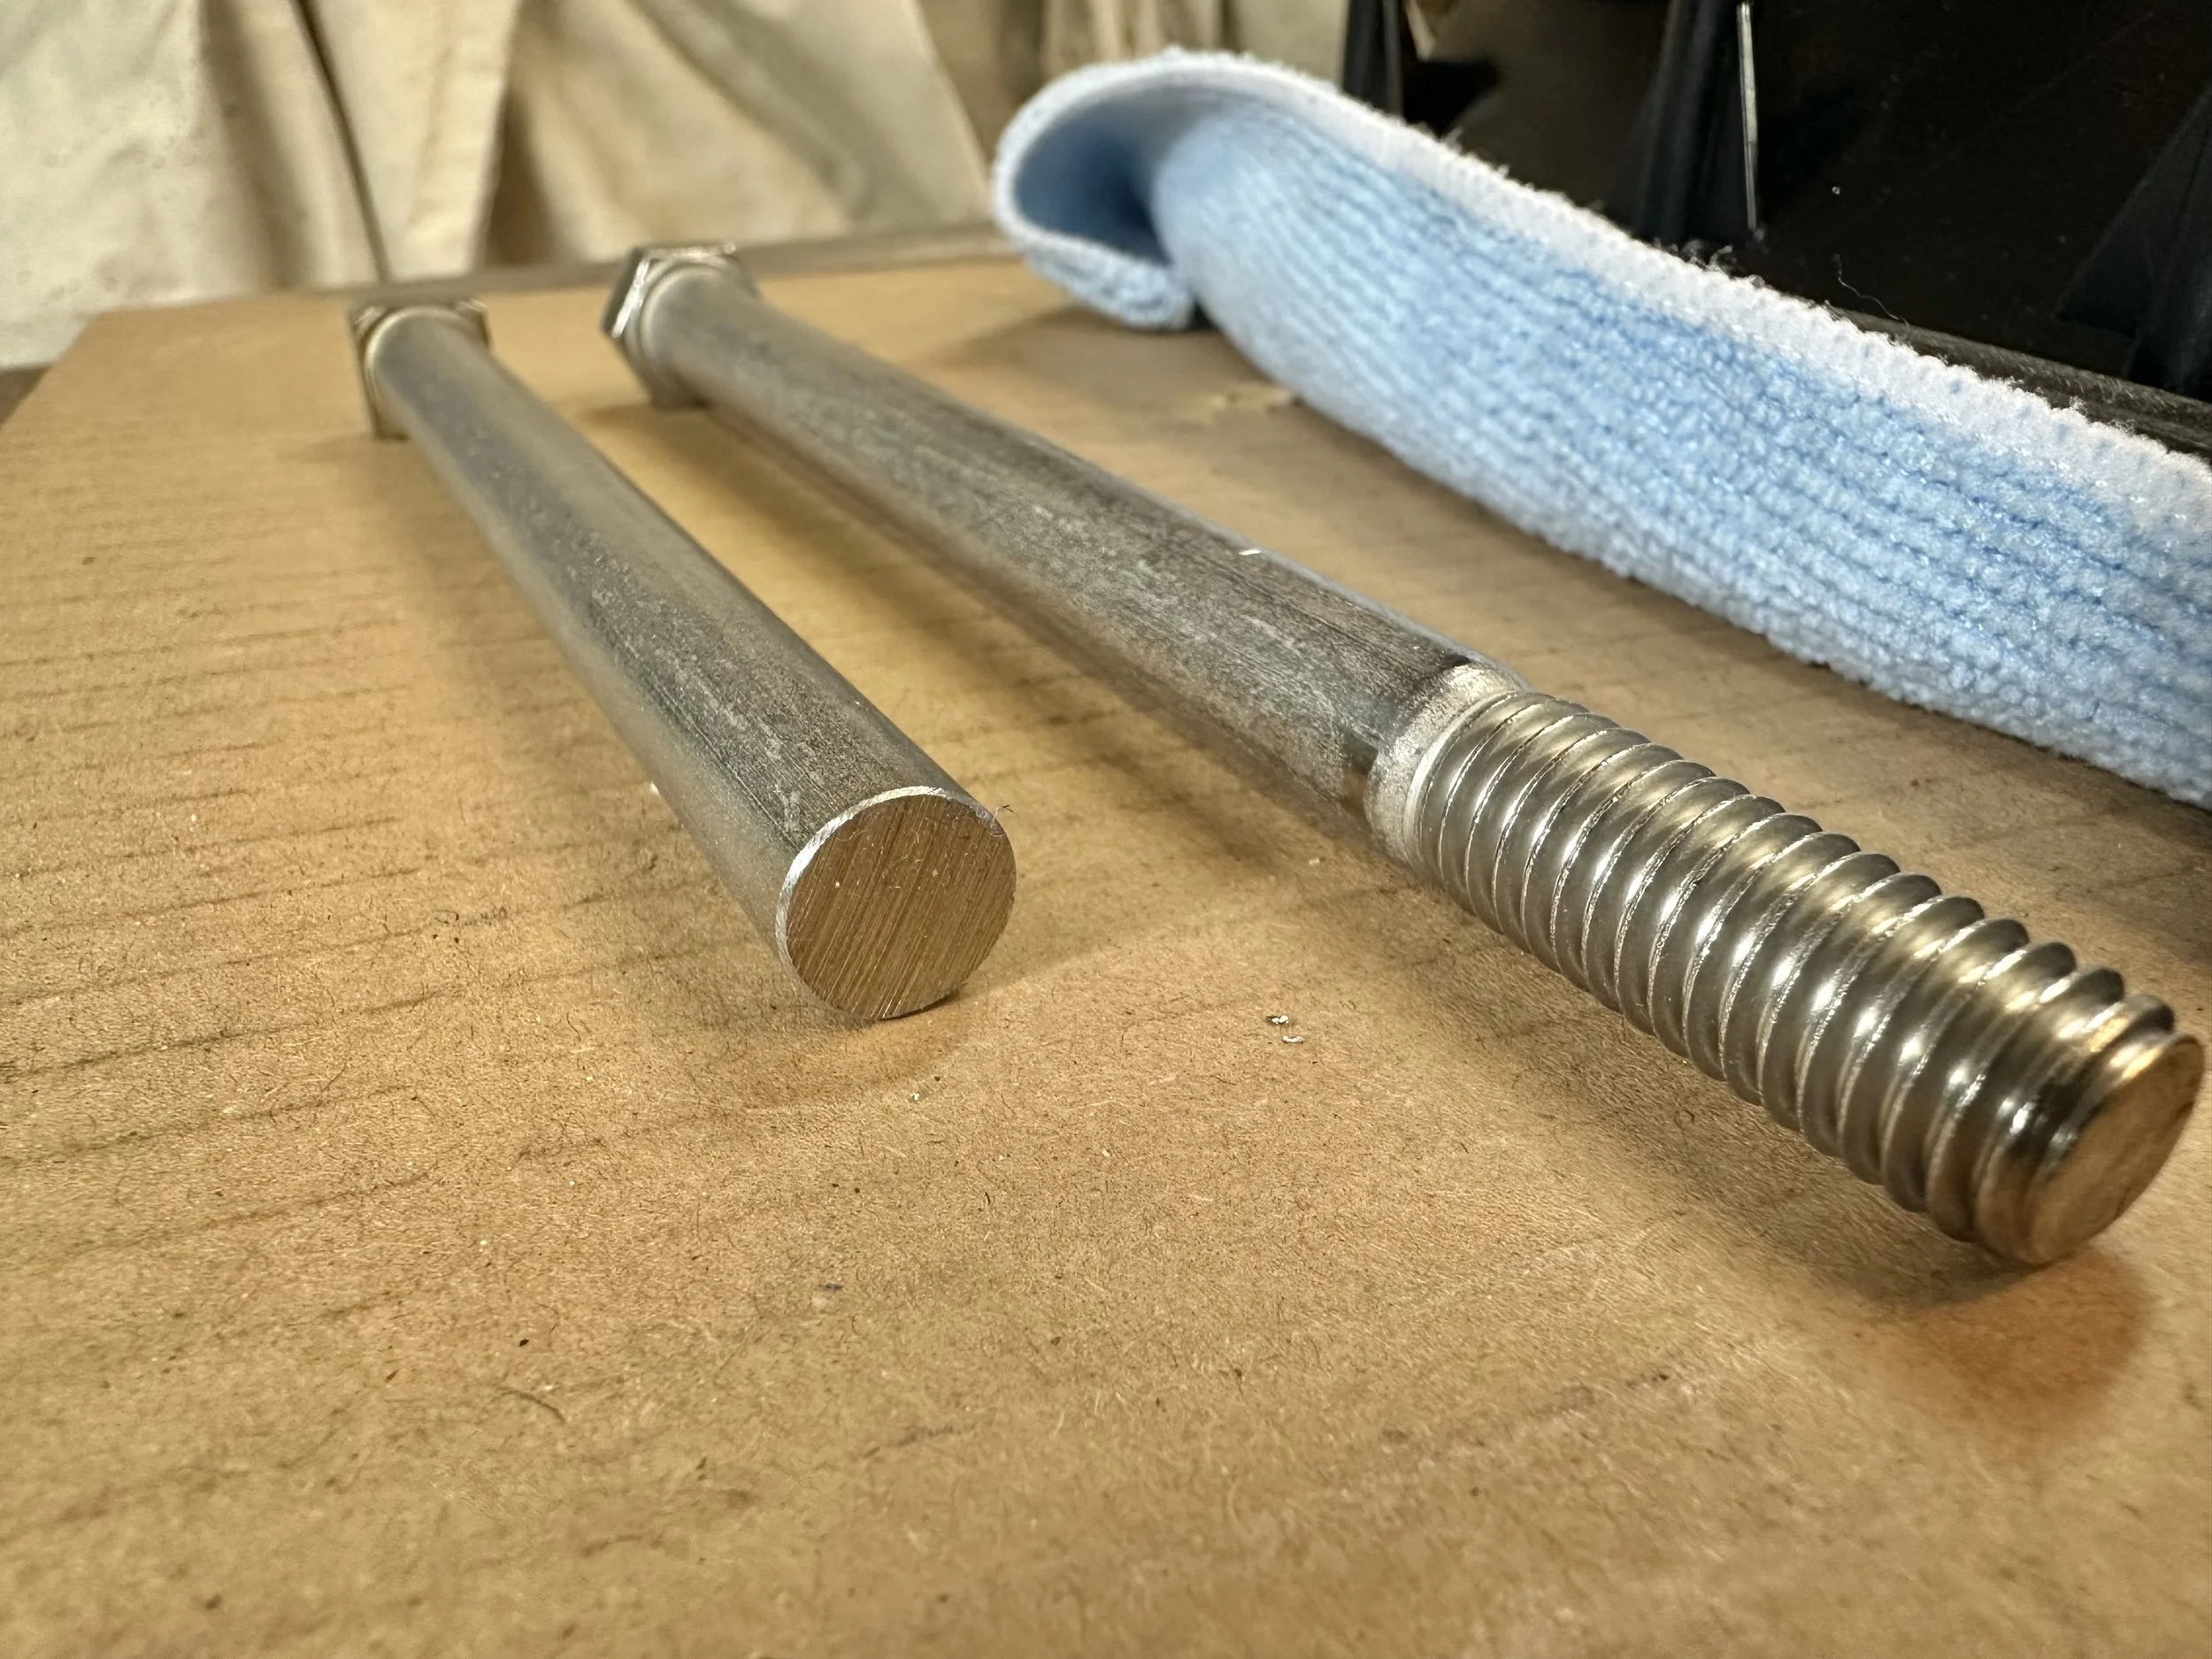
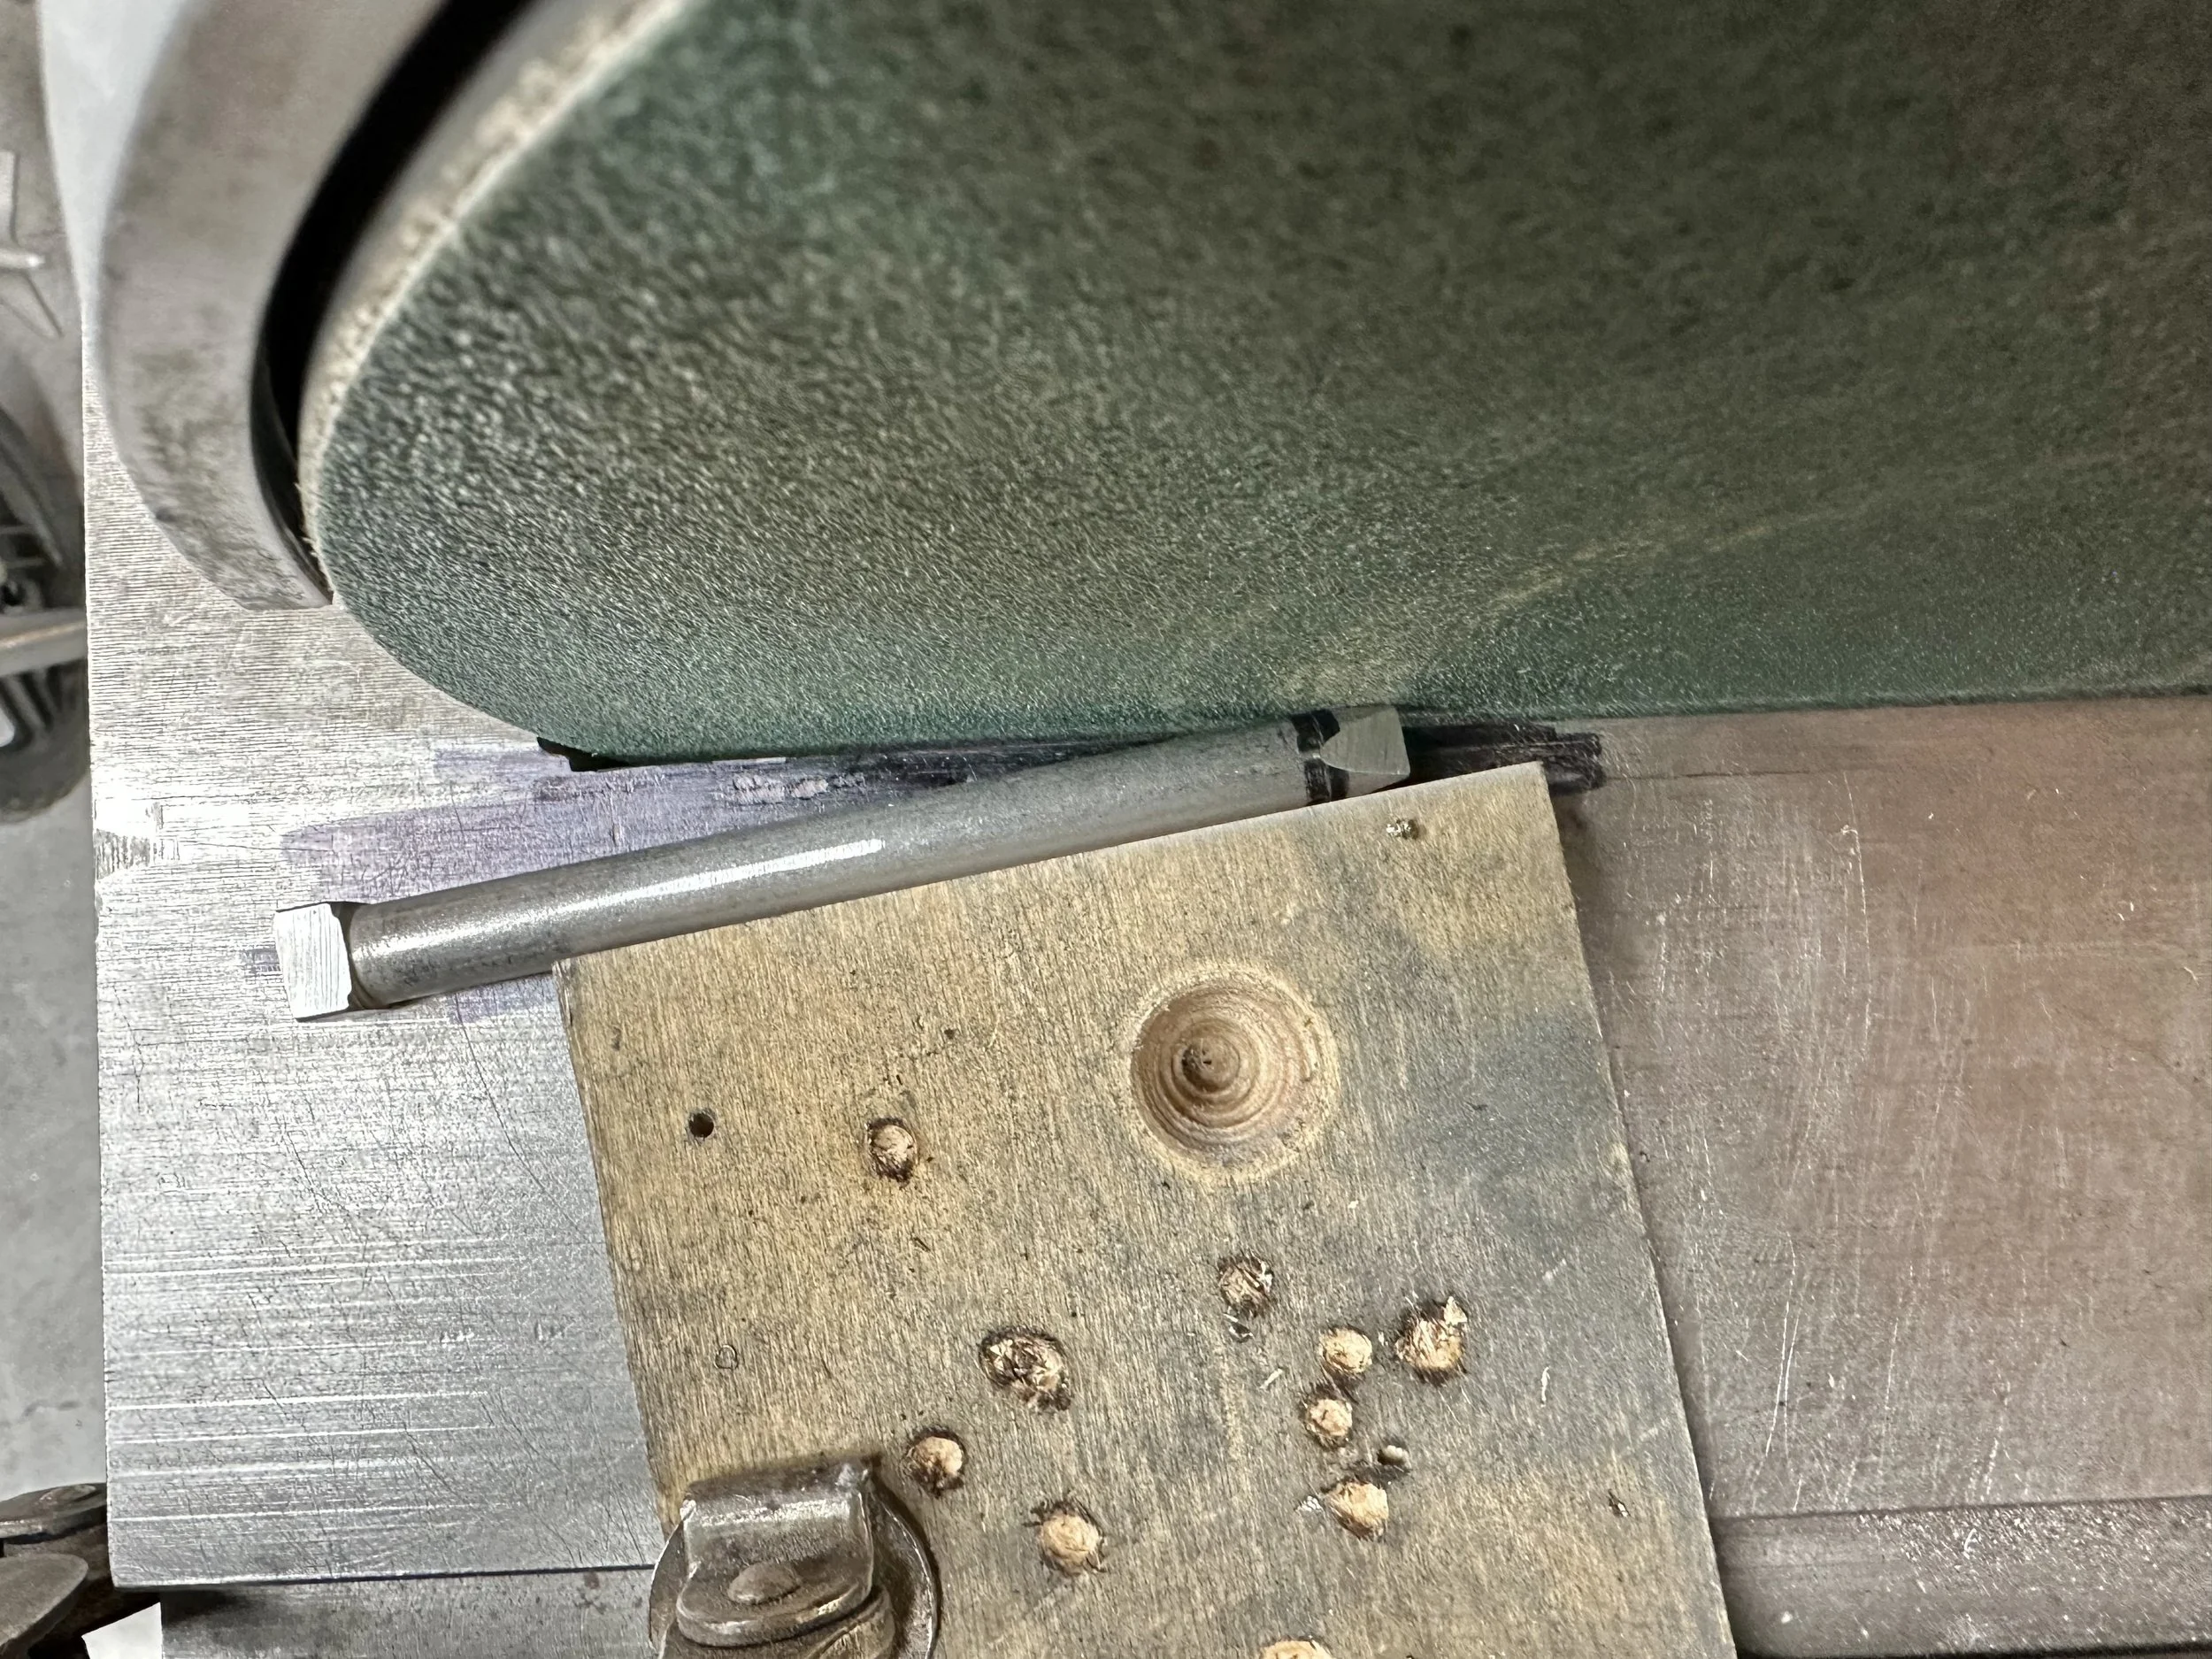
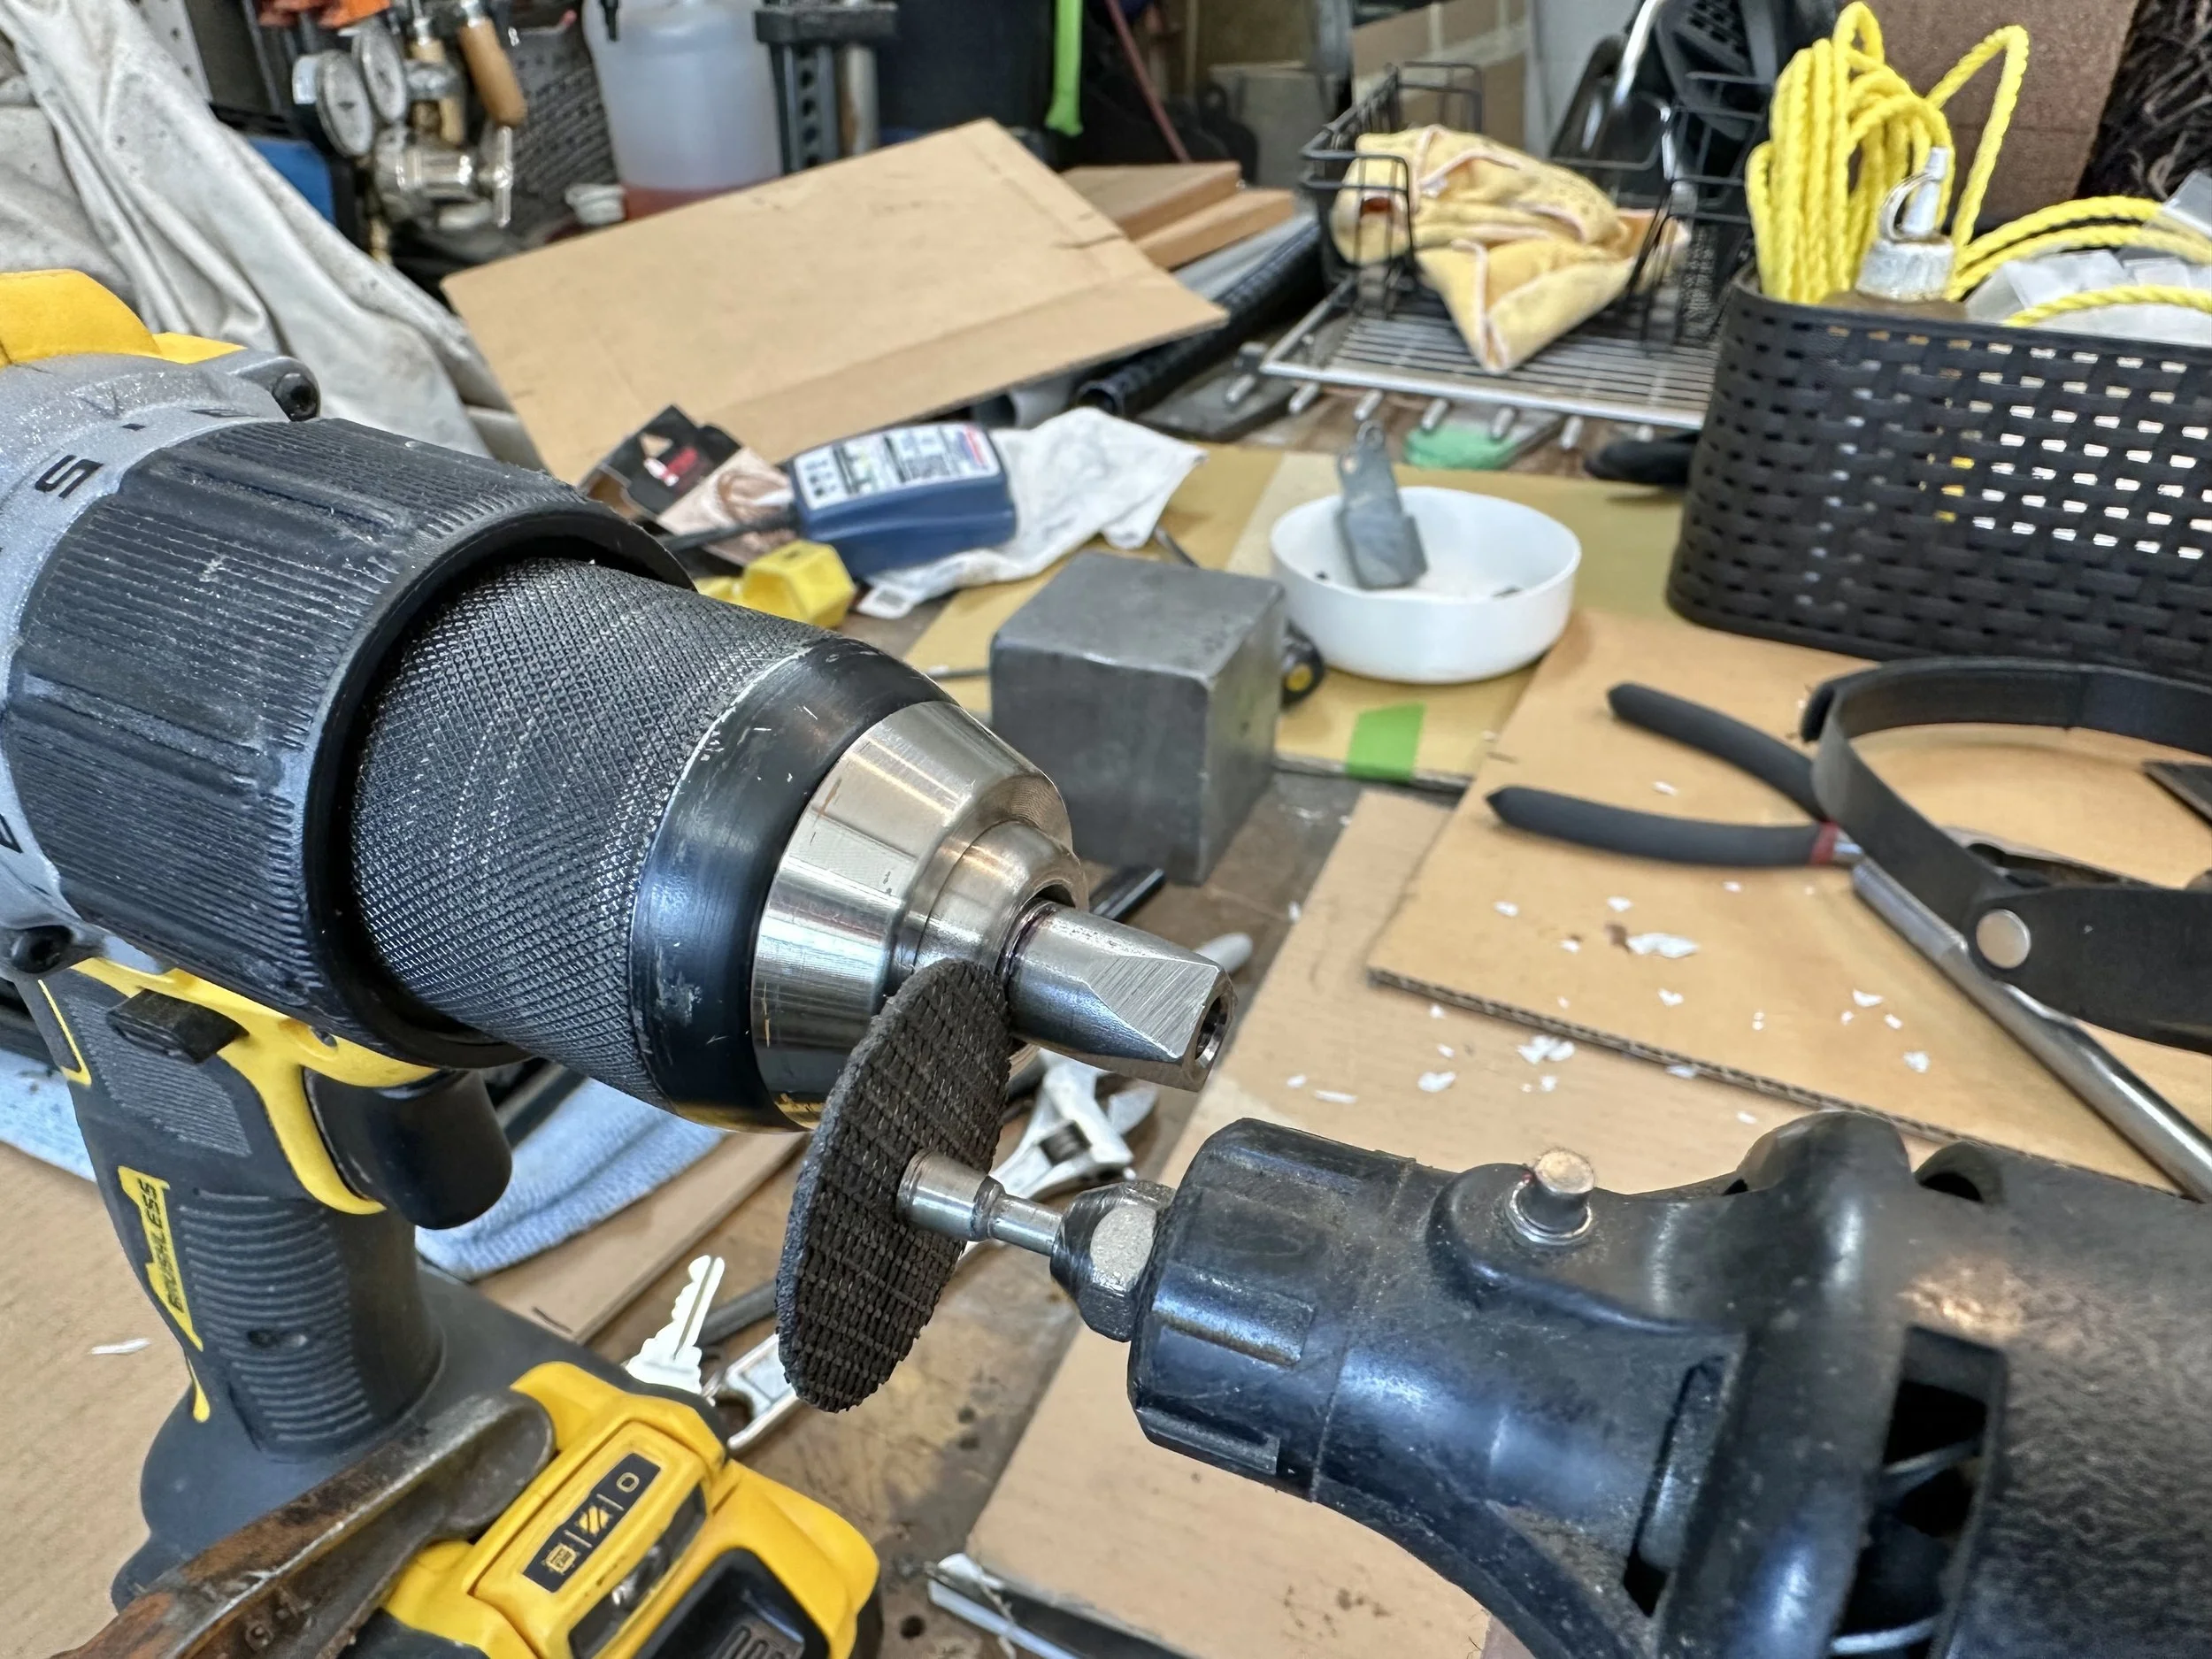
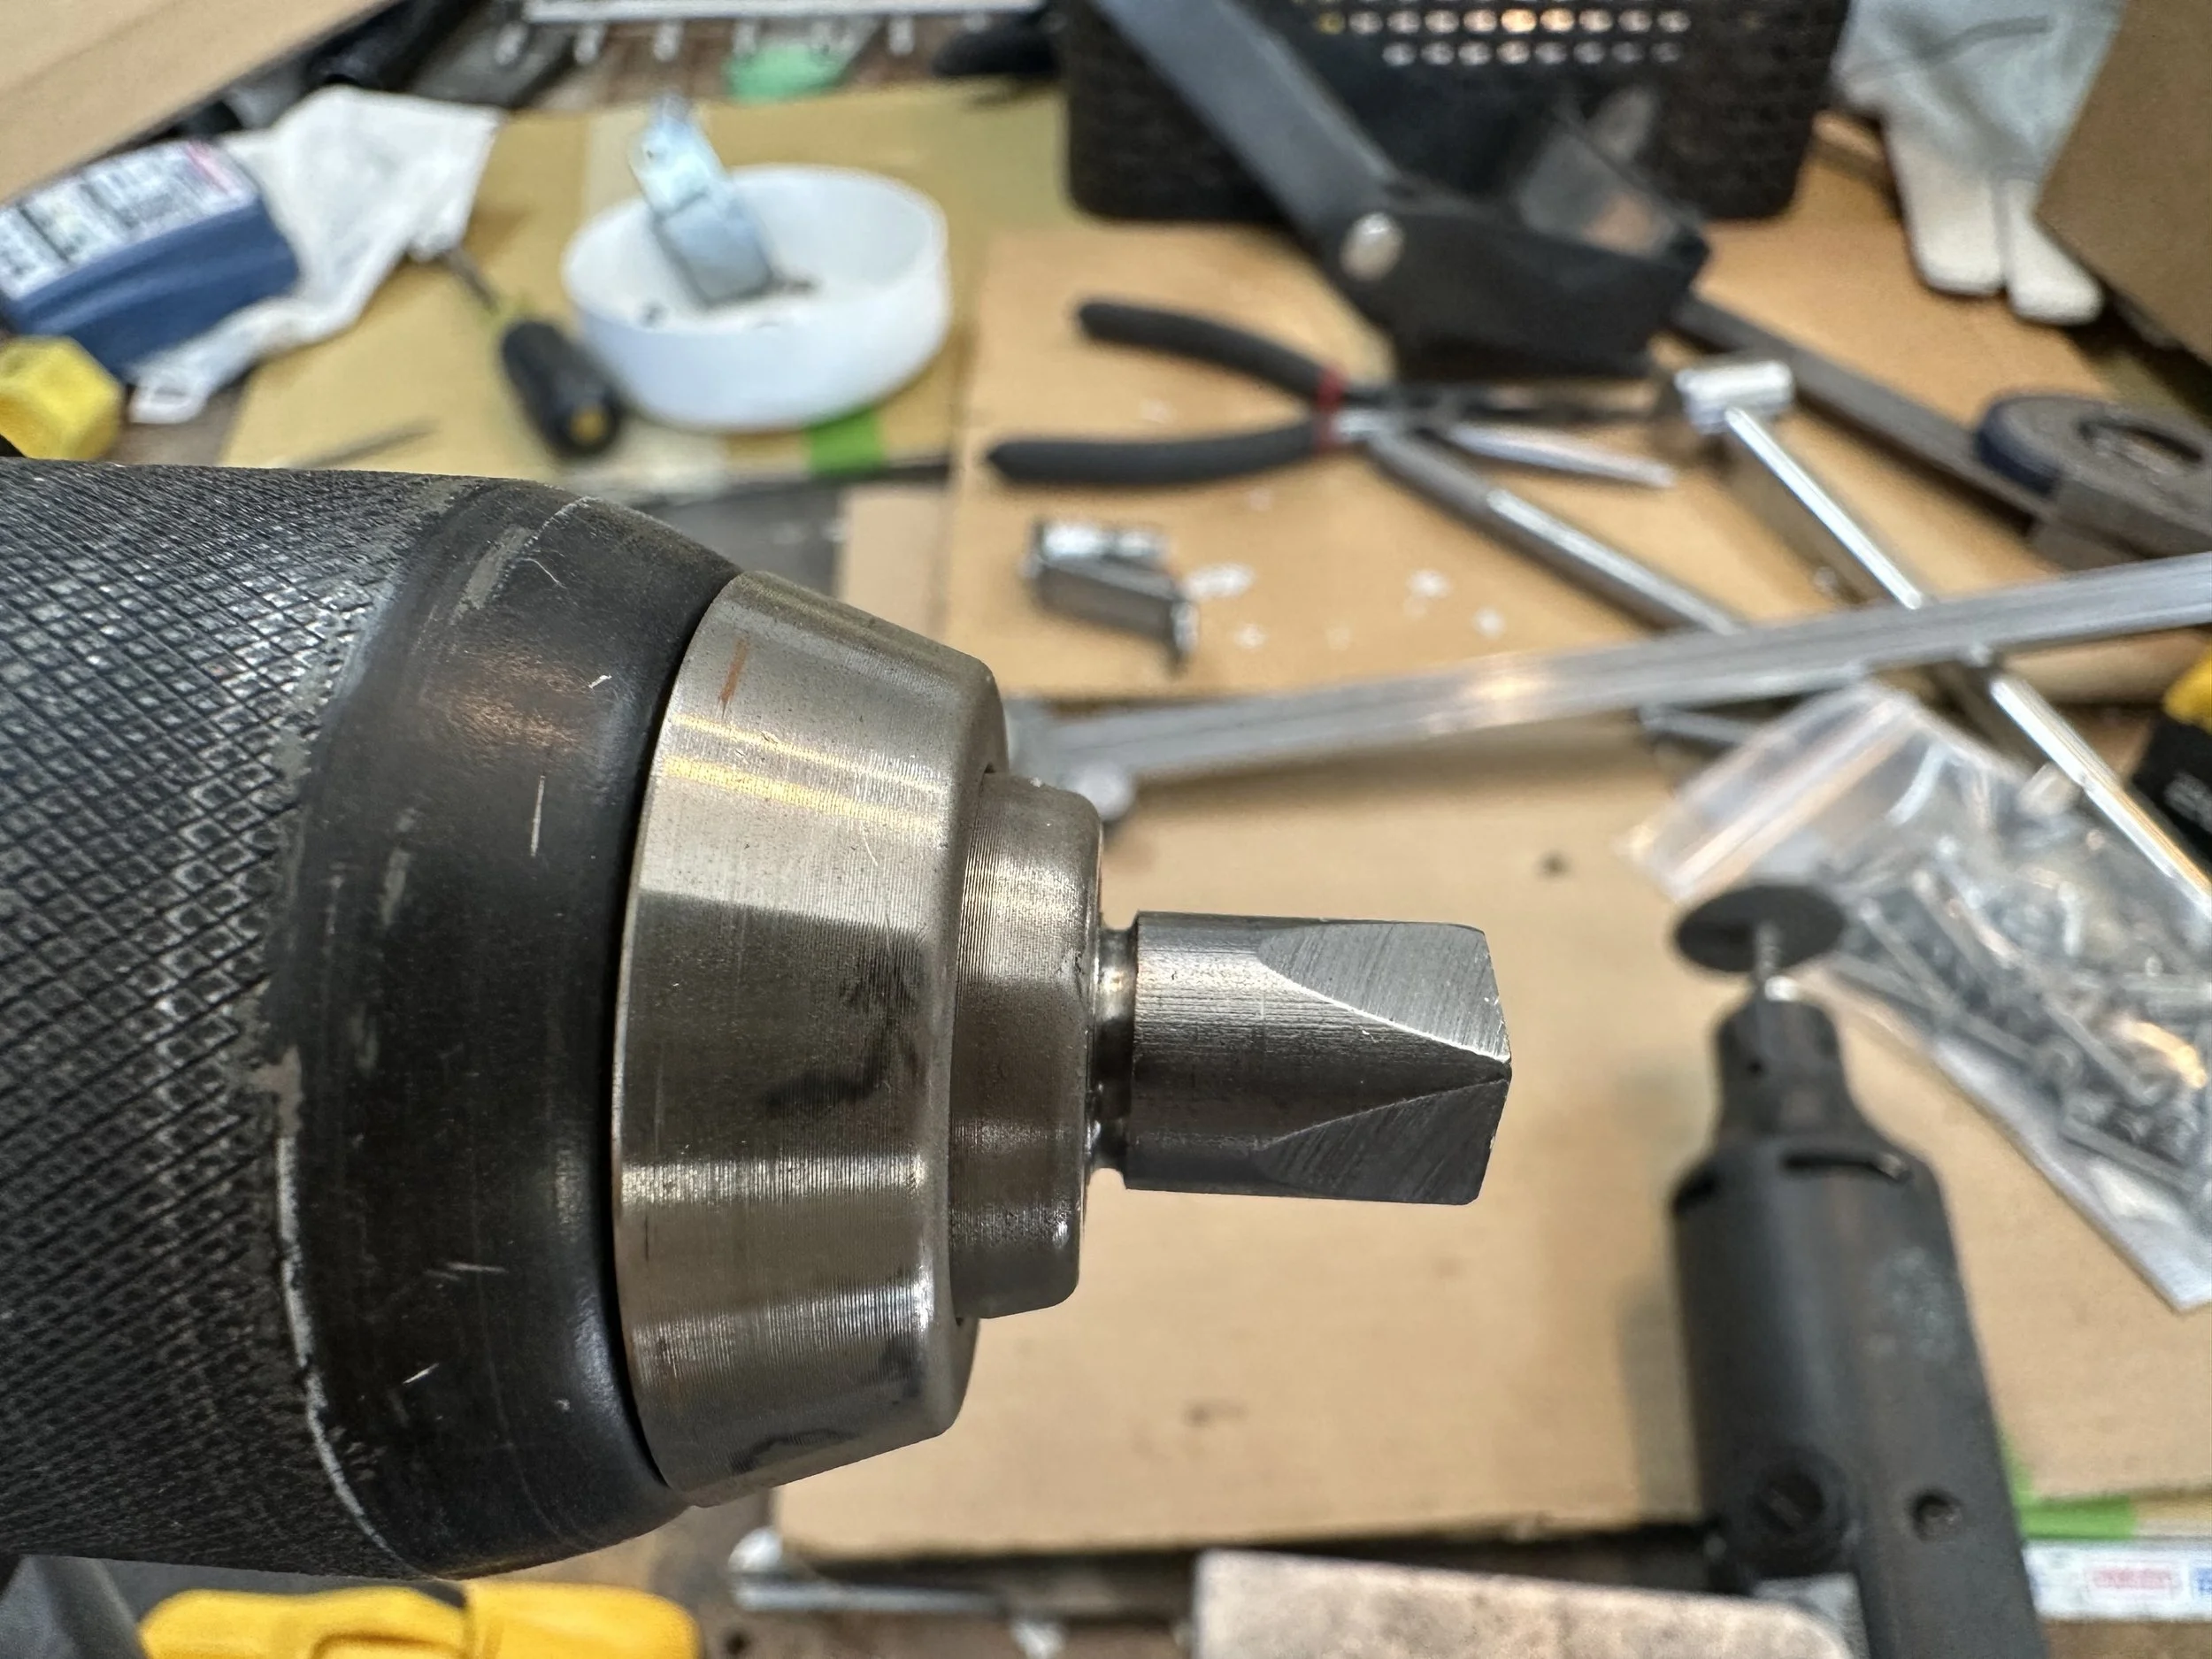
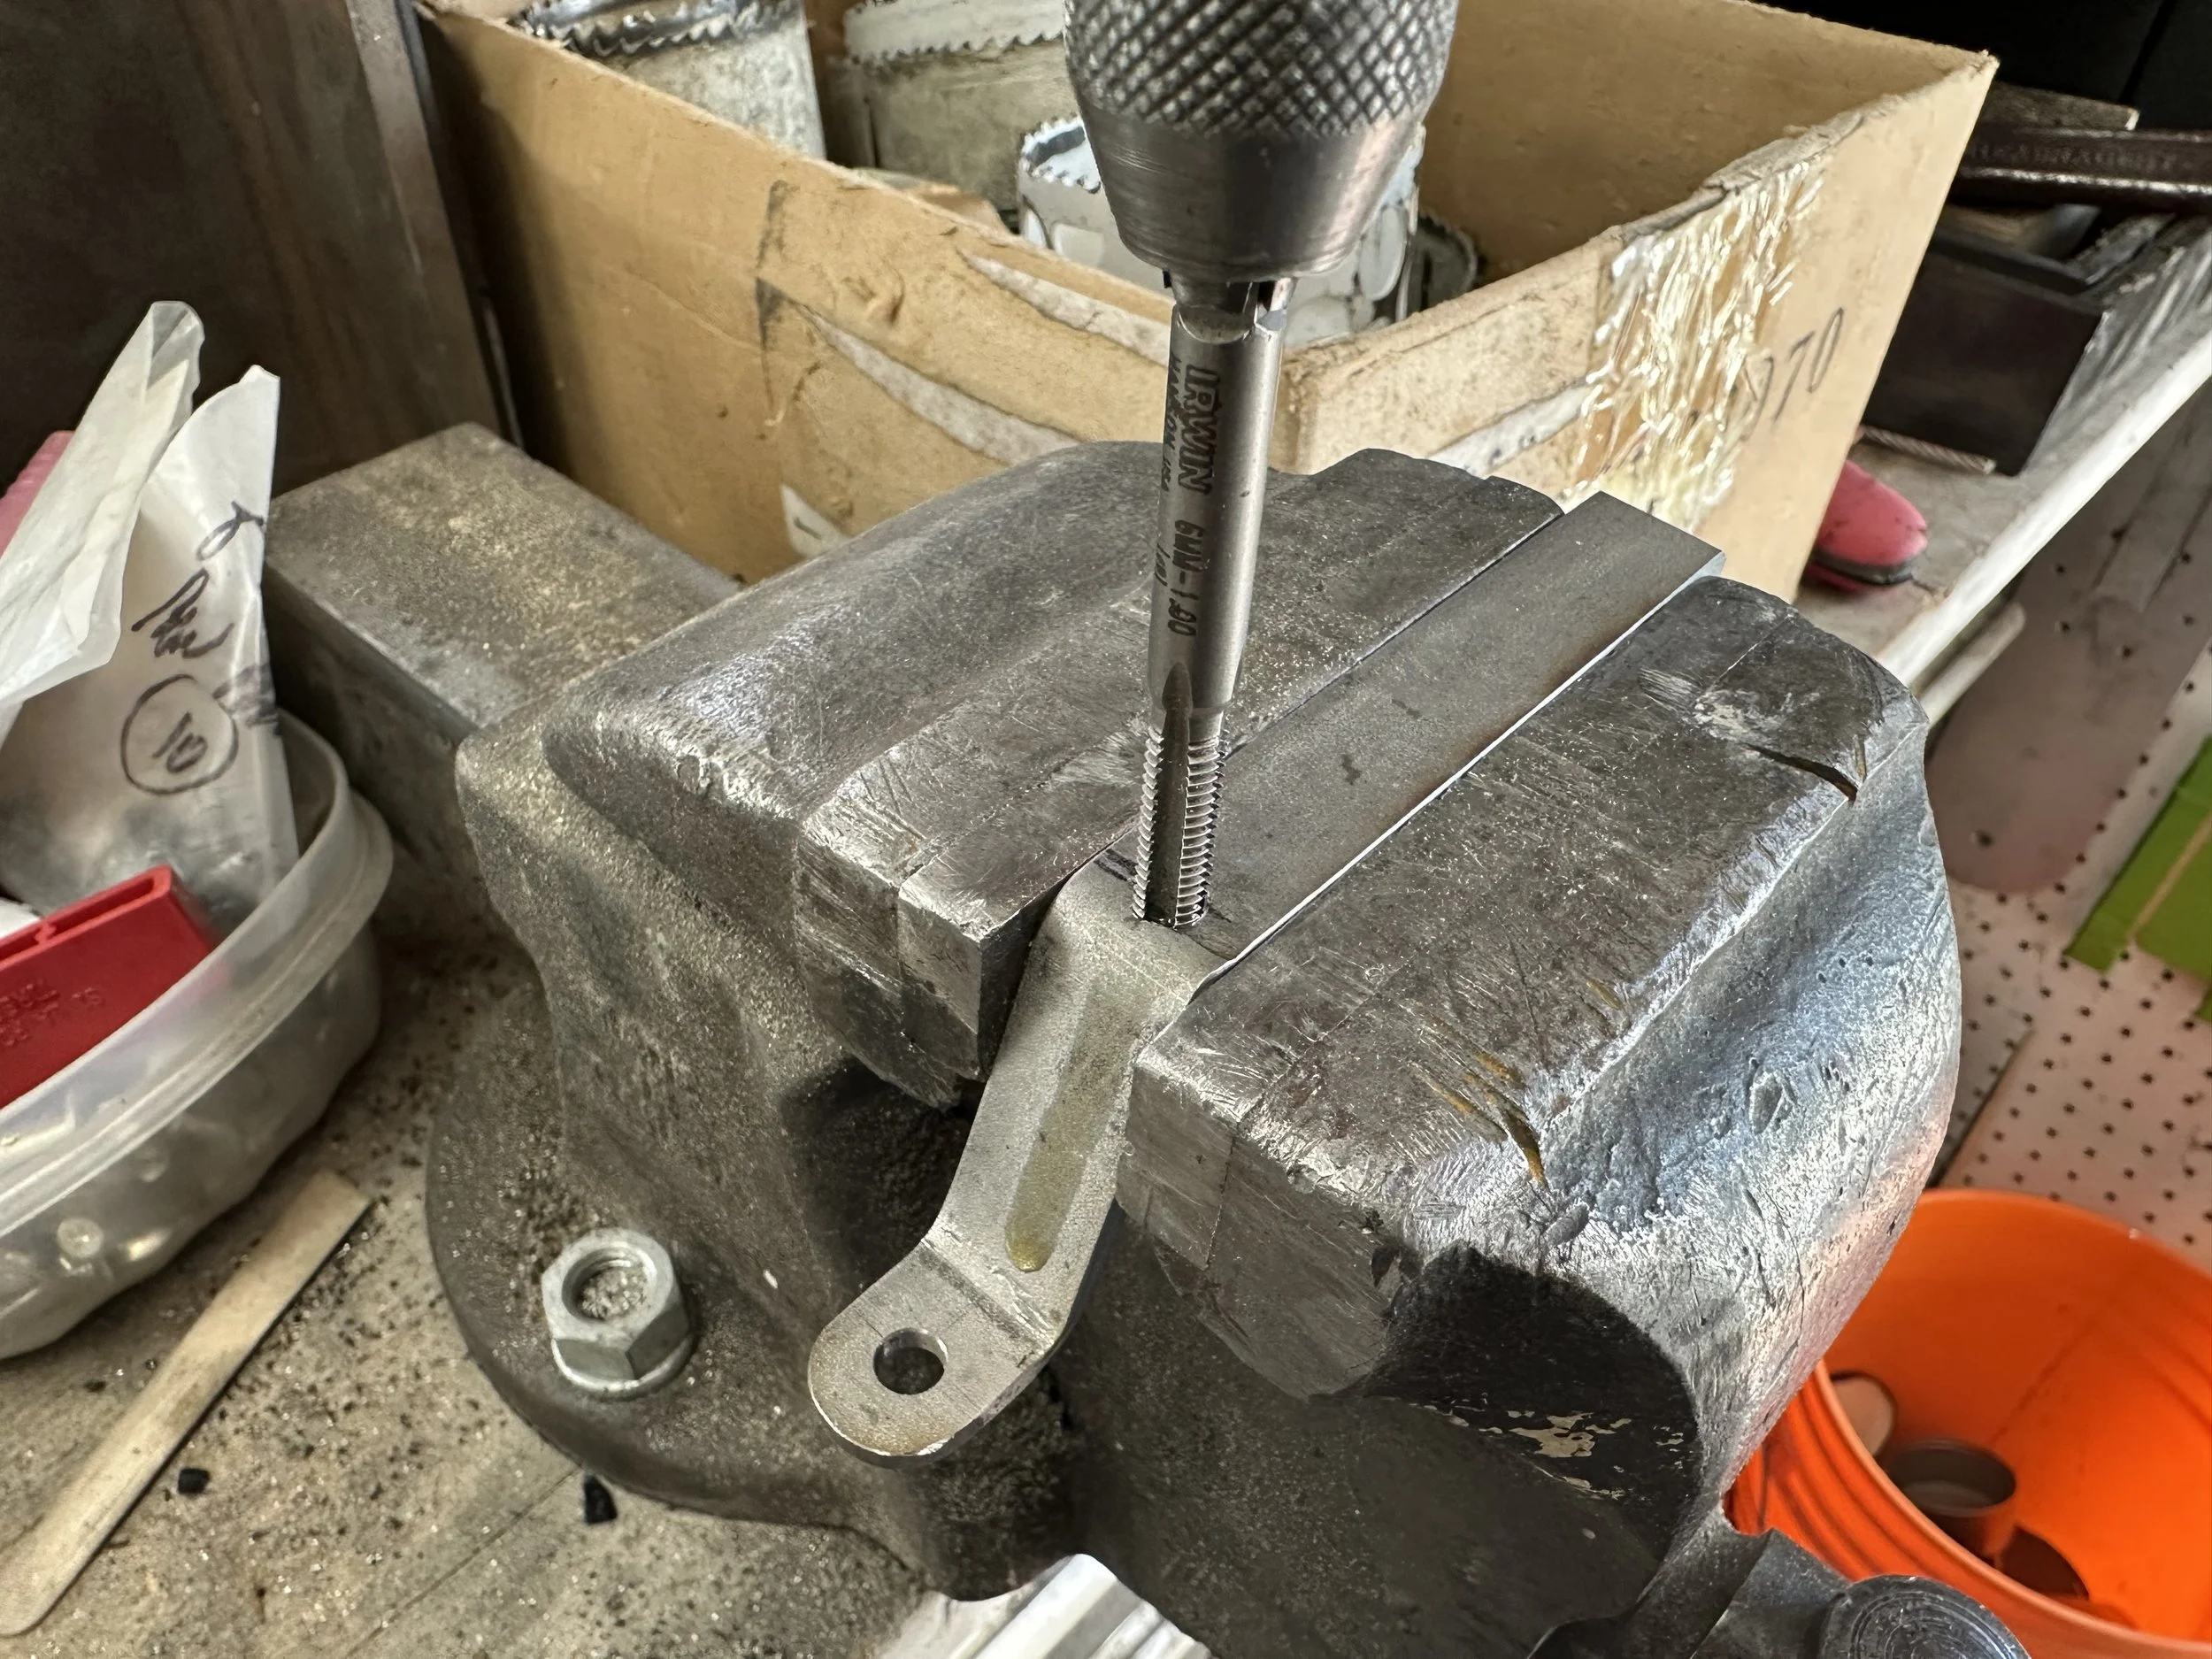
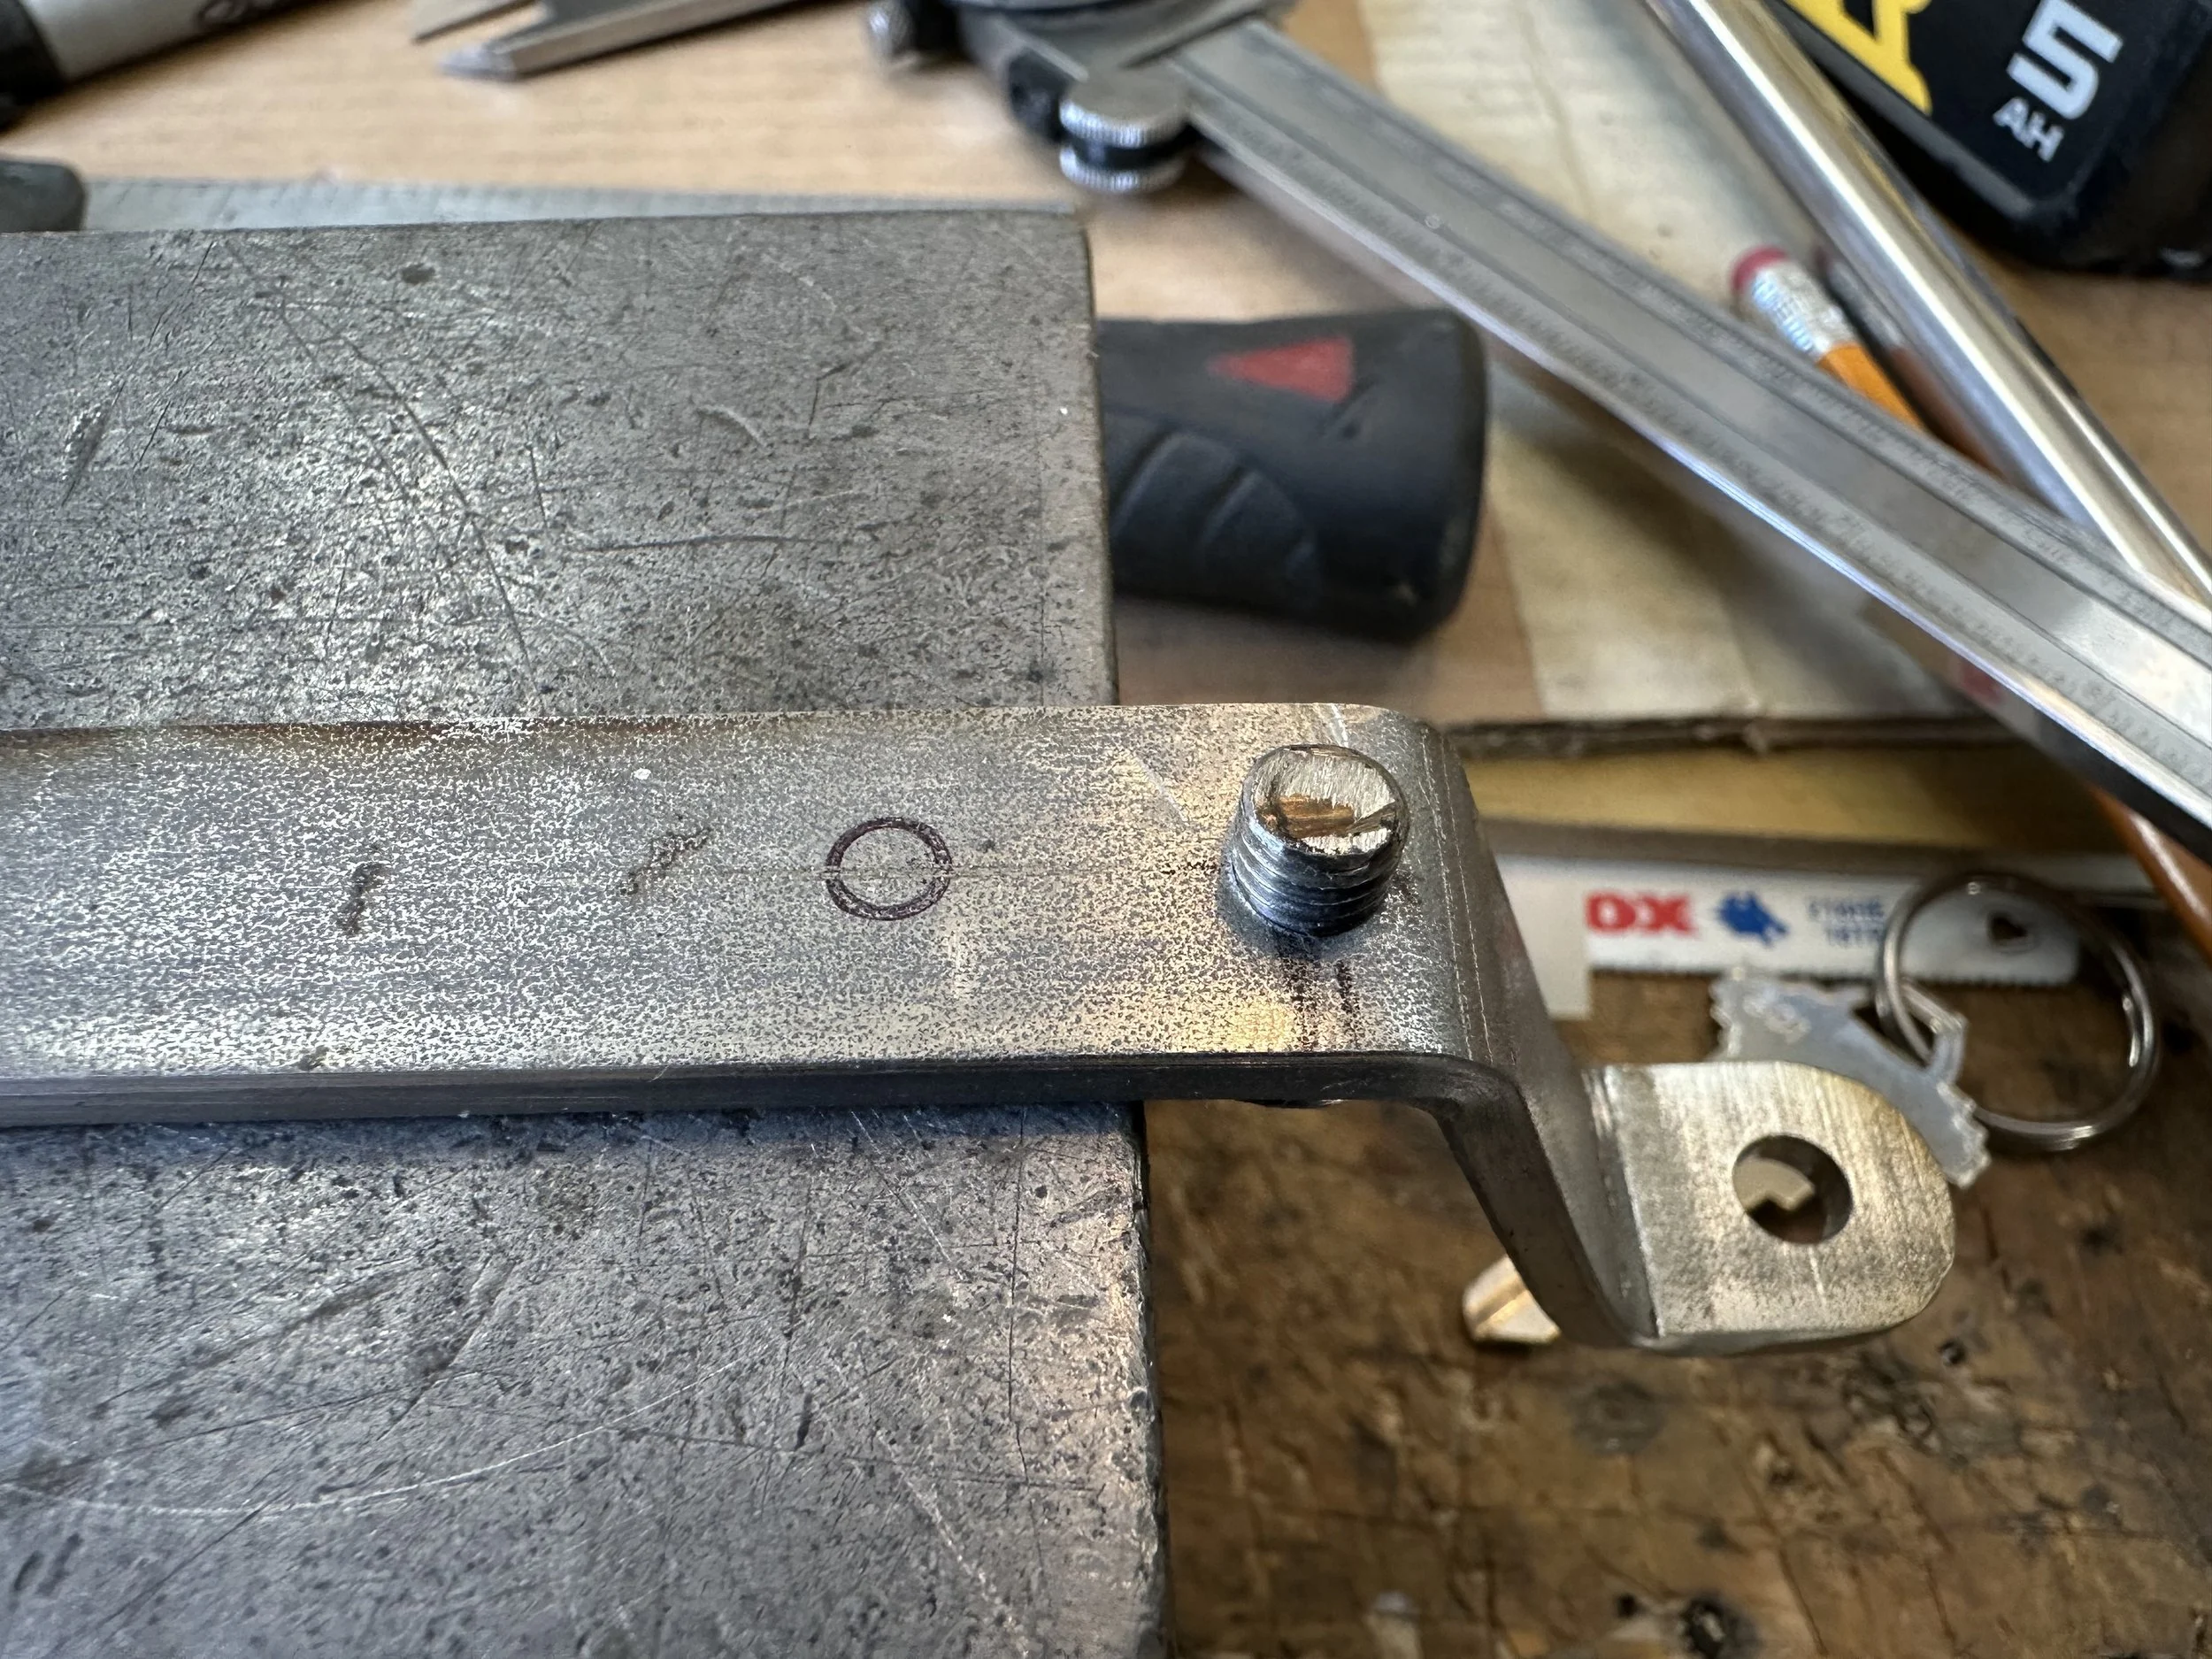
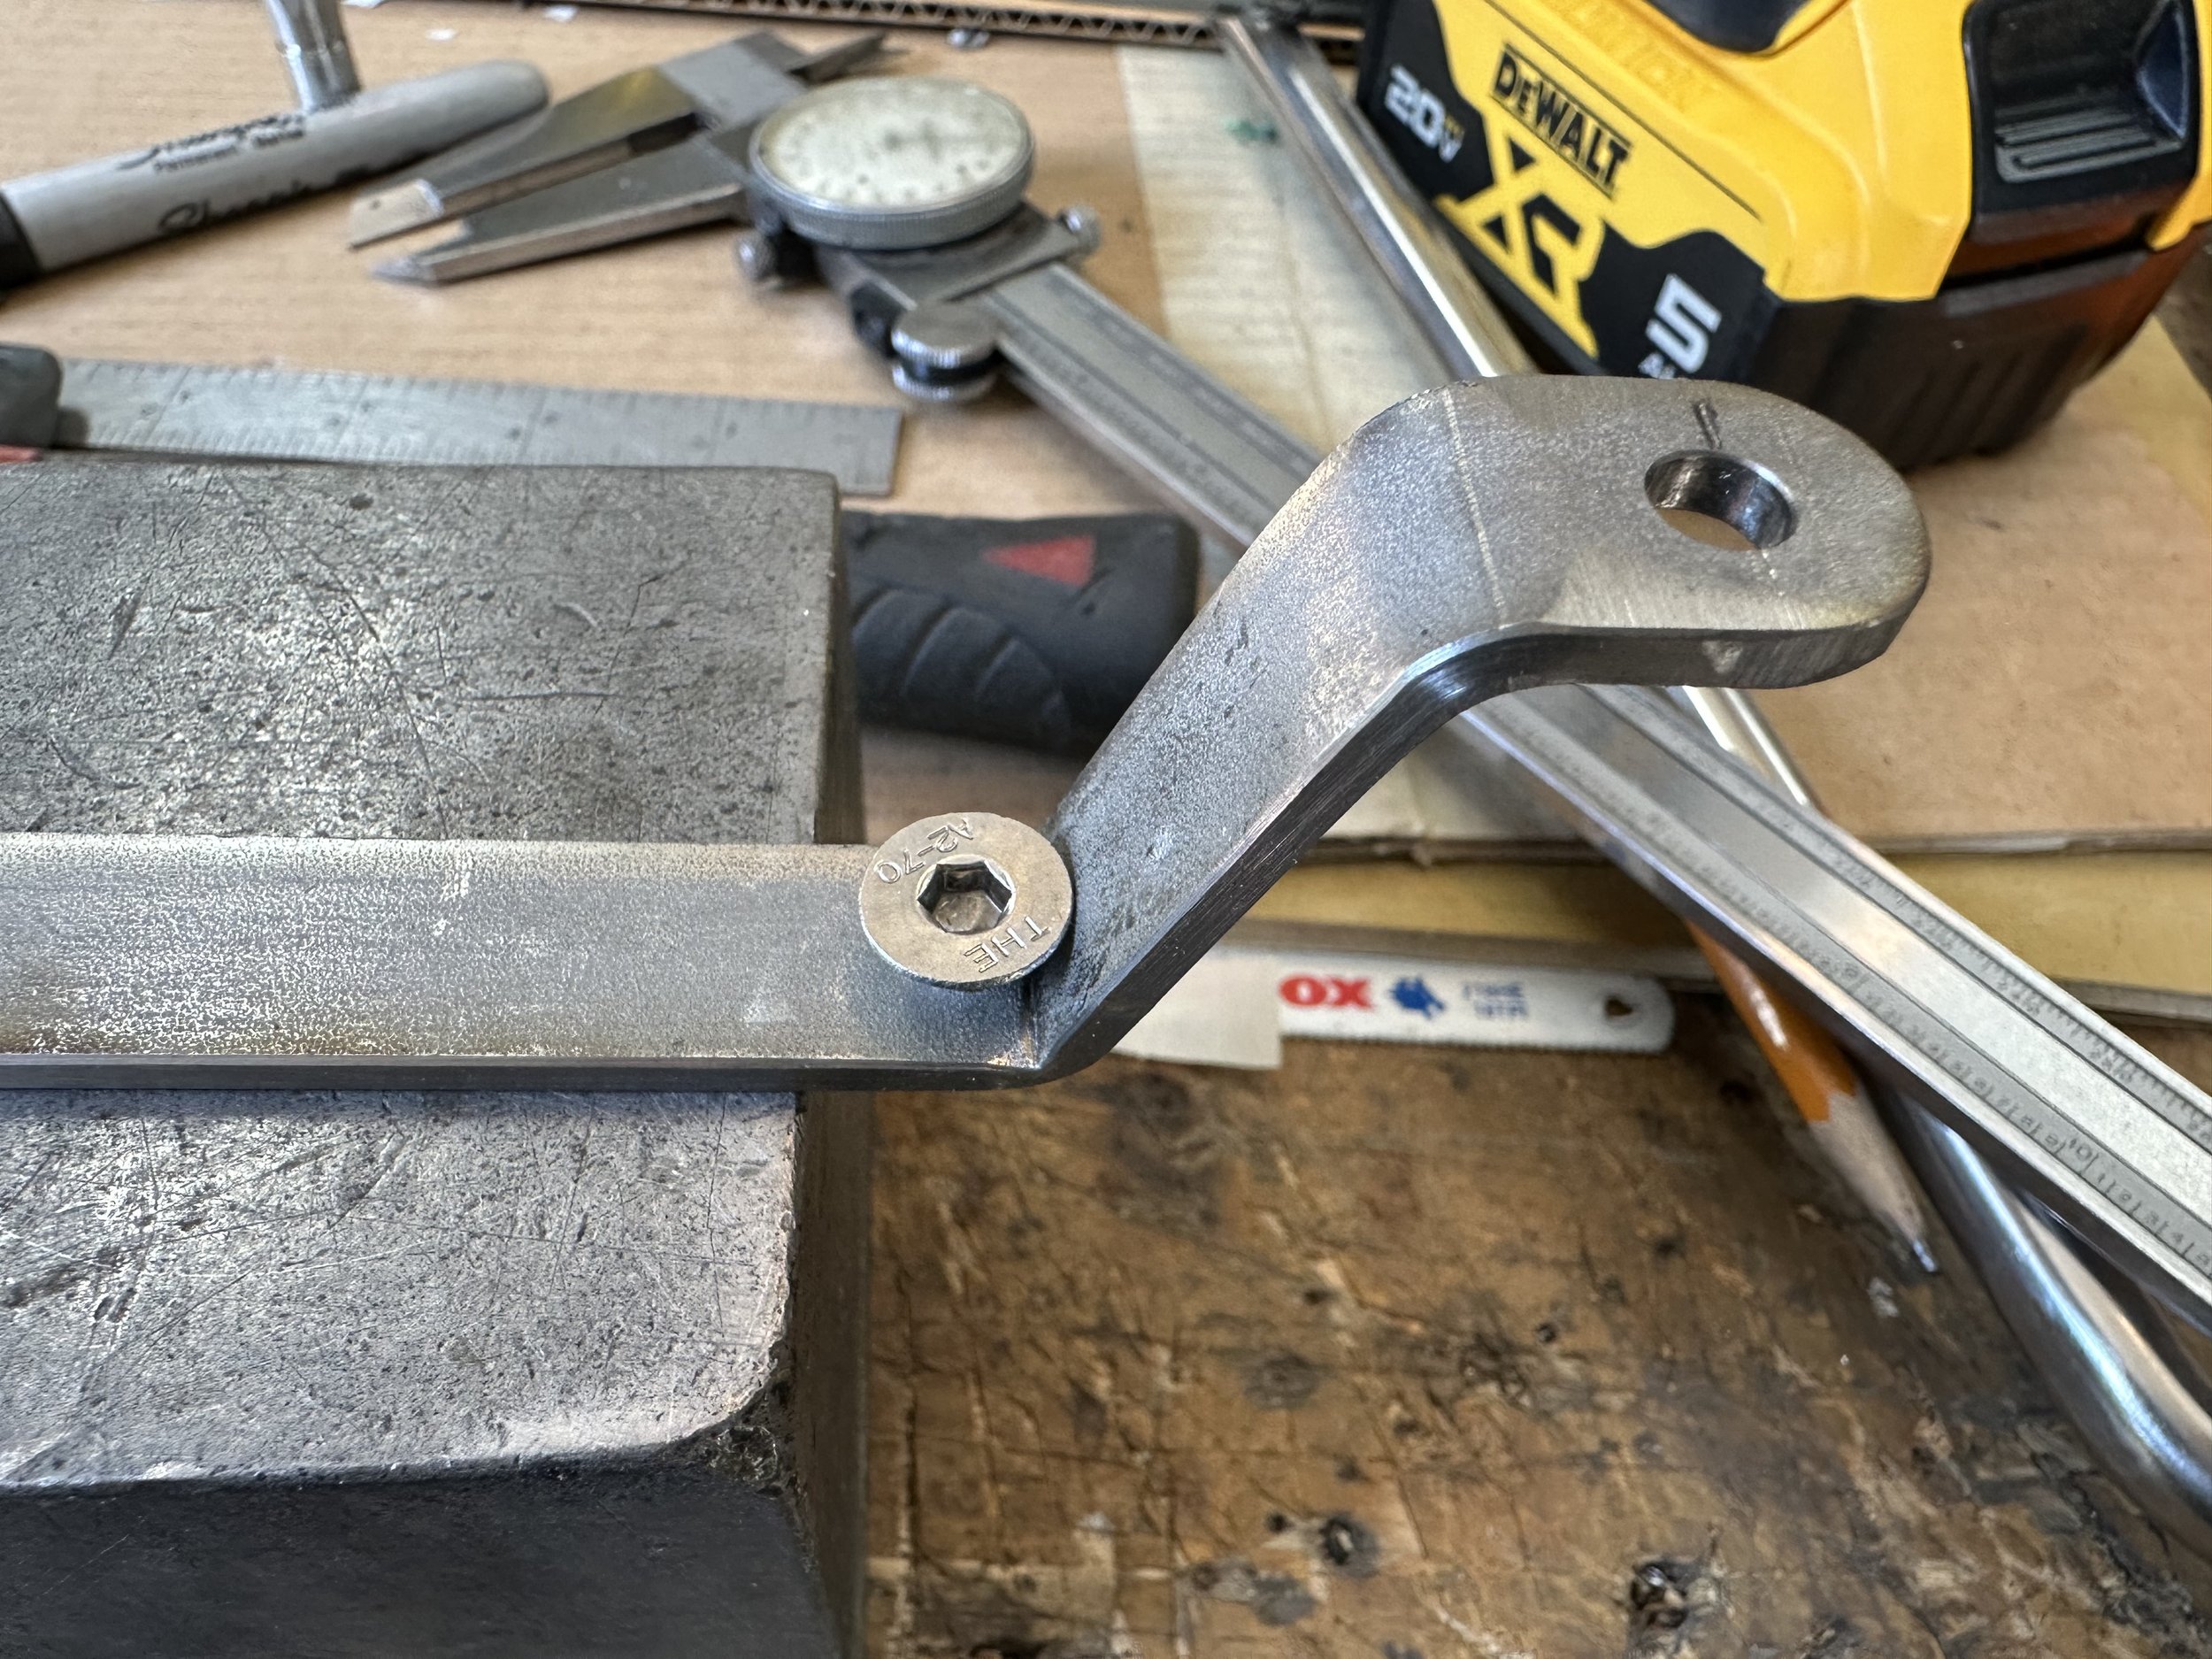
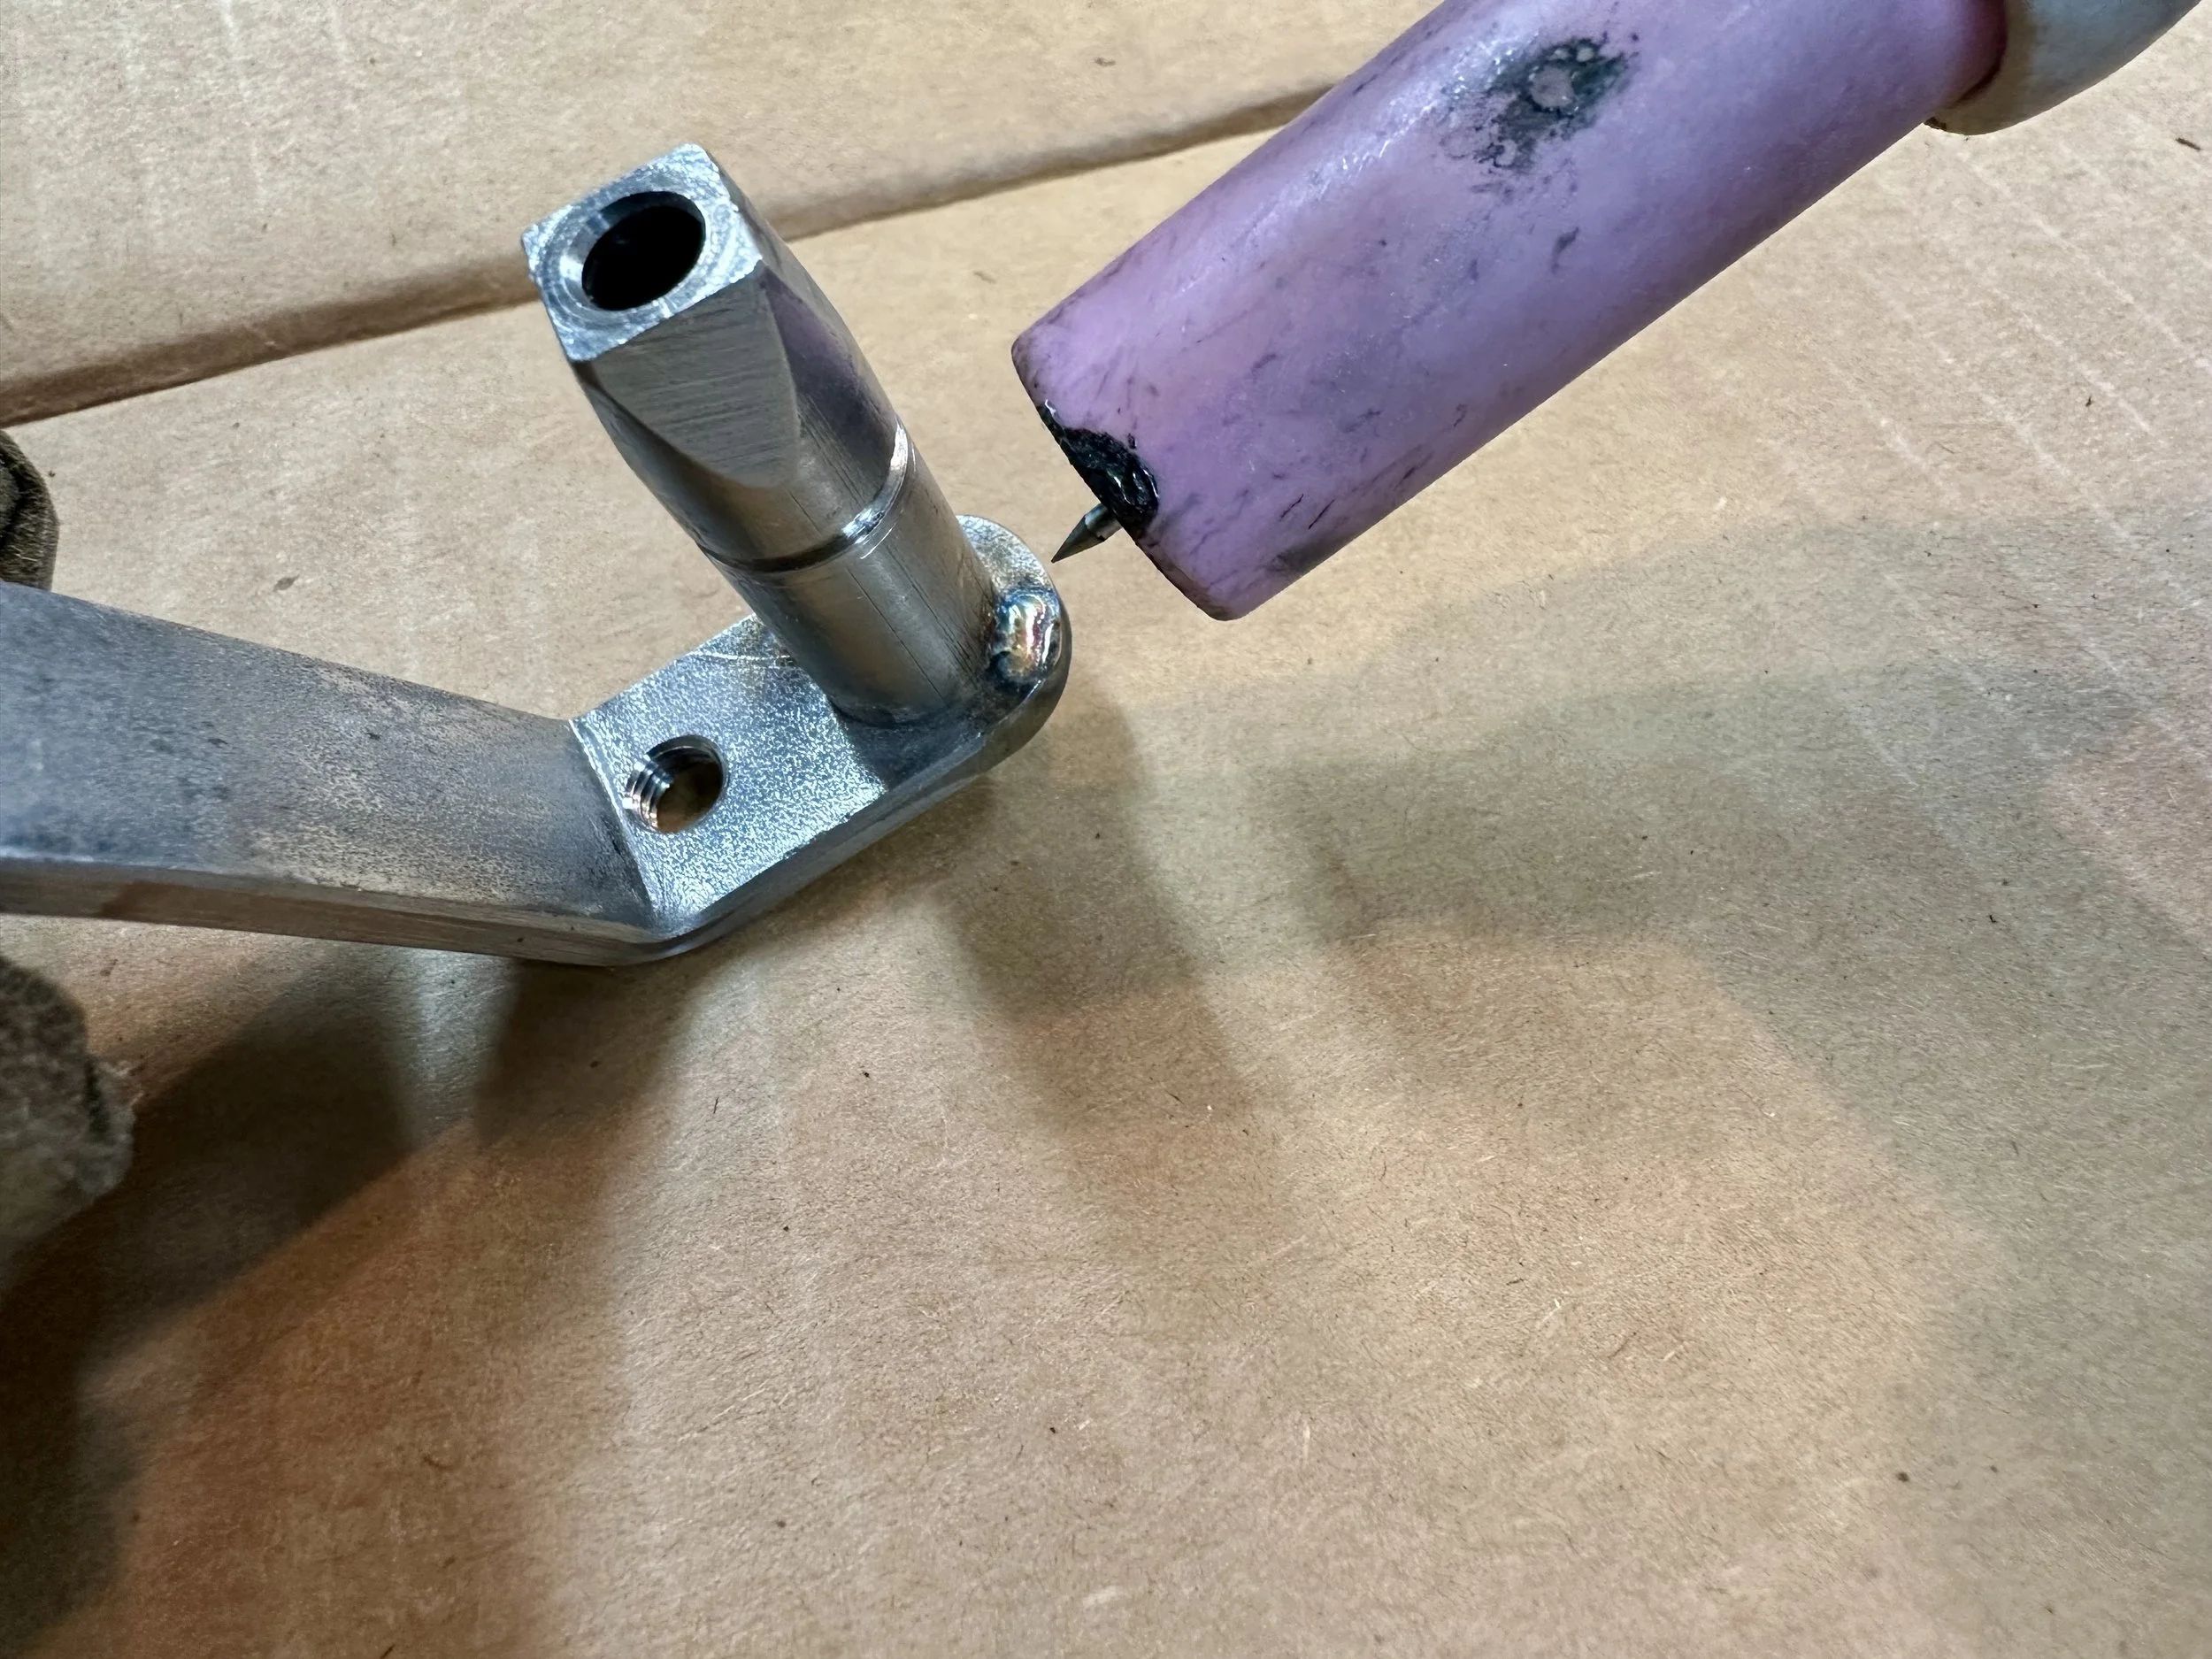
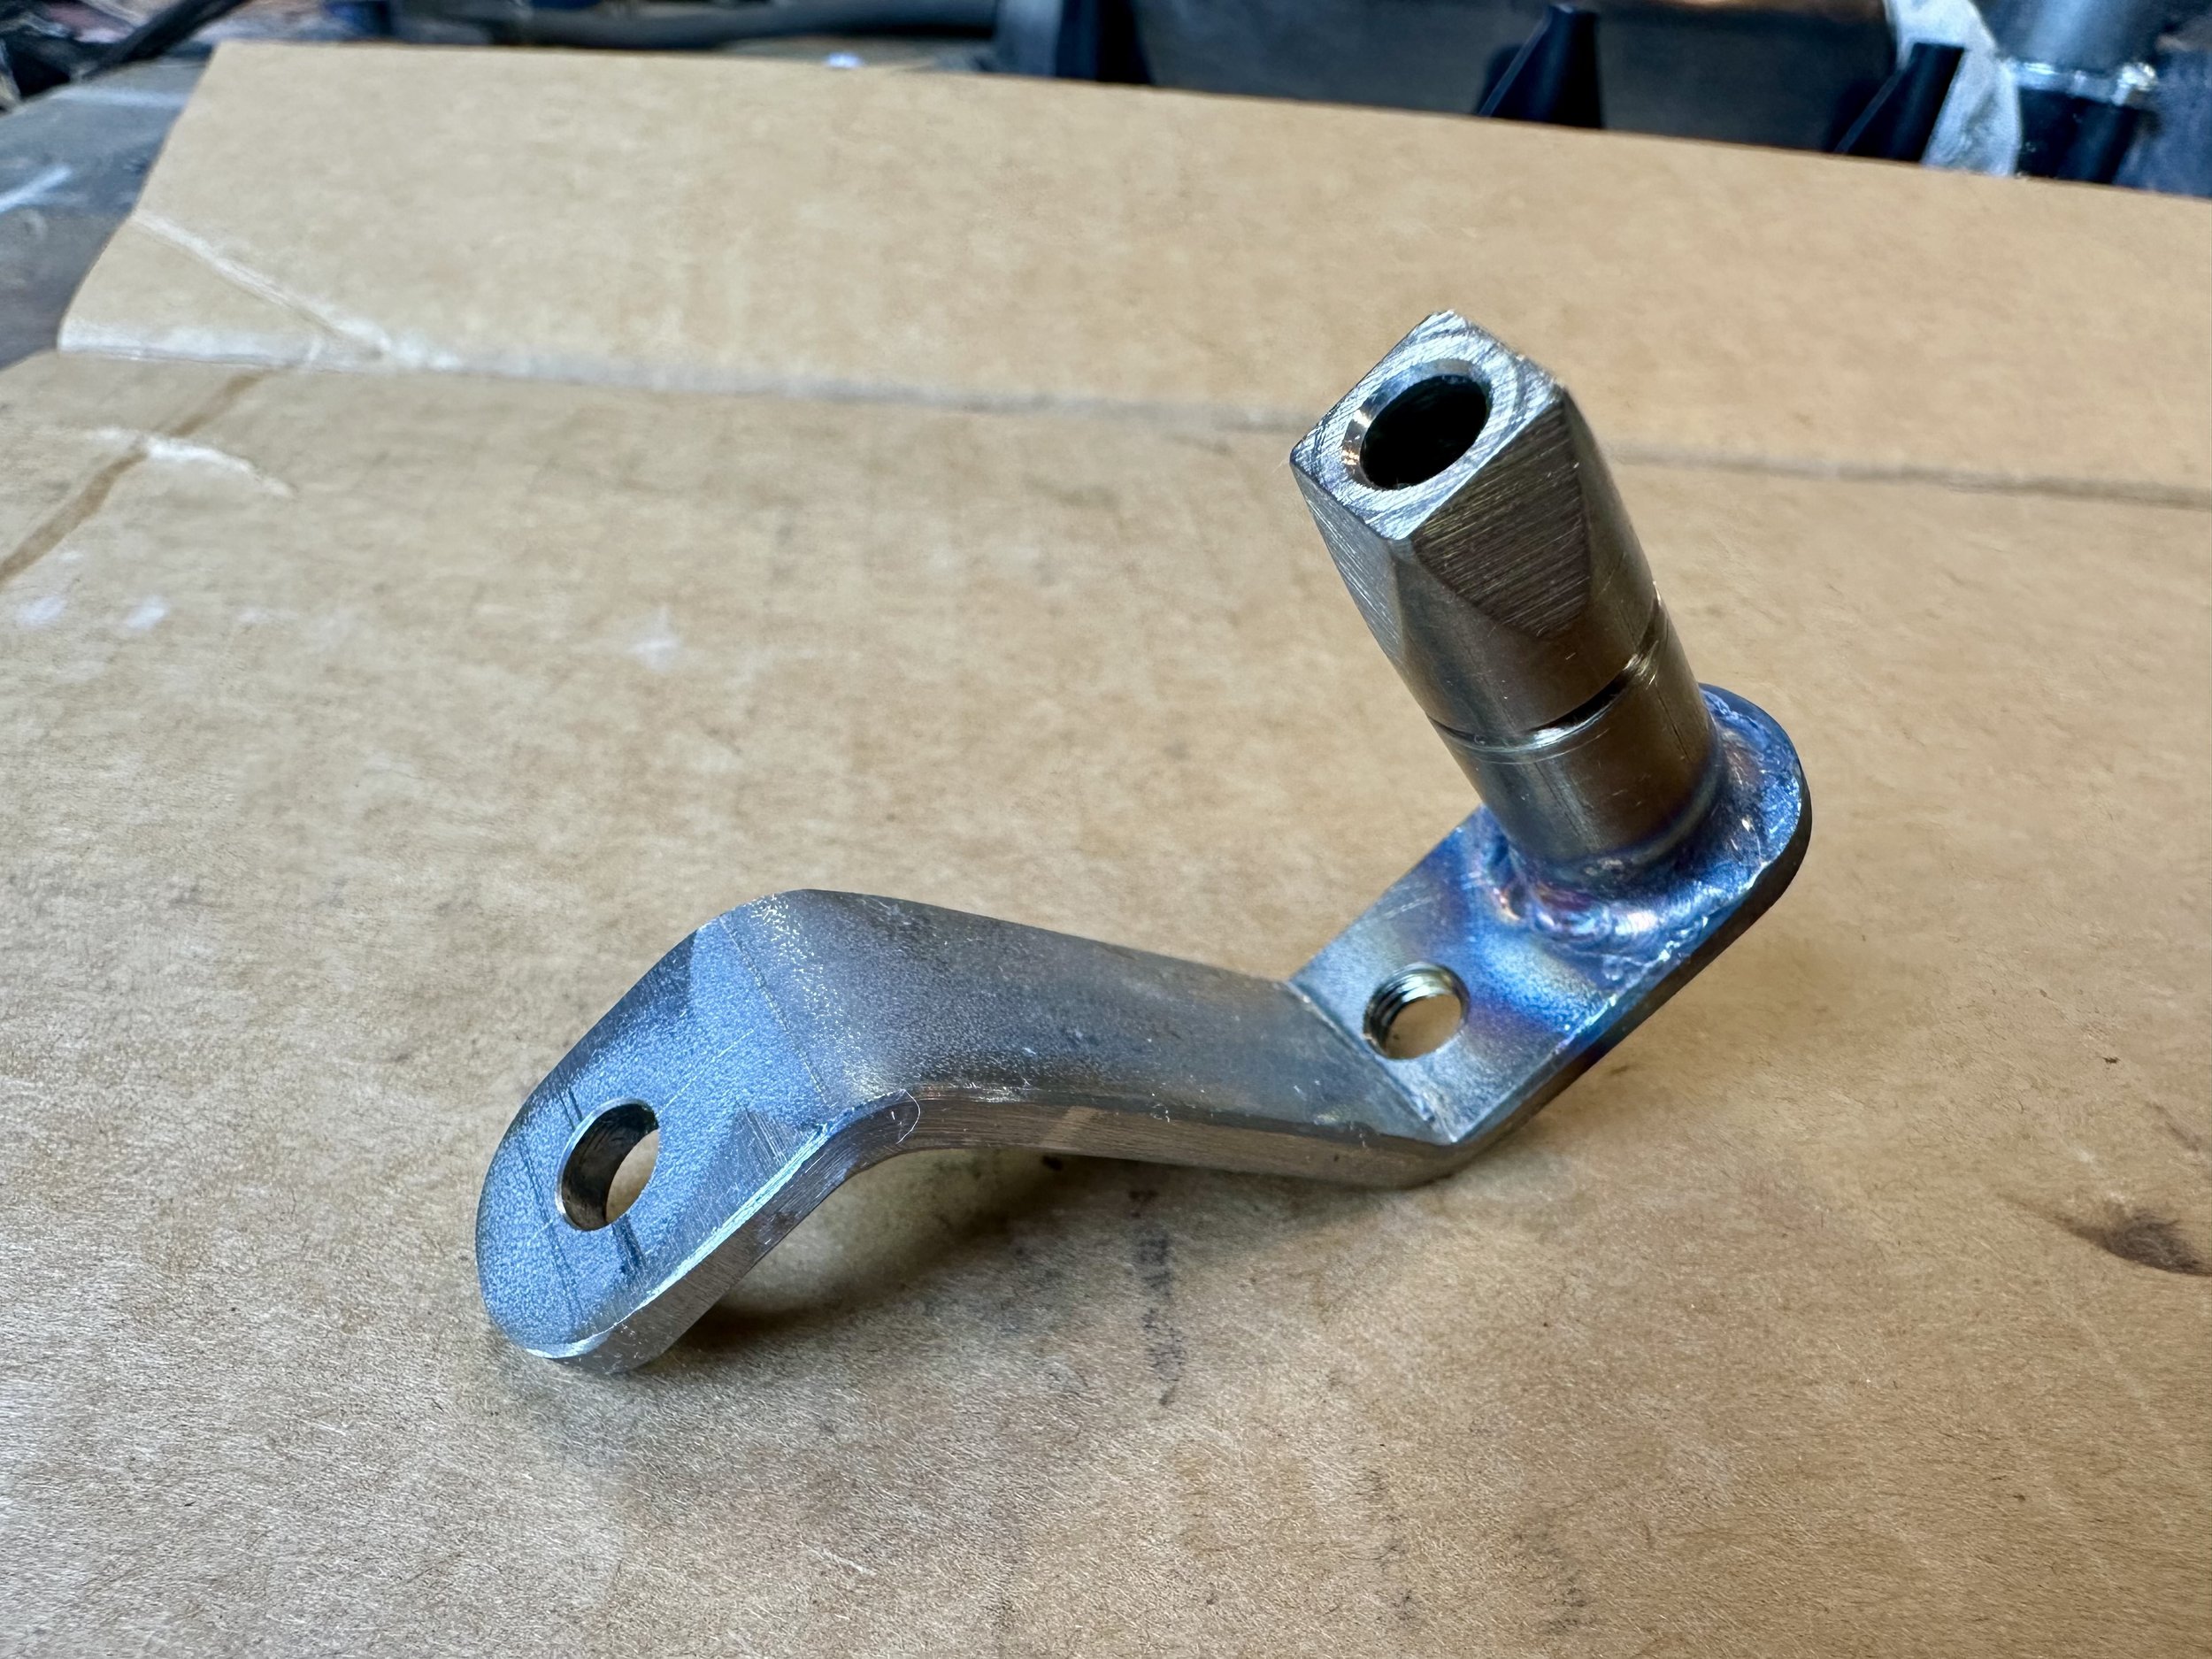
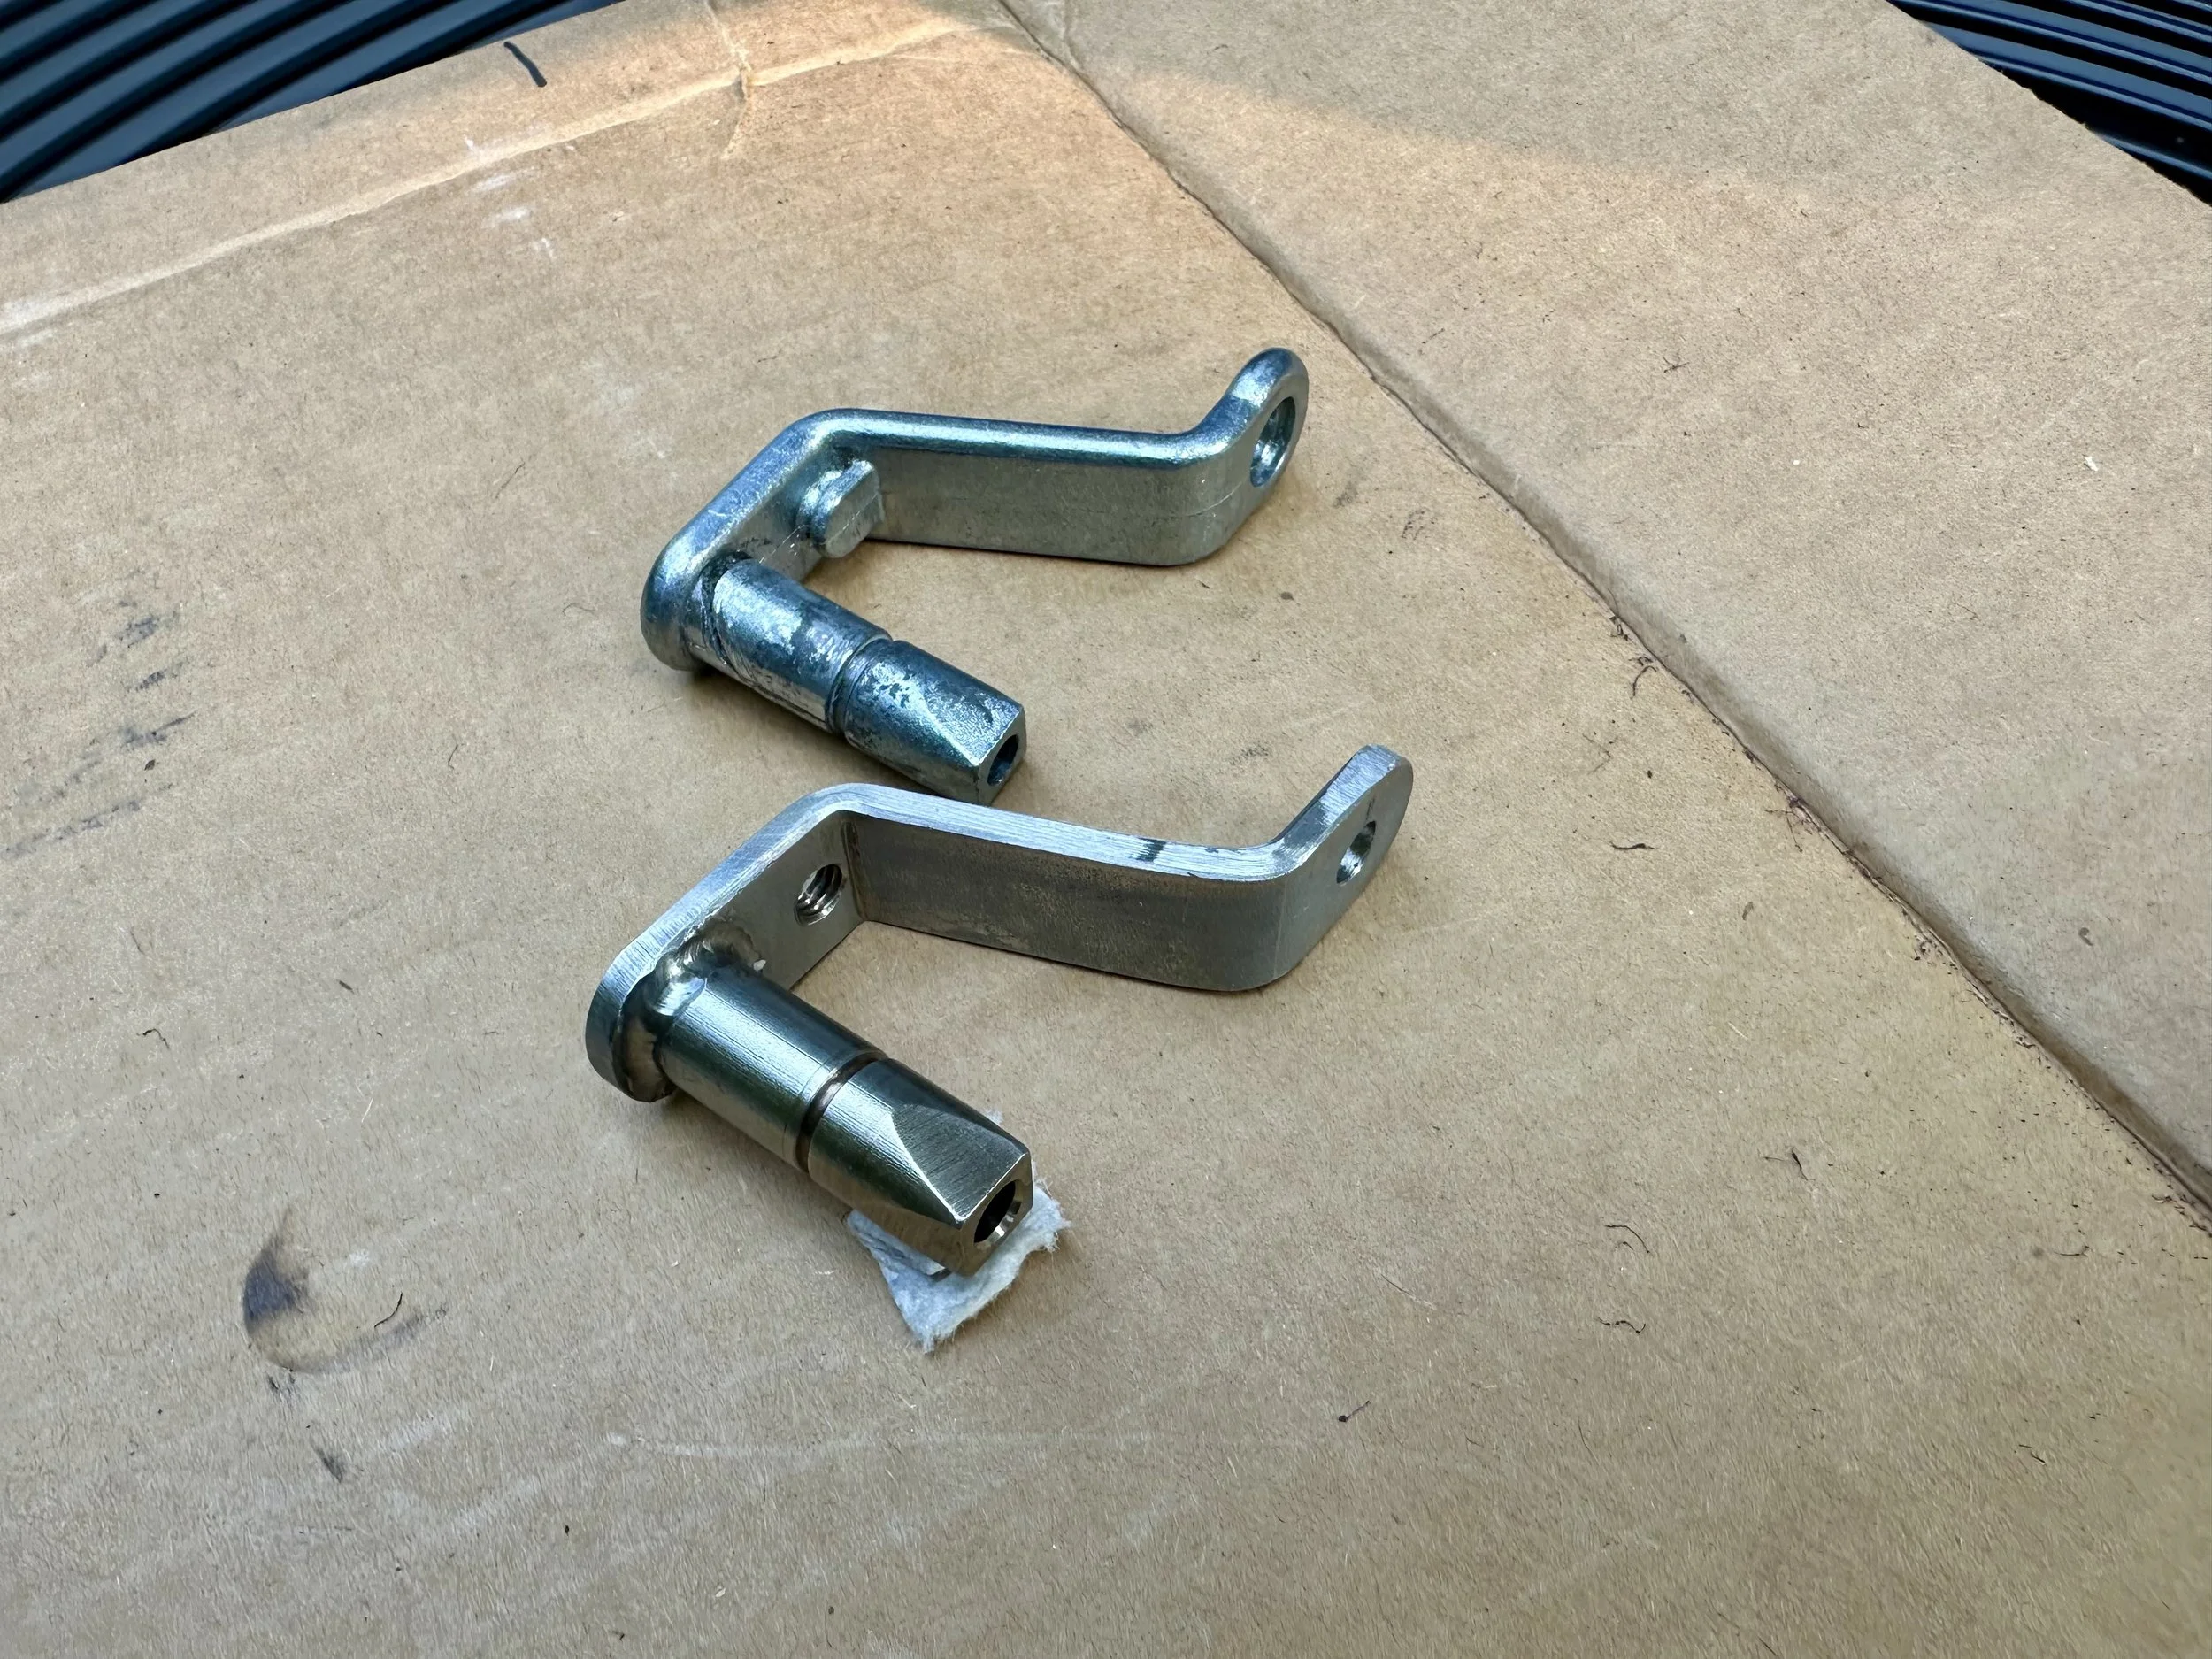
The only option was to see if we could repair tue broken part ourselves. So off came the assembly, and the start of a two day reconstruction of the broken part.
The process begins…
The door opener that needs repair, and which was previously repaired because of a crack in the outer facia. I made this new facia from aluminum and glued and screwed it over the factory plastic panel.
The inside cover had to be removed to determine what caused the door opener mechanism to fail.
The inside of the outer handle mechanism. An attempt was made to fix the fractured plastic housing in the field using JB Weld epoxy putty. It didn’t work.
With the assembly removed from the door I could now determine what broke.
The pivot axle that connects the latch lifting bar to the outside door handle is broken.
This is the broken part that must be replaced. But since I can’t easily get the part, I decided to remake it myself in stainless steel. This part is some kind of cast metal that can’t be welded.
The first step was to create the flatbar portion, which was done by bending 1/8” thick material in the bench vice with a heavy hammer.
The broken pivot rod was 11mm in diameter. So the easiest way to get something in stainless that matched, was to buy a bolt of the same diameter. In this case, a 7/16” bolt.
I got two of them in case my first try didn’t work. The threaded section was cut off with a hacksaw and then the end ground flat on the disk sander.
A rudimentary jig was clamped to the sander table to achieve the angle of the flats on the end of the shaft.
To make the four angled facets, the bolt head was ground to a square shape which acted as the 90° indexing key. Fortunately the manufacturer decided to make the part with this end rather than a spline. That would have been very hard to replicate.
I scribed marks on the end of the shaft and the side to have reference points to adjust the jig on the sander to the right angle. Careful repeat sanding and checking was done to determine the precise angle.
Once the flats were perfected, the shaft was cut to length and sanded for squareness.
The shaft has a groove for an o-ring seal. So I used a hand drill to spin the shaft while an abrasive disk in a Dremil tool was used to grind in the groove.
The groove finished to the correct depth and checked with a vernier gauge.
Comparing the old and new as completed to this stage.
Next was to drill and tap the flatbar to receive the screw that would be both the spring retainer and counter weight locating pin.
Then the pivot attachment bolt hole location was marked for drilling. This side of the screw acts as the counter weight locator.
This shows the screw in place. This side acts as the spring retainer.
The pivot bolt hole was drilled and the final end curvature of the flatbar was marked.
With the curvature ground to shape, the shaft was tacked on using the TIG welder. The full mechanism was then reassembled and installed back in the door to determine if I got the rotational lever angle correct. If it wasn’t right, the shaft would have to be broken off and re-welded at another angle. I got it right the first time.
The part after being fully welded.
With the weld scale cleaned off, the new part looks very similar to the old one.
Because of the crack through the facia panel that now migrated into the pivot housing, I installed two backing plates to sandwich the plastic parts between two metal ones. These plates were glued to the inside plastic using CA glue.
A little petroleum jelly was applied to the pivot shaft to aid in lubricating the hole in the housing.
Everything assembled and ready for installing back into the door.
The latch lifter (the flatbar piece) is dead centre like the original. The epoxy putty is being left in place as it does do a good job of reinforcing the pivot housing. Job done.